

DESIGN & FEATURE BY NIKKI WHITE
The MCM Bathroom design was created after we demolished our gorgeous Posh & Polished bathroom. It’s always a gut-wrenching task to destroy new work, but it was something Steve & I had planned on doing with this mock-up setting. Our goal was to create as many different types of style, designs, features, types of showers/tubs with this 5x9 space and turn the projects into DIY courses to help you LEARN.
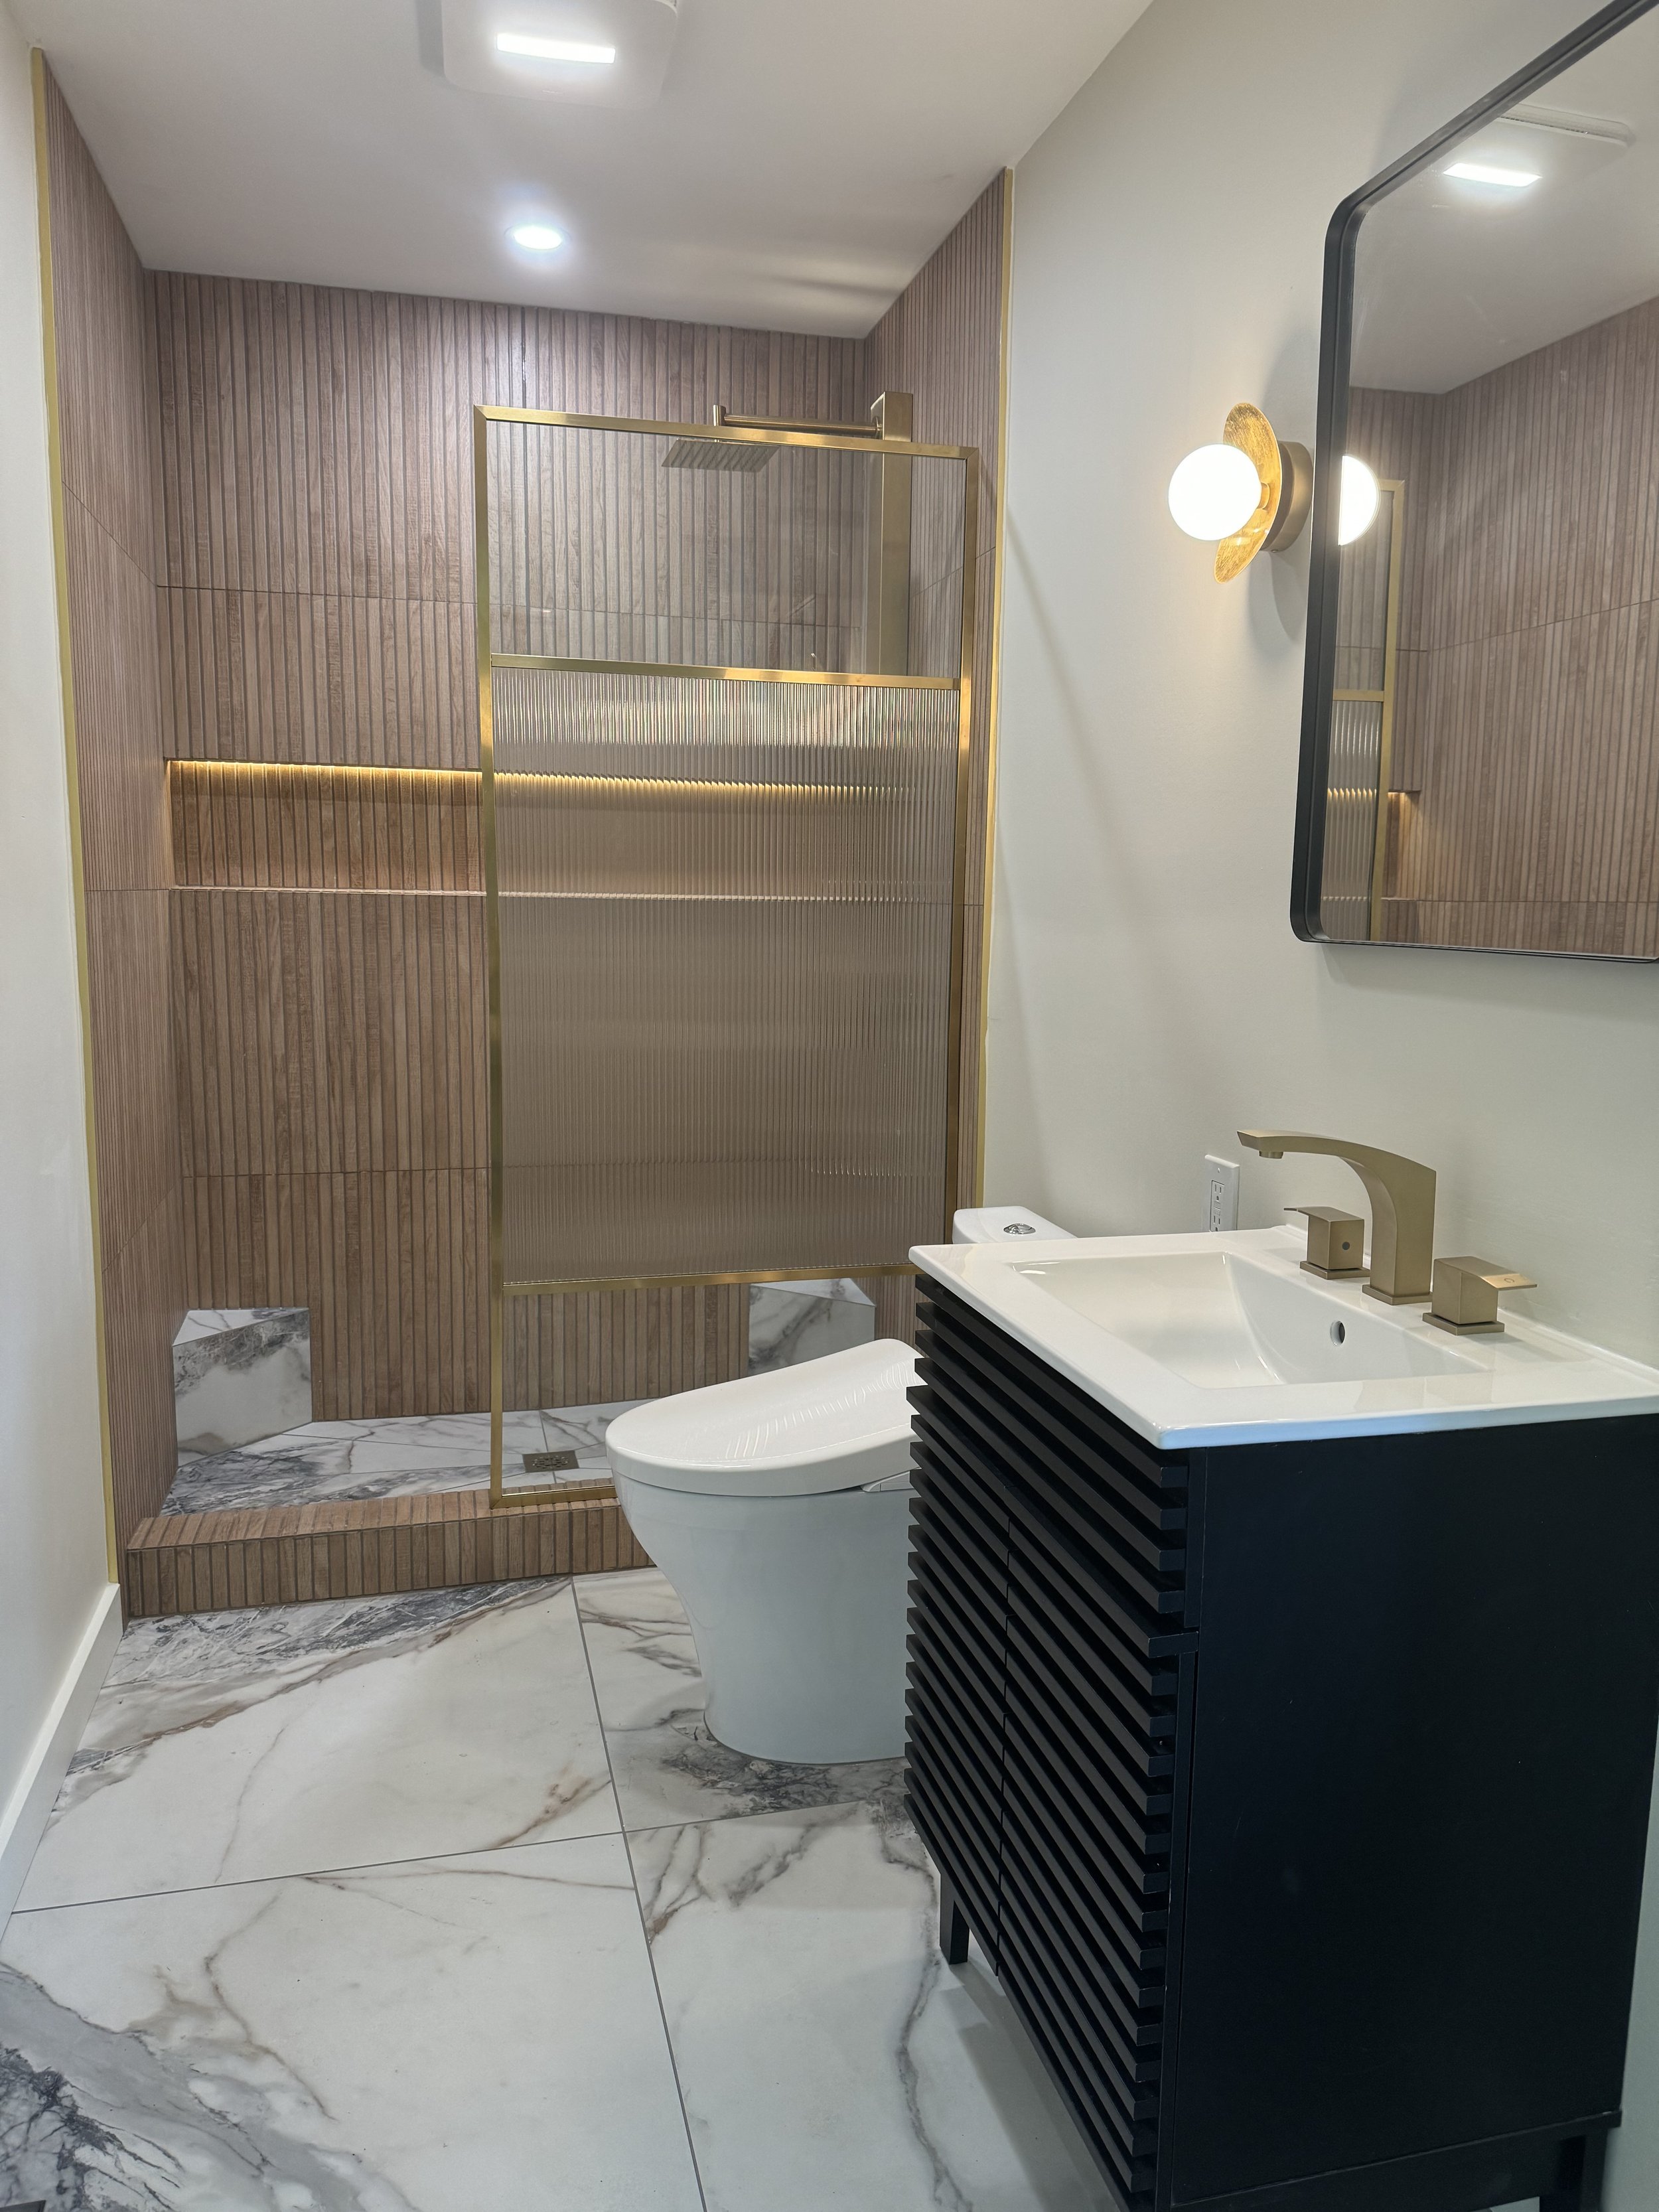
We decided to work with The Tile Club again, but this time we went with the ever popular (because it’s easier to install + fewer grout lines!) large format tile. I wanted to keep the bathroom minimal, clean, and fresh. The wood slat wall tiles helped bring in some warmth to the space, while the floating vanity allowed for more room and ease of clean up (plus that extra modern touch!). I was going to go with a vessel sink, but once we received the piece from Vigo, we knew it was not going to work.
The floor tiles are this beautiful, hand-crafted marble look alike that is actually porcelain. They are my favorite piece in the entire bathroom. Truly a work of art.
The sink is fairly basic, and at first I felt like I made a mistake with choosing it in black. It felt so dark and heavy in the space. Once it was installed (and we went with a standard sink top), I loved it. The gold metal details on the Vigo shower screen & accessories also helped warm the bathroom up.
My design board (below) was my initial jumping off point in creating the design of this bathroom. Some changes were made along the way, as you can see. A design board can be flexible like that… you have the power to make adjustments along the way as you see fit. I use it to keep me on track with my design vision.


tearing out the “old”
Steve begrudgingly tore out our stunning Posh & Polished bathroom (he developed the Kohler Shower/Tub Bathroom Remodeling Course in this bathroom!) to create the blank canvas for our MCM bathroom. See how he doesn’t look that sad the Posh & Polished bathroom was gone?!

Smiling through his pain LOL
We decided to work with Tile Redi for the waterproofing of this curbed shower. They wanted us to try out their waterproofed shower pan, and Steve was very happy to give it a go. This pan needed to be installed using a mud bed, which is a bit different from other waterproof brands, but not difficult to do.

Don’t be afraid of mud bed mix. It really is easy to use!
The reason for the mud bed? So the shower pan’s ridges on the bottom would have something to adhere to and keep it in place permanently.
*This shower pan is being phased out of Tile Redi’s product selection. They now have a new and improved shower pan with an easier drain connection and a smooth bottom that you only need to use thin set to adhere to the subfloor.

The mud bed coming to fruition
Once the shower pan was set, the rest of the project flowed. The walls, recessed nice, corner benches, and everything else fell into place. Our bathroom was ready for tile work! (Well, once it was painted. Steve likes to paint before tiling.)

Steve first installed the subflooring and framing (with the electric set up for the vent fan and lighting, along with plumbing). Then he installed the shower pan. After that came the drywall/lighting/vent fan. After that came the rest of the waterproofing, shower niche, and corner benches.
One of the heroic measures Steve decided to take on during this bathroom install was to ONLY USE a tile grinder for all cutting of the tile. Yes, you read that right. HE ONLY USED A TILE GRINDER. You can’t see the grinder in the picture (because it is permanently coated in thinset), but he used a Milwaukee Tile Grinder and Levelin Blades to get the job done.
Why did he only use a tile grinder? He wanted to show his students and course members that you CAN get the job done without all the expensive equipment. All you really need is a tile grinder and some good blades.
This was a very messy way of going about it, but it did work.
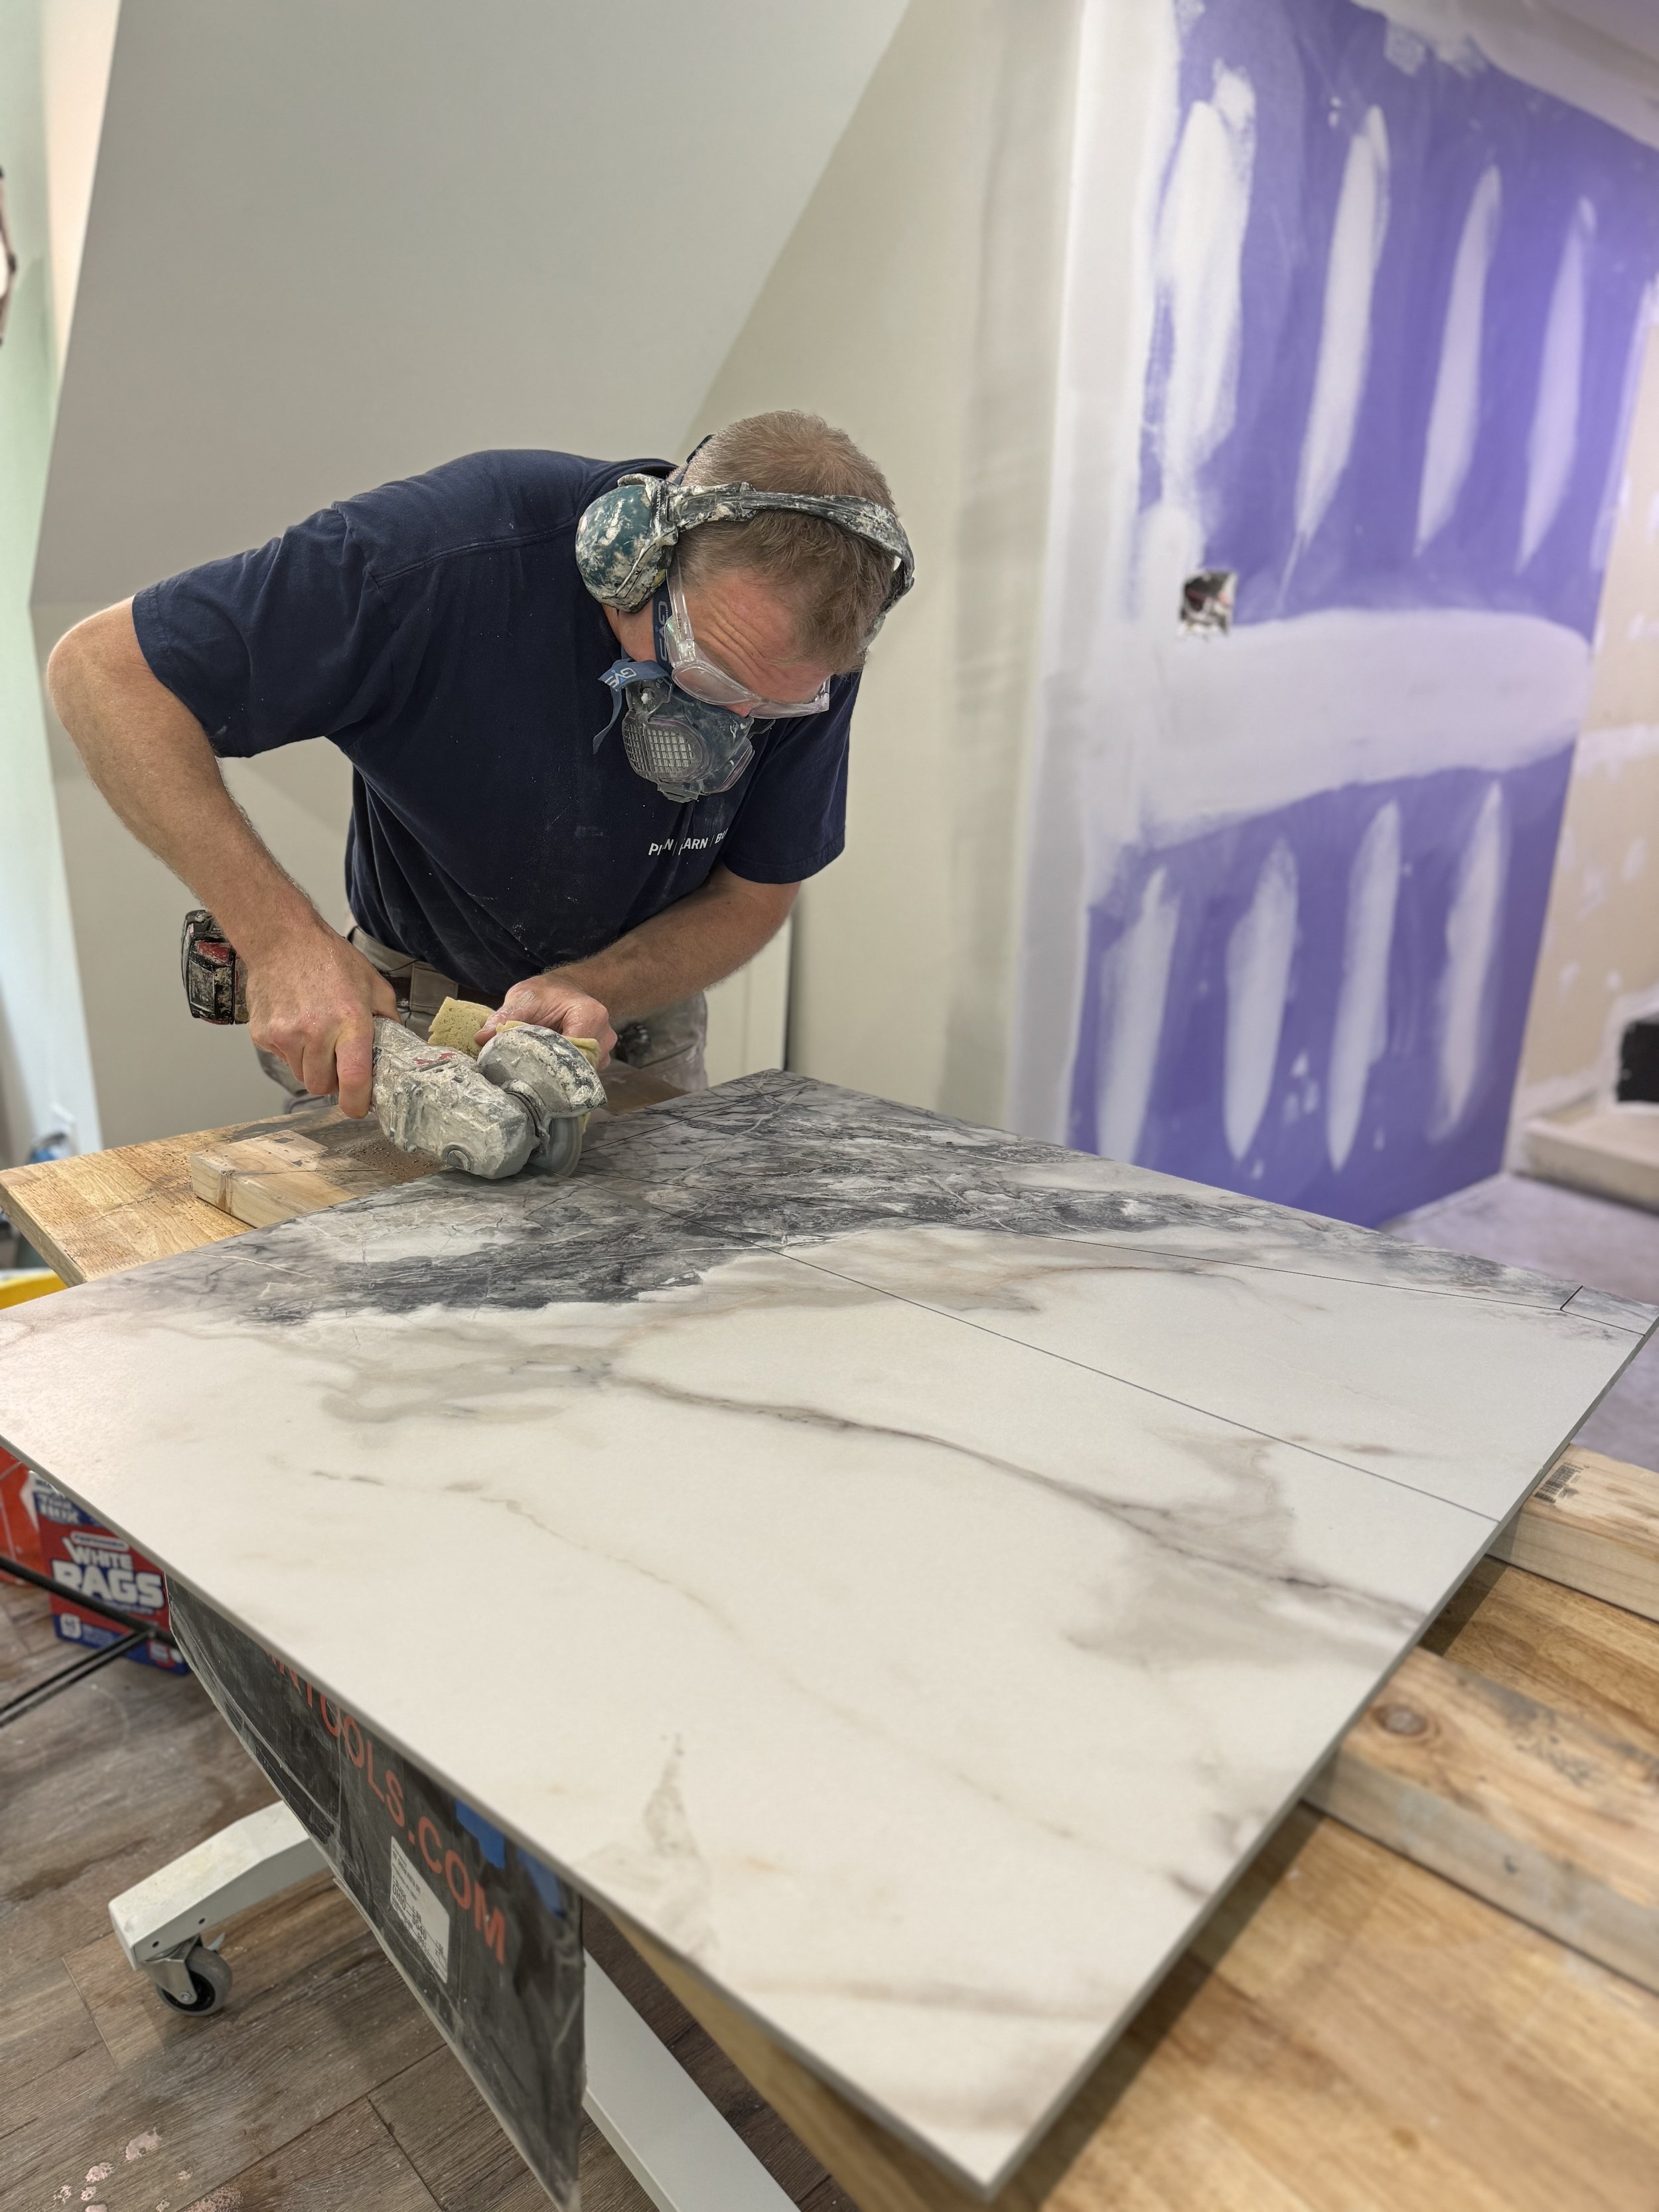
Grinding away. SO MUCH DUST. A ventilator is an absolute MUST.

It was SO DUSTY, filming became pretty miserable. Thankfully Steve saw my face and told me he could just set up the camera stand to film the tile grinding.
During the course of grinding tile, Steve made some serious magic happen. Since I had selected a large format tile for the shower floor, he needed to do the envelope cut style to make it work. Pictured below is after he cut the tiles to fit his shower floor template (yes, we are big believers and users of templates here!). It turned out beautifully.
From an interior design standpoint, I’ve never been overly enthusiastic about an envelope cut for a shower floor. Simply put, I don’t like the look of them. Steve really wanted to do this cut to demonstrate how to accomplish it for his students and course members. I simply conceded to his request, which was why I chose the tile flooring that I did. It’s all about compromise sometimes.

Steve’s envelope cut for the Mid Century Modern shower floor turned out perfect!
After he laid the shower floor down, he went straight to work on the remaining bathroom floor. This part I was really anxious to see because I LOVE how the large format floor tile looked on their own (not envelope cut style!). Steve used Blanke’s PERMAT to provide a bit more structure and support for the wood substrate to hold this massive tile.

Laying down the Blanke PERMAT to give some extra support for the wood substrate and tile
The wall color is called Soft Chamois by Benjamin Moore.

Blanke PERMAT with Steve’s tile template

Loved how it turned out! It looks even better in person.
Gonna write more here.

I need to write more here.

more word vomit is coming

Hang in there!

It’s coming!
This is going to be where I wrap things up.
the details & links of products used
Don’t worry, it’s coming…


Diving photograph by Kyla McLay


FINAL THOUGHTS
More to come!
Our advice from this project: BAM!