
How to BUILD and Tile a Shower Bench

HYDROBLOK makes shower bench construction easy 😊

A shower bench can be framed or built with foam panels

There are 2 primary ways of constructing a bench
Frame & wrap with 1/2" wall boards
Construct out of 1 1/2" or 2" Building Panels
In this shower I plan to use HYDROBLOK 1 1/2" building panels

Creating a bench out of foam is more costly, but does not expand or contract
This is longer lasting way to construct a shower bench IMO

This is a custom shower 😃 BUILD what suits you 👊

21" is a bit too high....

19 1/2" is much better 👍

One important aspect to think about is how the shower bench will look with shower doors
I recommend extending bench at least 1 1/2" from curbless transition
This was there is plenty of room to set glass on and provide a good look

This is especially important with curbed showers
If you plan to install a solid sill top, you'll want the shower bench or knee wall to extend outside of shower to allow the curb to neatly meet

HYDROBLOK is easy to construct, simply use the Hydroblok sealant to adhere building panels in place 👍


1 1/2" building panels need to be 12" on center
2" building panels can be up to 16" on center


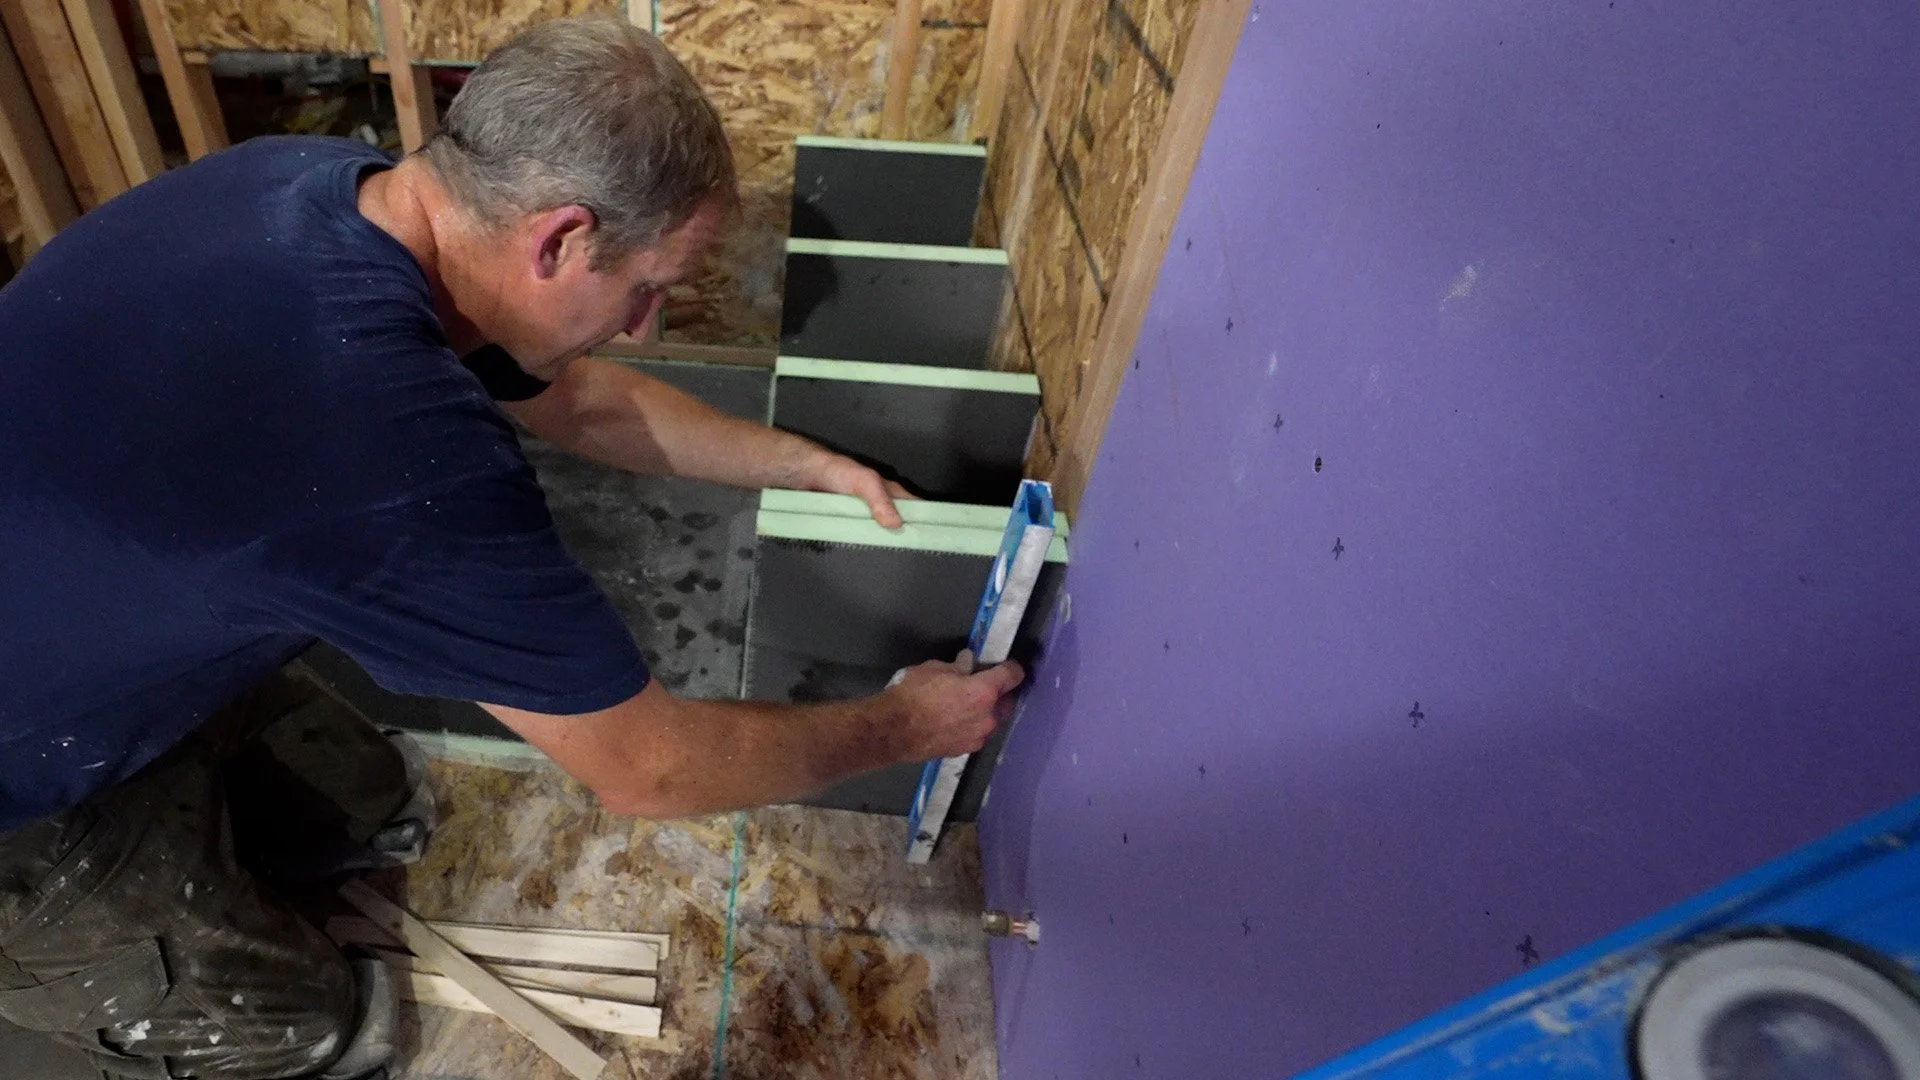
Keep Plumb 👍

1/2" Wall Board for front of Bench


⚠This is important ⚠ Slide wall panel into shower pan joint and mark


Create a perimeter rabbit joint for bench top
This is the same method used to cut & resize the shower pan

Set fence for 1/2" wall board width


Slight pitch towards shower 👍


Check all steps to the Curbless Shower BUILD in the HYDROBLOK Shower Course 👍
Available now in the DIY GEEK MEMBERSHIP
What's a DIY GEEK MEMBERSHIP?
Its a one-time payment for all of my courses 💥 And future ones 💥💥
You'll get access to all of my step-by-step courses that highlight all phases of a Bathroom Renovation Process:
Demo - Framing - Electrical - Plumbing - Drywall - Waterproofing - Tile setting - Shower doors - Lighting & much more 👍
🔥GUIDES - CHECKLISTS - SUPPORT🔥
Lifetime access - no ads
👉Join today👉👉 https://bit.ly/3XMKn3F


For template material I rip down strips of 1/4" sureply & hot glue together 👍


I was not happy about how this pencil trim sat above bench top tile...


Its not perfect but better. I would recommend trying to find a stardard bull nose edging or use a schluter edging profile. This will most likely cause water to set at edge of pencil trim 👎

Most thinsets will set up firmly enough to clean off excess thinset 👍 This will save a lot of time and frustration later 😄

Be sure to check out the detailed instruction in my latest online course - HYDROBLOK Curbless Shower Course
Currently available only in the DIY GEEK MEMBERSHIP
What's a DIY GEEK MEMBERSHIP?
Its a one-time payment for all of my courses 💥 And future ones 💥💥
You'll get access to all of my step-by-step courses that highlight all phases of a Bathroom Renovation Process:
Demo - Framing - Electrical - Plumbing - Drywall - Waterproofing - Tile setting - Shower doors - Lighting & much more 👍
🔥GUIDES - CHECKLISTS - SUPPORT🔥
Lifetime access - no ads
I now offer Bathroom Remodeling Coaching 😊
So if you have questions about your own bathroom, I'm here to help 👍
Schedule a 30 minute FaceTime or Zoom meeting
If you are a DIY GEEK MEMBER, ask me for the 20% discount code 👍
Feel free ask any questions below, I’d be happy to help 😊
Thanks
Steve
#diy #homeimprovement #bathroomremodel #tile #waterpoofing #bathroomdesign #bathroomremodelingteacher #diy #bathroomremodelingteacher #tipsandtricks #tutorial #howto