Comment

EASY PUSH BUTTON SHOWER

Hey students!

Last year, I worked for a client who was getting older and having a tough time getting over the tub and into his shower. I managed to convert his tub into a walk-in shower in just 3 DAYS (check out my 3 Day Shower Course here!). Along with the walk-in shower, we wanted to keep his shower faucet system super simple and efficient. That’s where the Grohe Push Button Shower Faucet came in!

I was so impressed with this faucet. Installing it and setting it up for my client was very easy, and I was really happy to make his showering as effortless as a push of a button. He was recovering from a stroke at the time, and it was incredibly important to make showering a simple process for him to complete on his own.

In this video, I show you how I installed this Grohe Push Button Shower Faucet. {FYI: This faucet has a normal shower head and a hand-held}

 
easy push button shower grohe installation DIY how to bathroom remodeling teacher handheld
 

I show you exactly what I did throughout the entire installation process, from the framing and rough-in…

 
easy push button shower grohe installation DIY how to bathroom remodeling teacher handheld
 

…to the valve placement and plumbing installation…

 
easy push button shower grohe installation DIY how to bathroom remodeling teacher handheld
 

…and to the temperature setting and testing the water.

 
easy push button shower grohe installation DIY how to bathroom remodeling teacher handheld
 

I walk you through the installation, step-by-step, so you can simply do it on your own.

 
push button shower easy installment grohe bathroom remodeling how to diy
 

Check out all the installation details by watching this video. It really does make showering, especially for the elderly, so much easier.

👉 Tools used in this video:

The Grohe Smart Control Shower System -https://www.build.com/grohe-gss-grohtherm-cir-05-a/s1516963?uid=3559106

💥Visit my Amazon Store for all products and tools that I recommend and use on a regular basis 👍 https://www.amazon.com/shop/bathroomremodelingteacher_

WE GOT MERCH! —> Check out the Official Bathroom Remodeling Teacher apparel line!

For help with your bathroom remodel 🎓Enroll in my courses today 🎓 -

All the tools and products I use and recommend can be found on my Amazon Storefront (detailed in the description box of the video). You can find my Storefront, and all of my other social medias, by going to https://linktr.ee/bathroomremodelingteacher. Any and all purchases from my Amazon Storefront are greatly appreciated and help keep my channel going!

I hope this helps you with your own installation. Subscribe to my channel to make sure you don’t miss a new upload!

See you next class,

Steve
Comment

Comment

HOW TO TURN A VINTAGE DRESSER INTO A BATHROOM VANITY

Hey students!

Brand new bathroom vanities are insanely expensive. And a lot of times, they’re not that well made. Allow me to introduce an alternative bathroom vanity idea that not only effortlessly adds character and patina to your bathroom, but is also much more affordable. I give you the vintage-dresser-turned-to-a-vanity idea!

My wife and I love doing this in bathrooms when we are flipping homes and even in our own homes. It gives you that one-of-a-kind, unique vanity that can warm up a space instantly.

In our current home, we converted a vintage dresser into a vanity, and we LOVE it.

 
bathroom design converting vintage dresser vanity sink DIY how to bathroom remodeling
 

The best part is that it’s not too difficult to turn a dresser into a vanity.

This video shows you exactly how I converted this dresser…

 
bathroom design converting vintage dresser vanity sink DIY how to bathroom remodeling
 

…into a bathroom vanity.

 
bathroom design converting vintage dresser vanity sink DIY how to bathroom remodeling
 

So, you can go from dull and cheap…

 
bathroom design converting vintage dresser vanity sink DIY how to bathroom remodeling
 

…to high-quality and timeless.

 
bathroom design converting vintage dresser vanity sink DIY how to bathroom remodeling
 

Be sure to watch this video to get all the details and products to convert your vintage dresser into a classic bathroom vanity.

👉 Tools used in this video:

Vessel sink - https://amzn.to/44erBCc
Pop-up drain -
https://amzn.to/43TAAJe
Sink faucet -
https://amzn.to/3JtXSx8

💥Visit my Amazon Store for all products and tools that I recommend and use on a regular basis 👍 https://www.amazon.com/shop/bathroomremodelingteacher_

WE GOT MERCH! —> Check out the Official Bathroom Remodeling Teacher apparel line!

For help with your bathroom remodel 🎓Enroll in my courses today 🎓 -

All the tools and products I use and recommend can be found on my Amazon Storefront (detailed in the description box of the video). You can find my Storefront, and all of my other social medias, by going to https://linktr.ee/bathroomremodelingteacher. Any and all purchases from my Amazon Storefront are greatly appreciated and help keep my channel going!

I hope this helps you with your own installation. Subscribe to my channel to make sure you don’t miss a new upload!

See you next class,

Steve

Comment

Comment

HOW TO REFINISH AN OLD CAST IRON TUB

Hey students!

Old cast iron tubs are… OLD. And a lot of them show their age. They discolor, chip, and generally look pretty worn the older they are. I have torn out a lot of cast iron tubs in my bathroom remodeling career, and I’m here to tell you DON’T DO IT. They don’t make tubs like they used to, and these cast iron tubs are rock solid and feel much more substantial than those new acrylic ones.

There is an affordable, DIY way to fix your dingy cast iron bathtub. It’s called Ekopel (and no, this is NOT sponsored). It’s a complete tub refinishing kit you can order off of Amazon, and it seriously makes your cast iron tub look BRAND SPANKING NEW. I recently used it to finish a cast iron tub I tore out of an client’s home, and I was incredibly pleased with the results (and so was my wife!).

This video details exactly how I refinished the tub and what products I used to get the best results.

To begin, make sure your tub is clean and the room is warm. The epoxy finish won’t be able to adhere properly in cold temperatures. Here I am next to a very nasty cast iron tub with the tub refinishing kit below.

 
cast iron tub refinish refurbish bathroom remodeling teacher DIY how to
 

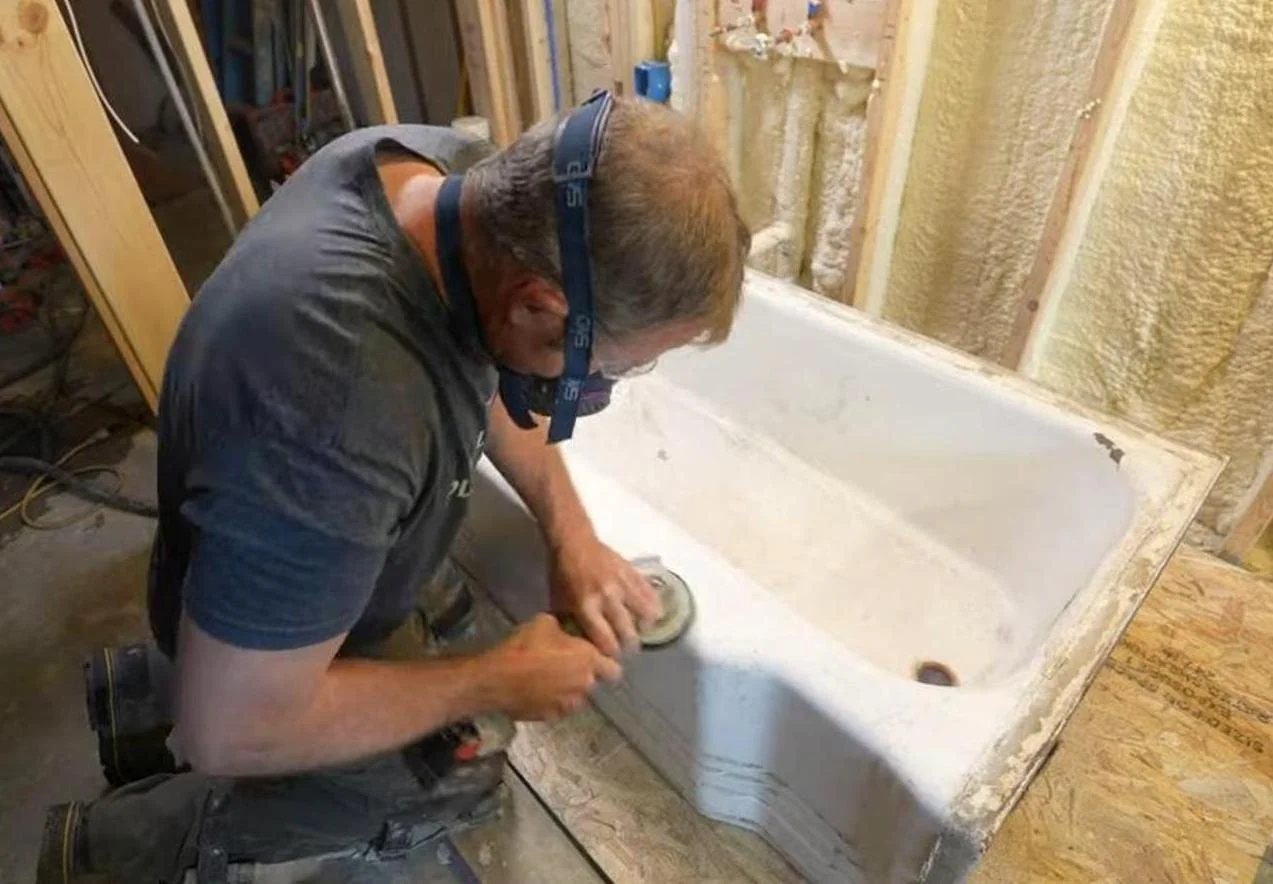
Next up is sanding your tub to remove any flakes and chips, and then giving it a good cleaning scrub. The sanding also helps with the application of the epoxy finish.

 
cast iron tub refinish refurbish sanding bathroom remodeling teacher DIY how to
 

I then scraped off any existing silicone on the tub, and used Bondo to fill in all the chips and dents.

 
cast iron tub refinish refurbish dents Bondo bathroom remodeling teacher DIY how to
 

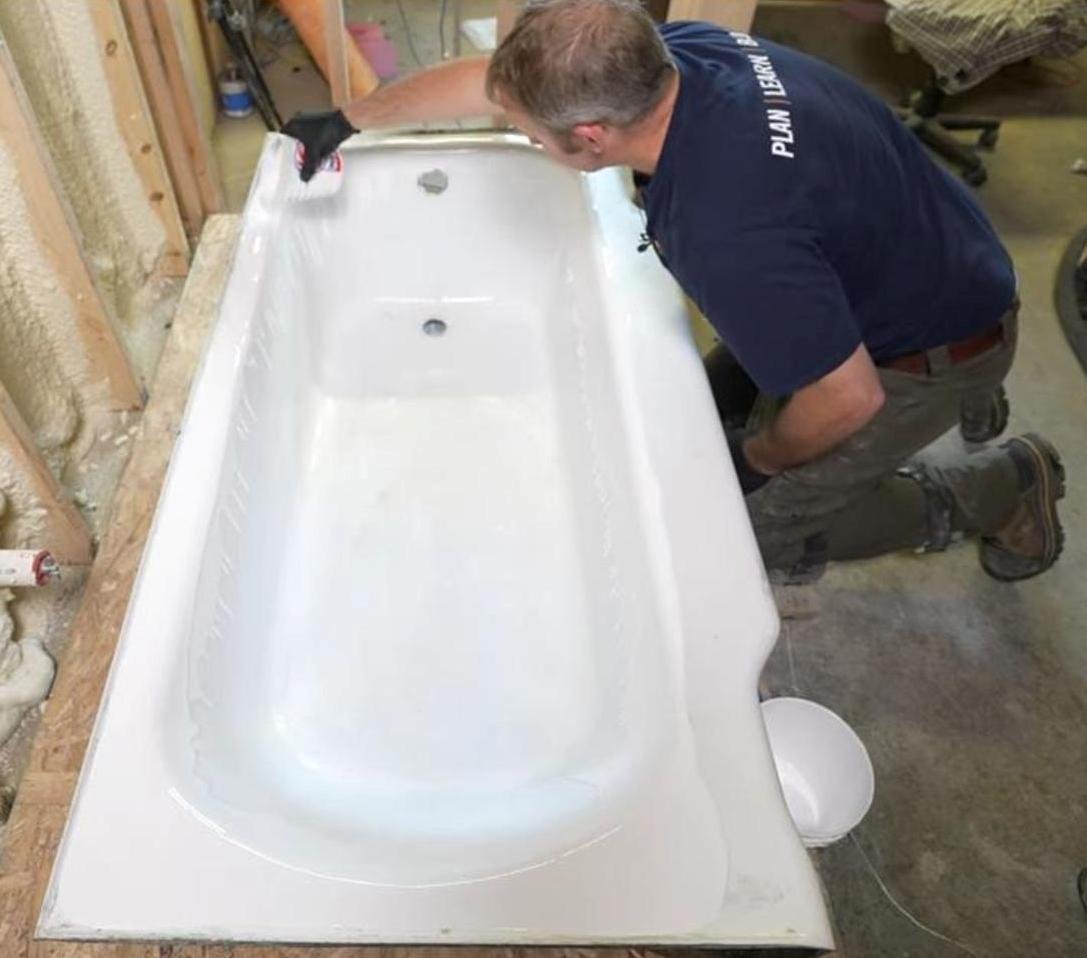
The trick is to pour the finish; don’t brush it on. Once the epoxy covers the walls of the tub, you can definitely manipulate it with a foam roller. But, let gravity do most of the work. A heating gun is crucial, as well, to get rid of any air pockets and pinholes. Don’t use a hair dryer. The air movement will cause all dust and particles to kick up and stick in your epoxy finish.

{Note: I’ve got to emphasize how much dust and debris is your enemy when you apply the epoxy finish. Make sure everything is as clean as possible.}

 
cast iron tub refinish refurbish bathroom remodeling teacher DIY how to
 

Here’s the before…

 
cast iron tub refinishing refurbishing bathroom remodeling teacher DIY how to
 

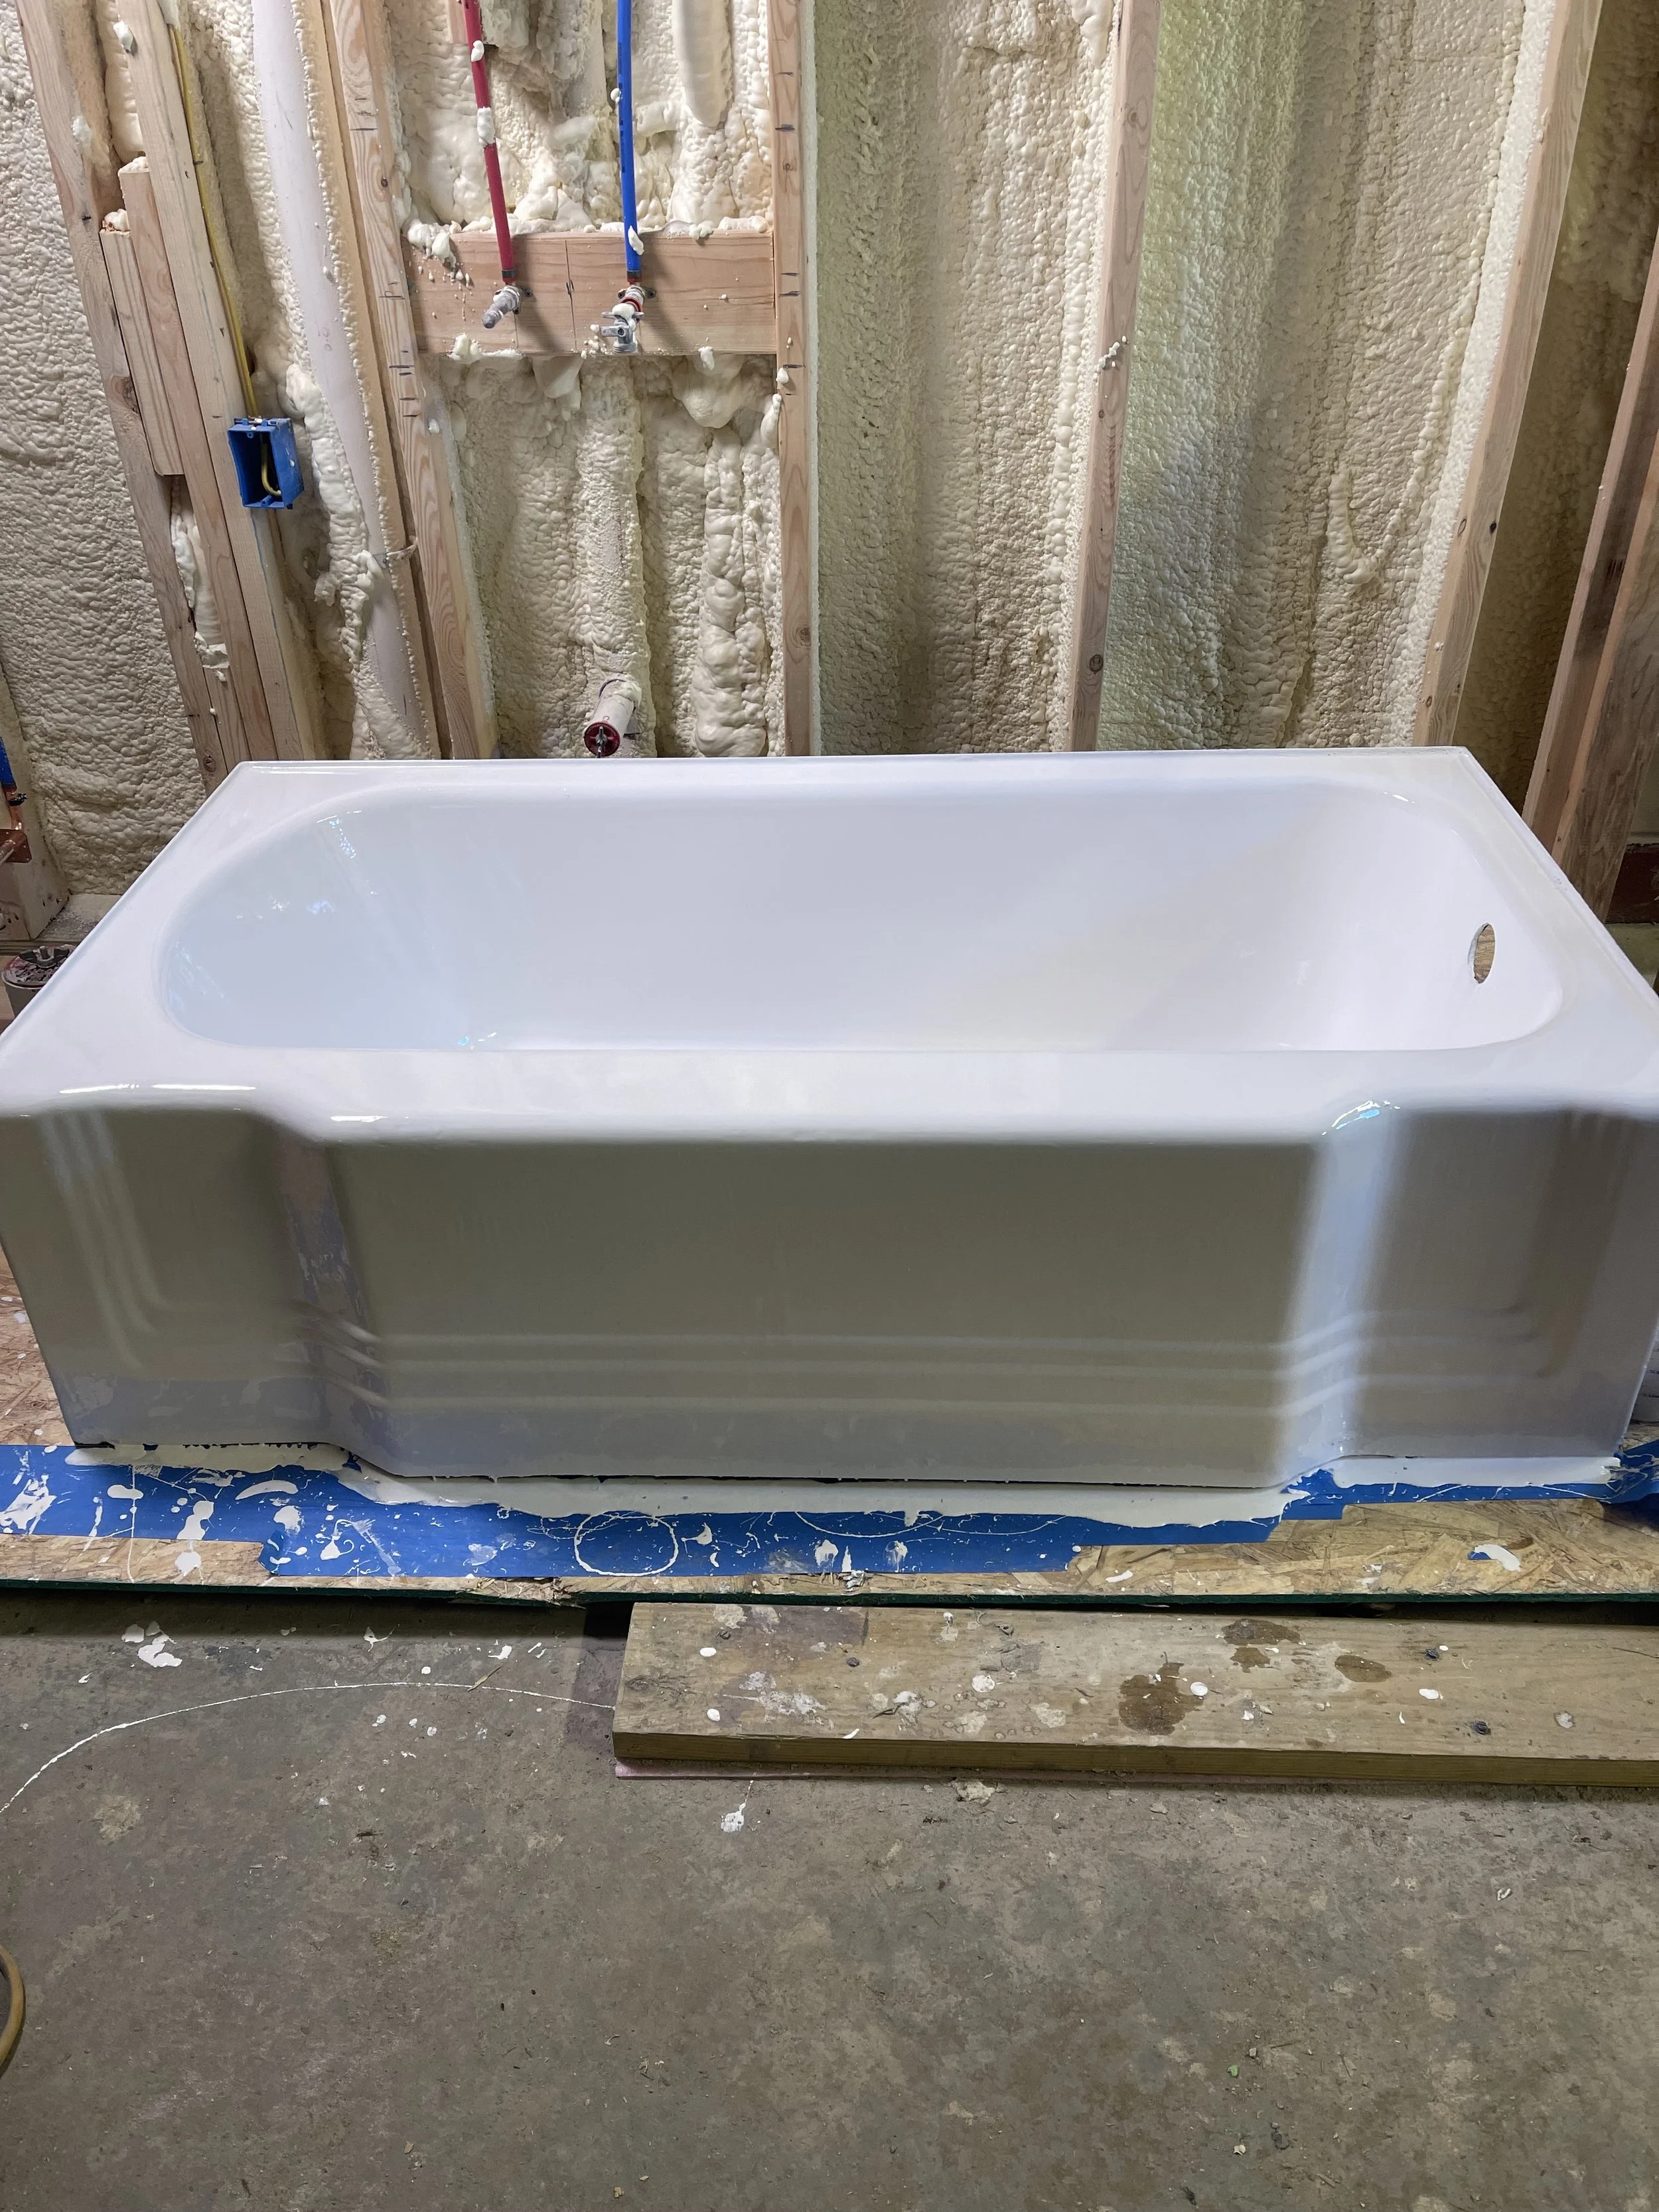
and after.

 
cast iron tub refinishing refurbishing bathroom remodeling teacher DIY how to
 

The video will show you every step I take to ensure the best outcome. Let me know what you think in the comments below, and thanks for watching!

👉 Tools used in this video:

Ekopel Tub Refinishing Kit - https://amzn.to/3WQuma6
Abrasive grinder discs -
https://amzn.to/3IYyC1O
Rubber gloves -
https://amzn.to/45QfPQ8
Heat gun -
https://amzn.to/3IYQTMy
Bondo -
https://amzn.to/3N00xzI

💥Visit my Amazon Store for all products and tools that I recommend and use on a regular basis 👍 https://www.amazon.com/shop/bathroomremodelingteacher_

Want to support the Bathroom Remodeling Teacher— in style?!? Check out the Official Bathroom Remodeling Teacher apparel line!

For help with your bathroom remodel 🎓Enroll in my courses today 🎓 -

All the tools and products I use and recommend can be found on my Amazon Storefront (detailed in the description box of the video). You can find my Storefront, and all of my other social medias, by going to https://linktr.ee/bathroomremodelingteacher. Any and all purchases from my Amazon Storefront are greatly appreciated and help keep my channel going!

I hope this helps you with your own installation. Subscribe to my channel to make sure you don’t miss a new upload!

See you next class,

Steve

Comment

Comment

CONCRETE REMOVAL FOR A BASEMENT BATHROOM

Hey students!

The latest project I’ve been working on has been constructing a basement bathroom (literally, from the ground up).

One of the first crucial steps I had to take to build this bathroom was busting up some very old, very hard concrete flooring. Why? I needed to make some serious space for the plumbing, insulation, heated flooring, and to make sure the floor was perfectly level to build on. One of the most important things to me was keeping everything level. That meant I didn’t want to have a slight step up into the bathroom space (tripping hazard, no thanks). This was all the more reason for me to bust up this concrete.

I’m building a curbless shower in this basement, and luckily there are some concrete removal tips & tricks I can let you in on, but first…

If you are thinking of building a basement bathroom in your home, I would encourage you to not only watch this video, but to also enroll in my DIY Geek Membership, where you would have access to ALL of my online bathroom remodeling courses AND early access to the Basement Bathroom Course I’m working on in real time.

The first step before starting your concrete removal is finding the perfect location for your basement bathroom. Find your existing waste stack and build from there.

Once I established my bathroom area, I began by measuring out the size of the bathroom (in this case, it is 4x8) and marking it on the concrete floor. I used my foam insulation board to trace my space easily.

 
foam insulation board measuring basement bathroom remodeling teacher diy
 

Once I outlined my space, I was ready to cut. I got my electric concrete saw (plus a small water pump to keep the dust down) and got to cutting. Pro tip: Be sure to wear your safety gear (face mask, glasses, and ear protection!).

 
wet concrete saw basement bathroom remodeling teacher diy
 

After cutting, I went to jack hammering the concrete. This was much more difficult than I thought it was going to be. Why? The house is old, which means the concrete is old… and very, very solid. Take your time and be patient. I’m an animal and kept going until I was finished— took me an hour. Haha! Pro tip: Keep wearing your safety gear (glasses, ear protection!).

 
jack hammering concrete basement bathroom remodeling teacher diy
 

Next up is the not-so-fun and very arduous task of removing all the broken up concrete.

 
concrete removal basement bathroom remodeling teacher diy
 

Once I had all of the debris out of there, I was able to examine the existing plumbing and come up with a new plumbing plan for the bathroom I was going to build.

 
existing plumbing under concrete basement bathroom remodeling teacher diy
 

Be sure to watch the video and find out all those details!

👉Helpful tools used in this video:

Electric concrete saw (the bigger one) - https://amzn.to/3MG5yhT
Jack hammer - https://www.harborfreight.com/15-amp-66-lb-1-18-in-hex-breaker-hammer-with-maximum-vibration-control-56407.html
Pro knee pads - https://amzn.to/42L1p1y
Ear protection - https://amzn.to/3InugRE

💥Visit my Amazon Store for all products and tools that I recommend and use on a regular basis 👍 https://www.amazon.com/shop/bathroomremodelingteacher_

Want to support the Bathroom Remodeling Teacher— in style?!? Check out the Official Bathroom Remodeling Teacher apparel line!

For help with your bathroom remodel 🎓Enroll in my courses today 🎓 -

All the tools and products I use and recommend can be found on my Amazon Storefront (detailed in the description box of the video). You can find my Storefront, and all of my other social medias, by going to https://linktr.ee/bathroomremodelingteacher. Any and all purchases from my Amazon Storefront are greatly appreciated and help keep my channel going!

I hope this helps you with your own installation. Subscribe to my channel to make sure you don’t miss a new upload!

See you next class,

Steve

Comment

Comment

WE GOT MERCH!

 
bathroom remodeling teacher hoodie merchandise apparel
 

Hey students!

The day has finally come… We have officially launched our Bathroom Remodeling Teacher Merch!

 
bathroom remodeling teacher tee shirt plan learn build merchandise apparel
 

We wanted to come up with a fun way to show your support for the Bathroom Remodeling Teacher, so we came up with this fun and practical line of apparel you can casually wear anywhere.

Each purchase directly supports Steve and his efforts in creating courses and content to teach you the best ways of remodeling bathrooms and other renovating projects.

 
bathroom remodeling teacher hat apparel merchandise
 

If you have been watching Steve for a while now, you will probably recognize a lot of these t-shirts. He personally loves wearing them when he is working hard on a bathroom remodel!

 
bathroom remodeling teacher womens vneck tshirt merchandise apparel
 

The best part is there are things for both men and women to wear! Be sure to check out all the merch, especially where Steve and Nikki modeling it!

If you do buy a shirt, be sure to tag @bathroomremodelingteacher_ on Instagram!

Thanks in advance for any and all support you have given the Bathroom Remodeling Teacher! We really do appreciate it— we would be here without you guys!

💥Visit my Amazon Store for all products and tools that I recommend and use on a regular basis 👍 https://www.amazon.com/shop/bathroomremodelingteacher_

For help with your bathroom remodel 🎓Enroll in my courses today 🎓 -

All the tools and products I use and recommend can be found on my Amazon Storefront (detailed in the description box of the video). You can find my Storefront, and all of my other social medias, by going to https://linktr.ee/bathroomremodelingteacher. Any and all purchases from my Amazon Storefront are greatly appreciated and help keep my channel going!

I hope this helps you with your own installation. Subscribe to my channel to make sure you don’t miss a new upload!

See you next class,

Steve

Comment

Comment

HOW TO TILE AROUND A ONE PIECE FIBERGLASS TUB SHOWER SURROUND

Hey students!

Fiberglass, one-piece tub shower surrounds are incredibly affordable, and very common in a lot of homes. Some may think they aren't "fancy" enough, but I have a great (and easy!) way to make them look high-end.

Let’s start off with the basics. Exactly what is a fiberglass tub and shower? Fiberglass reinforced plastic is made from layers of minuscule strings of interwoven glass, heated together. That is then molded, shaped, and sprayed with a resin gel coat. It's one of the most affordable materials for tubs and one of the easiest to install.

So, this is a great option for DIYers who are wanting to avoid a ton of tile work and save some serious cash.

In this video, I show you, from start to finish, how to tile around the top and sides of a fiberglass one-piece tub and shower surround.

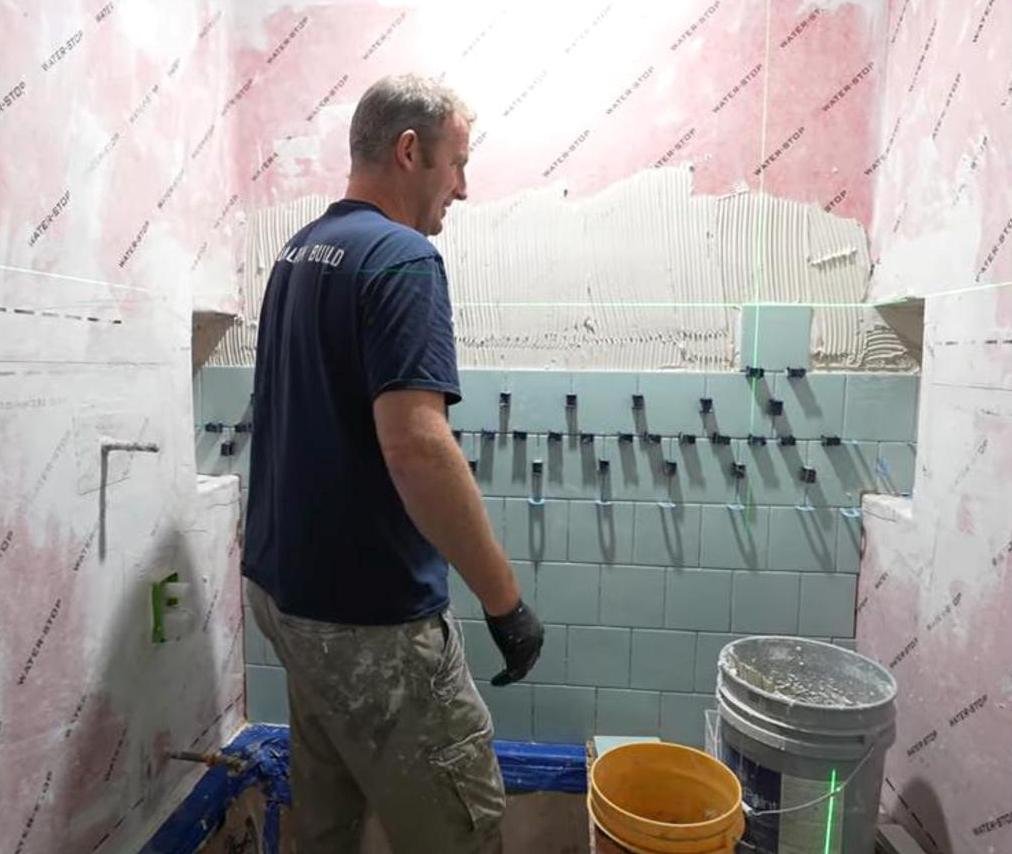
First things first: LAYOUT. I’m using your run-of-the-mill, white subway tile you can get at Home Depot at a very reasonable price. I want to make sure everything is nice and straight. One of the first things you have to pay attention to is making sure your shower (and therefore your tile) is LEVEL. Get that level laser out!

 
tile layout around fiberglass tub shower surround laser level bathroom remodeling DIY how to
 

You’re gonna want to start your tile work on your back wall first. Let’s get out my FAVORITE thinset and start burning it into the substrate.

 
start tile back wall first fiberglass tub shower surround tile work bathroom remodeling DIY how to
 

I love using these horseshoe shims to make sure my grout lines are the right size, and to keep my tiles level.

 
horseshoe shims level tile work bathroom remodeling teacher fiberglass tub shower surround DIY how to
 

When I tiled the sides, I made sure to extend a nice bullnose tile all the way down the edge of the fiberglass surround. Why? It is incredibly important to make sure you waterproof and tile this area because that is where we see the MOST drywall deterioration due to high water exposure. So, protect your work and your bathroom walls and do this.

 
bullnose white subway tile edge fiberglass tub shower surround waterproof bathroom remodeling teacher DIY how to
 

It was really difficult to get an “after shot” of this bathroom because it was oddly shaped. I will say it made the unit look incredibly solid and more expensive. The fact that the walls above and around the unit were waterproofed and tiled made my customer extremely happy.

🔨Some of the materials & tools used in this video (Amazon affiliate links):

Fein Grinder Dust Shroud - https://amzn.to/3Lyp0eC
Fein Shop-vac - https://amzn.to/44ykzZN
Makita Grinder - https://amzn.to/3VAQ15S
Montolit CGX blade - https://amzn.to/42lU87S
Tlock tile leveling system: - https://amzn.to/44vAech
Montolit 24" tile cutter - https://amzn.to/4274lFo
Schluter Jolly (metal edging) - https://amzn.to/3AStqIn
Ardex X5 (cheaper at a supplier) - https://amzn.to/3AWXD90
Dewalt laser - https://amzn.to/425HABS
Montolit CGX blade - https://amzn.to/3AVm4ni
Montolit STL blade - https://www.contractorsdirect.com
Montlit squadron blade - https://amzn.to/3p41FcZ
Fein Multimaster cutter - https://amzn.to/423kSKt
Proknees 0714 knee pads - https://amzn.to/3p8Q0tw
Ardex sponge - https://amzn.to/413Zpjl
Horseshoe tile spacers - https://amzn.to/44rWRhY
Linoleum knife (scraper) - https://amzn.to/3pefZzF
Red tile spacer wedges - https://amzn.to/3LXB9eD
Troxell grout float - https://amzn.to/3LqQ3s0
Tile nippers - https://amzn.to/3ntD9lc

💥Visit my Amazon Store for all products and tools that I recommend and use on a regular basis 👍 https://www.amazon.com/shop/bathroomremodelingteacher_

For help with your bathroom remodel 🎓Enroll in my courses today 🎓 -

All the tools and products I use and recommend can be found on my Amazon Storefront (detailed in the description box of the video). You can find my Storefront, and all of my other social medias, by going to https://linktr.ee/bathroomremodelingteacher. Any and all purchases from my Amazon Storefront are greatly appreciated and help keep my channel going!

I hope this helps you with your own installation. Subscribe to my channel to make sure you don’t miss a new upload!

See you next class,

Steve

Comment

Comment

HOW TO INSTALL A SHOWER PAN

Hey students!

My most requested remodeling project these days is how to install a shower pan when converting from a tub to walk-in shower… and for good reason. Why? It’s in HIGH DEMAND (hello, aging Baby Boomers). It’s also not as costly as an all tiled walk-in shower, making it even more appealing to those who need a walk-in shower.

If I was a newer contractor starting in this business, this type of project is all I would be focusing on. You get in and out of a client’s home quickly. It makes for an easy work week. Plus, it’s really not that hard to do.

This kind of project is such a simple way to make good money if you are into remodeling bathrooms.

What’s even better is I already have a course {3 Day Tile Course} detailing how to successfully build a walk-in shower using a premade shower pan.

This video cuts straight to the point installing a shower pan when you are going from a tub to a walk-in shower. I go over the drain installation…

 
install shower pan tub to walk-in shower bathroom remodeling teacher DIY home improvement
 

… to patching the subfloor underneath…


…laying down the plastic vapor barrier and mortar to keep that pan dry and in place…

 
install shower pan tub to walk-in shower bathroom remodeling teacher DIY home improvement
 

…to setting the shower pan and connecting the plumbing.

 
install shower pan tub to walk-in shower bathroom remodeling teacher DIY home improvement
 

You can have a beautiful and affordable walk-in shower once you complete this project. Be sure to watch the entire video for all the tips and tricks of installing a shower pan, and check out my dedicated course to this project to help you out even more!

🔨Some of the materials & tools used in this video (Amazon affiliate links):

Dreamline Slimline bases - https://amzn.to/3nXyBU6
Wheeler Rex pipe cutter - https://amzn.to/3GuQ6S9

View the rest of the materials and tools in this checklist.

💥Visit my Amazon Store for all products and tools that I recommend and use on a regular basis 👍 https://www.amazon.com/shop/bathroomremodelingteacher_

For help with your bathroom remodel 🎓Enroll in my courses today 🎓 -

All the tools and products I use and recommend can be found on my Amazon Storefront (detailed in the description box of the video). You can find my Storefront, and all of my other social medias, by going to https://linktr.ee/bathroomremodelingteacher. Any and all purchases from my Amazon Storefront are greatly appreciated and help keep my channel going!

I hope this helps you with your own installation. Subscribe to my channel to make sure you don’t miss a new upload!

See you next class,

Steve

Comment

1 Comment

HOW TO INSTALL FLOATING LAMINATE FLOORING

Hey students!

Do you have wall-to-wall carpet you want to replace? Or tired, old wood floors that need to be refinished but you do not have the time, energy, and patience to complete?

Laminate flooring is a great solution to your flooring problems. It is lower in cost when compared to other flooring options (i.e. luxury vinyl plank flooring and hardwood flooring), and it’s installation is easy enough for you to do on your own.

The best part about laminate flooring? The products have become so well made and developed, a lot of them look like real hardwood floors (for a FRACTION of the cost!). The laminate flooring I’m installing in this video was $2.99/sqft. I had about 900 sqft I needed to cover, which brought me to about $2,700 in the flooring material.

Since this is a home remodeling project I’m very familiar with doing (I’ve installed too many to recall), I have some helpful methods and tools I wanted to share with you to make your laminate flooring installation go fast and easy.

One of my biggest tips is acclimating the laminate flooring before installing it. Make sure you get the laminate flooring sitting at the job site for at least a week before starting the installation so it can properly adjust to the current temperature and humidity levels of the home. I can’t tell you how many times I got bit in the ass with hurrying this part along. The laminate flooring can shift and move when adjusting to temps, and you want to avoid that so your freshly installed floor doesn’t buckle or move around on you.

 
installing floating laminate flooring DIY home improvement bathroom remodeling teacher acclimating moisture temperature
 

Another tip is to install a vapor barrier underneath the laminate flooring. This adds a bit of softness to your floors, but more importantly, it eliminates any moisture that comes up from beneath the floors (like the moisture in your basement). This step is especially crucial if you are installing laminate flooring over concrete.

 
installing floating laminate flooring DIY home improvement bathroom remodeling teacher  vapor barrier
 

A major problem a lot of DIYers run into when installing laminate flooring is the flooring layout. I go over some methods and tips on how to best install your flooring (i.e. the direction of the flooring, where to start when the room is not a simple square/rectangle shape, etc.).

 
installing floating laminate flooring DIY home improvement bathroom remodeling teacher layout pattern
 

There is a ton of information packed into this video that will definitely help you out with your own laminate flooring project, from my favorite flooring tools to tile and door transitions to filling in gaps in the subfloor.

You can go from this {dark & dingy}…

 
installing floating laminate flooring DIY home improvement bathroom remodeling teacher carpet dark dingy
 

…to this {bright & polished} in no time.

 
installing floating laminate flooring DIY home improvement bathroom remodeling teacher installed bright polished clean
 

You gotta watch the full video… I promise you will get a ton of useful tiling information out of it! 👊

🔨Some of the materials & tools used in this video (Amazon affiliate links):

Pro-knee pads - https://amzn.to/3lX44Ff
Fein Shop vac (dust extractor) - https://amzn.to/3nCxucp
Fein oscillating tool - https://amzn.to/3JXwWFr
Moisture meter - https://amzn.to/3nDst30
Toe kick saw - https://amzn.to/3JZYkme

View the rest of the materials and tools in this checklist.

💥Visit my Amazon Store for all products and tools that I recommend and use on a regular basis 👍 https://www.amazon.com/shop/bathroomremodelingteacher_

For help with your bathroom remodel 🎓Enroll in my courses today 🎓 -

All the tools and products I use and recommend can be found on my Amazon Storefront (detailed in the description box of the video). You can find my Storefront, and all of my other social medias, by going to https://linktr.ee/bathroomremodelingteacher. Any and all purchases from my Amazon Storefront are greatly appreciated and help keep my channel going!

I hope this helps you with your own installation. Subscribe to my channel to make sure you don’t miss a new upload!

See you next class,

Steve

1 Comment

Comment

HOW TO TILE A BATHROOM- MY BEST ADVICE

Hey students!

I’m often referred to as “that tile guy.” It’s understandable. I’ve been demonstrating how to tile bathrooms on YouTube since 2015. I’ve also been in the bathroom remodeling field for about 15 years.

Since I’ve put in a lot of time in this type of home remodeling, I’ve learned a ton of tips and easier short cuts when it comes to laying tile. I want to share my best tiling techniques with you.

This video is PACKED with a ton of information. It will more than likely answer most of your tiling questions.

Some of the advice I share is the best thinset you can use to make tiling easier and why it is the best…

 
best tiling advice DIY home remodeling bathroom remodeling teacher ardex thinset
 

My favorite tools that make tiling easier…

 
best tiling advice DIY home remodeling bathroom remodeling teacher tile tools
 

How to overcome tile layout issues…

 
best tiling advice home remodeling DIY bathroom remodeling teacher tile layout issues
 

And how to charge for your own bathroom remodeling jobs.

 
best tiling advice home remodeling DIY bathroom remodeling teacher charging customers for bathroom remodel
 

You gotta watch the full video… I promise you will get a ton of useful tiling information out of it! 👊

🔨Some of the materials & tools used in this video (Amazon affiliate links):

Fein Grinder Dust Shroud - https://amzn.to/3nqNH4b
Fein Shop-vac - https://amzn.to/40pkMfr
Makita Grinder - https://amzn.to/3lOVg4g
Montolit CGX blade - https://amzn.to/40m3OPe
T-lock tile leveling system: - https://amzn.to/3FTQSaP
Montolit 24" tile cutter - https://amzn.to/42OLbVO
Schluter Jolly (metal edging) - https://amzn.to/3FZXYdY
Ardex X5 (cheaper at a supplier) - https://amzn.to/3LY0Coj
Dewalt laser - https://amzn.to/3TQ7bv8
Montolit CGX blade - https://amzn.to/3KcK2jw
Montolit STL blade - https://www.contractorsdirect.com/
Montlit squadron blade - https://amzn.to/3ZsuvQS
Fein Multimaster cutter - https://amzn.to/3JQbgeb
Pro-knees 0714 knee pads - https://amzn.to/3Khvy1T
Ardex sponge - https://amzn.to/40plnhb
Horseshoe tile spacers - https://amzn.to/40oc3tQ
Linoleum knife (scraper) - https://amzn.to/42JSptX
Red tile spacer wedges - https://amzn.to/3TSD3j1
Troxell grout float - https://amzn.to/3KcKJcA
Tile nippers - https://amzn.to/3nvne5q

💥Visit my Amazon Store for all products and tools that I recommend and use on a regular basis 👍 https://www.amazon.com/shop/bathroomremodelingteacher_

For help with your bathroom remodel 🎓Enroll in my courses today 🎓 -

All the tools and products I use and recommend can be found on my Amazon Storefront (detailed in the description box of the video). You can find my Storefront, and all of my other social medias, by going to https://linktr.ee/bathroomremodelingteacher. Any and all purchases from my Amazon Storefront are greatly appreciated and help keep my channel going!

I hope this helps you with your own installation. Subscribe to my channel to make sure you don’t miss a new upload!

See you next class,

Steve

Comment

Comment

HOW TO FRAME A CURBLESS SHOWER

Hey students!

CURBLESS WALK-IN SHOWERS ARE THE PINNACLE OF BATHROOM LUXURY… AND YOU DESERVE TO HAVE THAT.

If you are remodeling your bathroom and you have the option of building of walk-in shower, making it curbless will be aesthetically pleasing and a highly practical choice. When we get much older (hopefully we all do!), stepping over tubs or curbs can be a risky challenge. Stumbles and falls increase with age. Because of this, it’s easy to justify a gorgeous curbless shower in your home! 😄

What’s even better is that you can install your own curbless shower with my help. I have a dedicated course {The Ultimate Curbless Shower Course} that contains over 100 AD FREE VIDEOS, written instructions, favorite curbless shower systems I like to use, checklists, guides, and more to assist you in your bathroom remodel. You won’t need outside contractors who are inconsistent and unreliable. You can get it done yourself.

In this video, I go over the fundamental aspects of building the frame work for a curbless shower.

One point I go over is that most of the curbless shower systems out there require you to get the plywood even with the top of the joist.

 
framing a curbless shower plywood level installing bathroom remodeling teacher DIY
 

I like to ensure the framework is reinforced to keep the shower floor level, strong, and secure. No tile movement or shifting!

 
frame curbless shower plywood nailgun bathroom remodeling teacher DIY
 

I address how I go around my vent stack, and demonstrate my method of installing the plywood to maintain levelness.

 
frame a curbless shower plywood floor nailgun bathroom remodeling teacher DIY
 

And, of course, drilling the hole for your shower drain. One step closer to making it a real shower!

 
drilling hole shower drain frame curbless shower bathroom remodeling teacher DIY
 

Be sure to watch the full video for all of these tips in detail, and enroll in my Ultimate Curbless Shower Course to learn how to BUILD your own curbless shower.

 
how to build a curbless shower DIY how to frame a curbless shower bathroom remodeling teacher
 

💥Visit my Amazon Store for all products and tools that I recommend and use on a regular basis 👍 https://www.amazon.com/shop/bathroomremodelingteacher_

For help with your bathroom remodel 🎓Enroll in my courses today 🎓 -

All the tools and products I use and recommend can be found on my Amazon Storefront (detailed in the description box of the video). You can find my Storefront, and all of my other social medias, by going to https://linktr.ee/bathroomremodelingteacher. Any and all purchases from my Amazon Storefront are greatly appreciated and help keep my channel going!

I hope this helps you with your own installation. Subscribe to my channel to make sure you don’t miss a new upload!

See you next class,

Steve

Comment

Comment

HOW TO INSTALL WATERPROOF LAMINATE FLOORING

Hey students!

It's happening whether you like it or not… 😄 Laminate flooring is taking over!

You know I LOVE tile, and I can't believe I'm saying it… but these waterproof laminate flooring systems are awesome! 💥 Slip resistant, softer feel on the feet, & definitely a lot warmer than tile (unless you have heated flooring, of course 😊). The fact that it is a fraction of the cost of real tile AND it’s easier to install also helps sway many homeowners into buying it.

In this video, I demonstrate how to install SmartCore Waterproof Laminate Flooring.

Just to give you a quick rundown, I talk about laminate flooring versus tile flooring, along with all the tools you will need to install the laminate flooring.

 
laminate flooring tools DIY bathroom remodeling teacher
 

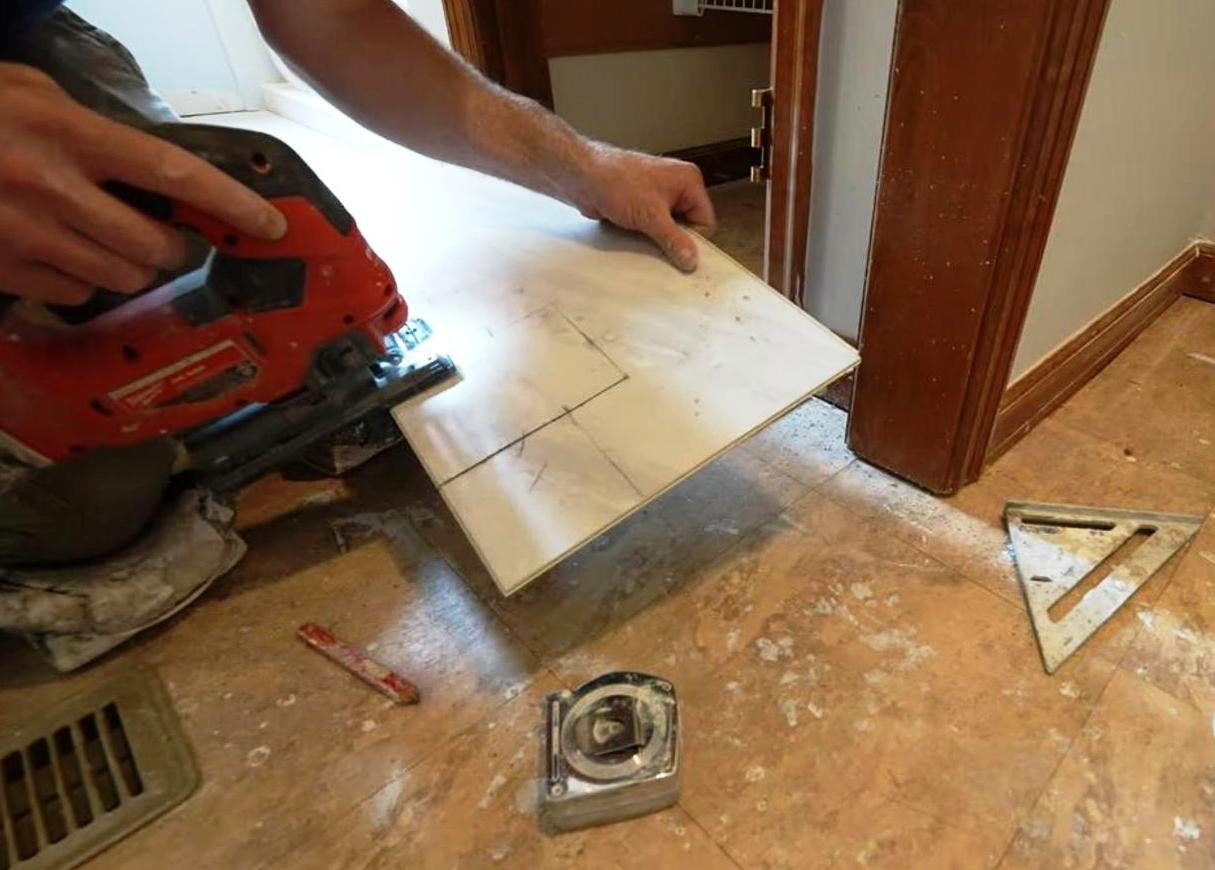
I also go over the layout pattern and how to cut the laminate.

 
cutting laminate flooring DIY bathroom remodeling teacher
 

I share my cutting trick for the laminate around a door jamb, and the best tips on how to click the laminate flooring together.

 
cutting trick laminate flooring bathroom remodeling teacher
 

Finally, I discuss the door transition and sealing that gap between the shower base and new flooring.

 
sealing gap laminate flooring shower bathroom remodeling teacher
 

I hope these tips help you out! 👊

 
laminate tile flooring bathroom remodeling teacher
 

🔨Some of the materials & tools used in this video (Amazon affiliate links):

SmartCore Flooring - https://www.lowes.com/pd/SMARTCORE-Ultra-8-Piece-11-97-in-x-23-62-in-Tivoli-Travertine-Luxury-Vinyl-Plank-Flooring/1000779124
Fein Multimaster cutter - https://amzn.to/3IIW16g
Fein wide 2 1/2" blades - https://amzn.to/3KIzxVK
Pro knees 0714 - https://amzn.to/3KMUmPL
Floor tool kit - https://amzn.to/3KUNxeW
Roberts tapin block - https://amzn.to/3ZeFnCO
Milwaukee jig saw - https://amzn.to/3meoKbB
Milwaukee trim gun - https://amzn.to/3Yjmxcs
Flex trim - https://amzn.to/3Z9wZnL

💥Visit my Amazon Store for all products and tools that I recommend and use on a regular basis 👍 https://www.amazon.com/shop/bathroomremodelingteacher_

For help with your bathroom remodel 🎓Enroll in my courses today 🎓 -

All the tools and products I use and recommend can be found on my Amazon Storefront (detailed in the description box of the video). You can find my Storefront, and all of my other social medias, by going to https://linktr.ee/bathroomremodelingteacher. Any and all purchases from my Amazon Storefront are greatly appreciated and help keep my channel going!

I hope this helps you with your own installation. Subscribe to my channel to make sure you don’t miss a new upload!

See you next class,

Steve

Comment

1 Comment

HOW TO ESTIMATE A BATHROOM REMODEL-TIME AND LABOR

Hey students!

Time is money, and money is time. I’m a firm believer in that saying. And because of that, I value my time a great deal, and I hope you do the same for yourself.

When I go to look at a potential job, I examine the full scope of the project, and the amount of time it will take me to achieve the results I want to achieve. I also take into account the amount of labor and strength it will require me to get the job done. Let’s be real… our physicality will only get us so far for so long. In my opinion, all contractors need to be compensated for putting their body and health in risky situations.

For those of you wanting to get into the remodeling business as a main profession, this video will be a huge help when it comes to giving estimates to customers. It’s also just interesting to see how and why contractors price projects the way they do.

In this video, I evaluate my client’s bathroom, and give you an idea of the amount of time and labor that will go into the remodel.

To give you a quick video run down, one of the first things I check out is the amount of demo that will be required. How hard will it be to remove the flooring and existing tile? How much garbage am I going to be hauling out of there?

 
demo estimate time labor bathroom remodeling teacher DIY
 

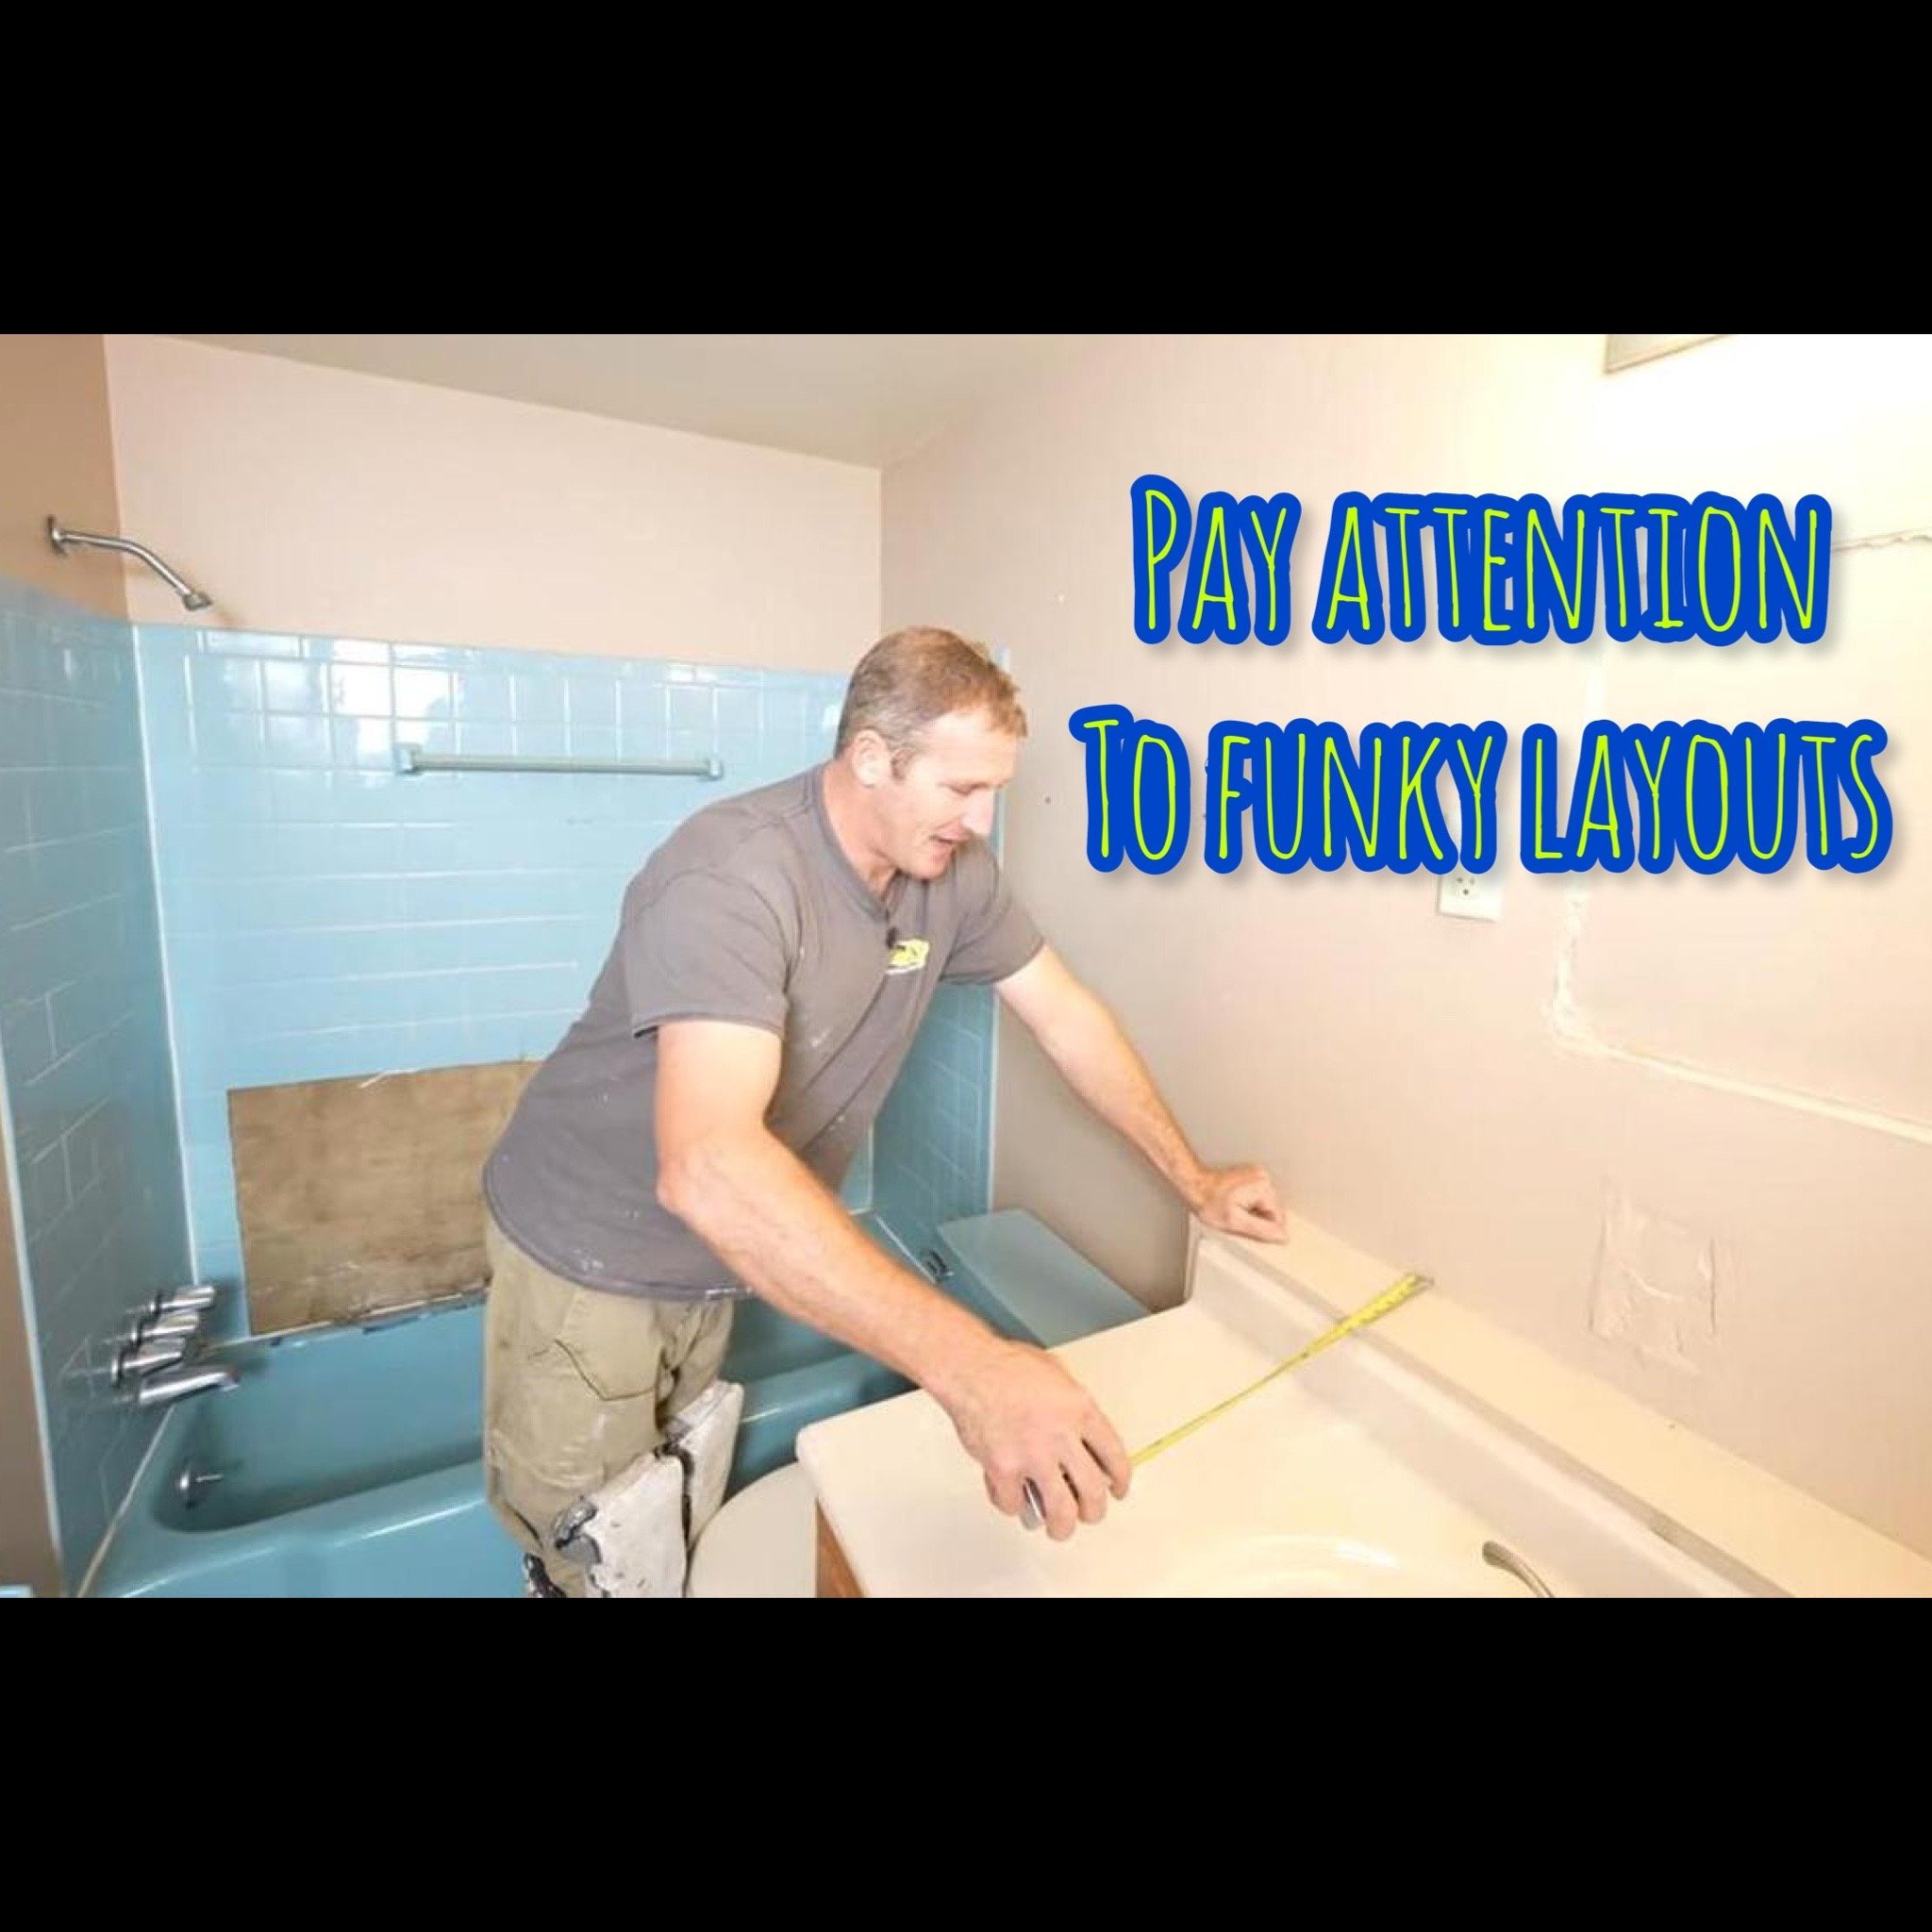
You also need to pay close attention to any odd configurations in the space. In this bathroom, the sink had a funky layout that could be hiding potential issues that may affect the budget.

 
sink layout configuration estimate time labor bathroom remodeling teacher DIY
 

Another thing I consider is the time and work I will be spending on adding a new vent fan to the bathroom. Most times, these bathrooms have a terrible venting system, and I usually have to construct a better method of venting that bathroom.

 
vent fan estimate time labor bathroom remodeling teacher DIY home improvement
 

Lastly, I always pay attention to the odd electrical outlet placement. This lets me know that I will more than likely need to change some of the electrical components of the bathroom, which adds more work to the overall project.

 
electrical outlet placement estimate time labor bathroom remodeling teacher DIY home improvement
 

Be sure to watch the full video to learn all of my evaluation methods when it comes to estimating a client’s bathroom.

💥Visit my Amazon Store for all products and tools that I recommend and use on a regular basis 👍 https://www.amazon.com/shop/bathroomremodelingteacher_

ENROLL IN ANY OF MY COURSES FOR MORE TIPS ON ESTIMATING BATHROOMS 🎓 -

All the tools and products I use and recommend can be found on my Amazon Storefront (detailed in the description box of the video). You can find my Storefront, and all of my other social medias, by going to https://linktr.ee/bathroomremodelingteacher. Any and all purchases from my Amazon Storefront are greatly appreciated and help keep my channel going!

I hope this helps you with your own installation. Subscribe to my channel to make sure you don’t miss a new upload!

See you next class,

Steve

1 Comment

Comment

HOW TO REPAIR THE FRAMING IN A BATHROOM REMODEL

Hey students!

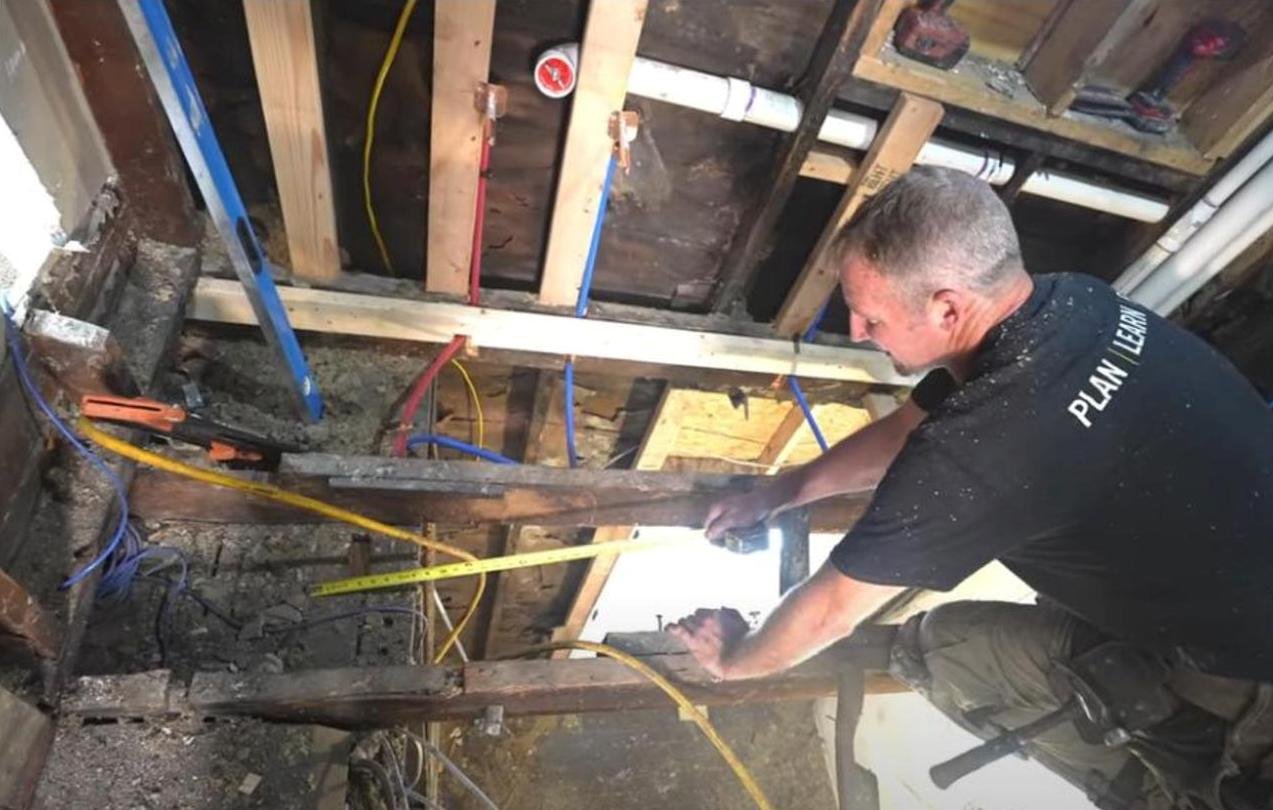
I’ve said it before, and I’ll say it again: when you are remodeling your bathroom, your best plan of action is to gut it down to the studs so you can see what is going on with the plumbing, electric, and FRAMING. This is definitely a must in an older bathroom/home.

Time and water can do extensive damage to existing framing in the bathroom space. Plus, you don’t know what the previous contractor did to that bathroom framing to make things work (like notching a chunk out of the floor framing to make the plumbing run right).

If you are laying down thousands of dollars worth of waterproofing, tile, and fixtures in a bathroom, you best believe you want to have a solid, LEVEL foundation. Otherwise, you might just be throwing your money away.

I know this can be an overwhelming process, and I am here to help guide you through it.

In this video, I go over the best way to evaluate your old framing, how to set a new ledger board, and I also explain exactly what a load bearing wall is, as well as balloon framing.

 
load bearing wall repair framing bathroom remodeling teacher DIY
 

I’ll also show you how to sister a new joist, and go over the common obstructions you might run into when adding new framing.

 
sistering joist framing repair bathroom remodeling teacher DIY
 

You’ll see me add new plywood to the space, and I explain why I like OSB Plywood the best. I’ll also show you a common framing issue at a bathroom door entrance and how I overcome it.

 
plywood flooring framing repair bathroom remodeling teacher DIY
 

I even throw in a spray foam adhesive disaster at the end to keep it real. 😄

 
spray foam adhesive framing repair bathroom remodeling teacher DIY
 

Be sure to watch the full video so you can freshen up your bathroom framing with confidence!

🔨Some of the materials & tools used in this video (Amazon affiliate links):

Paslode framing nailer - https://amzn.to/3SqPDVQ
8d ring shank nails - https://amzn.to/3xPQwOm
6ft level - https://amzn.to/3xKYTdS
Pro-knee pads 0714 - https://amzn.to/41niqPi

💥Visit my Amazon Store for all products and tools that I recommend and use on a regular basis 👍 https://www.amazon.com/shop/bathroomremodelingteacher_

For help with your bathroom remodel 🎓Enroll in my courses today 🎓 -

All the tools and products I use and recommend can be found on my Amazon Storefront (detailed in the description box of the video). You can find my Storefront, and all of my other social medias, by going to https://linktr.ee/bathroomremodelingteacher. Any and all purchases from my Amazon Storefront are greatly appreciated and help keep my channel going!

I hope this helps you with your own installation. Subscribe to my channel to make sure you don’t miss a new upload!

See you next class,

Steve
Comment

Comment

15 PAINTING HACKS FOR HOMEOWNERS

Hey students!

Painting is probably the easiest and fastest way to make a massive, positive change to your home. But, the downside is it can be very labor and time intensive.

Since I’ve painted at least over 100 homes in my life, I’ve learned a few tricks to make it easier along the way. I’ve come up with 15 painting hacks to share with you to make your painting job effortless.

In this video, I explain…

  • the benefits and techniques of using a paint sprayer vs. a paint brush

  • why you should use a quick drying siliconized caulking

  • the reasons I love the shrink free spackling for my touch-ups

  • the importance of wiping down all the walls before painting

 
painting house fast DIY railing bathroom remodeling teacher
 
  • why you should spray the ceiling, trim, and doors

  • how priming saves you time and money in the long run

  • how removing light fixtures makes the process simpler

  • the best way to spray your staircase railings (MAJOR TIME SAVER HERE!)

 
painting sprayer gable attic fast DIY bathroom remodeling teacher
 
  • the importance of removing all door hardware before painting

  • the best way to spray trim and cut in walls with the brush

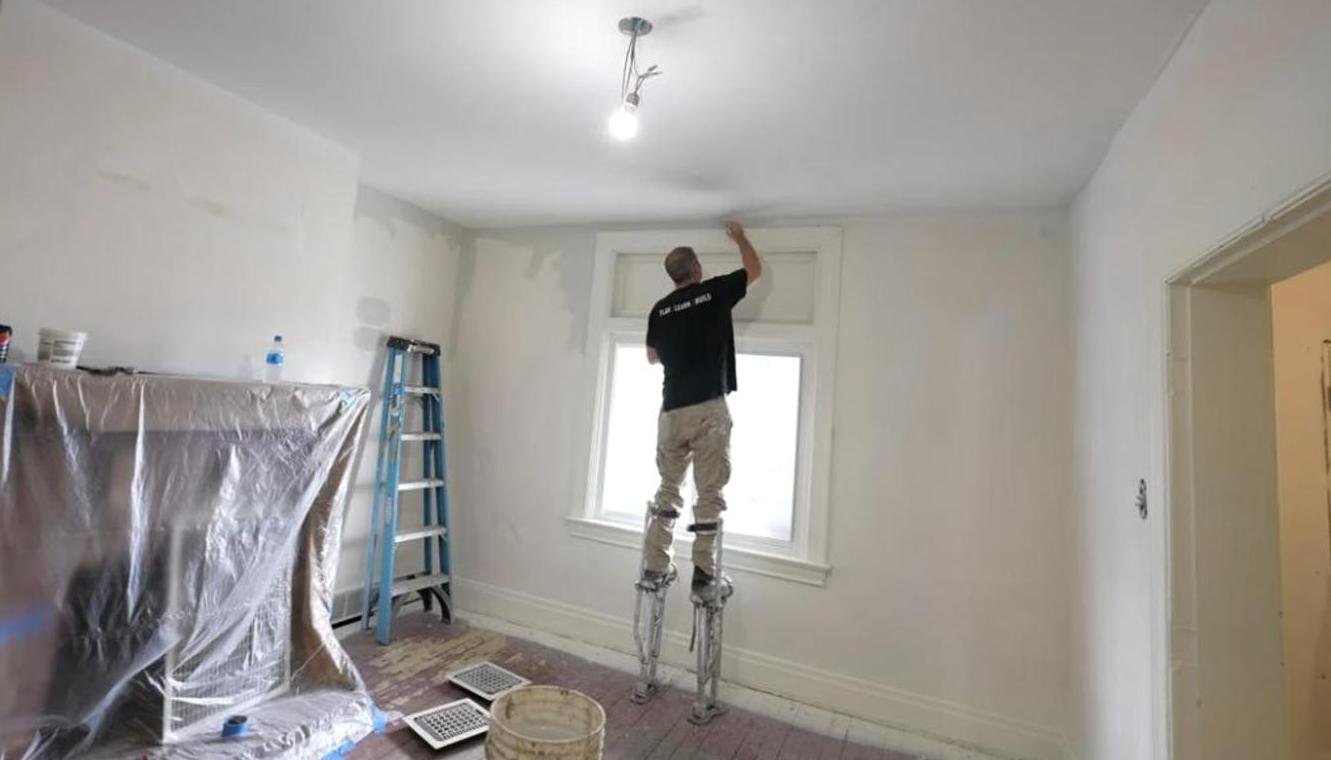
  • how to use the drywall stilts for painting hard to reach places

  • why the angled brush is one of the best paint brushes (Link below!)

 
painting fast brush cutting in DIY bathroom remodeling teacher
 
  • the best technique of continual brush strokes

  • how to spray attic walls with gable ceilings

  • the benefits of the 18” paint roller

 
stilts painting fast house DIY bathroom remodeling teacher cutting in
 

The paint and my techniques transformed this house!

 
fast painting house DIY bathroom remodeling teacher
 

Be sure to watch the full video to make painting your house easier!

🔨Some of the materials & tools used in this video (Amazon affiliate links):

Graco X5 sprayer - https://amzn.to/3Z92qip
Purdy 12-18" roller - https://amzn.to/3InGuZt
Purdy extension pole - https://amzn.to/3ILK8Oh
Purdy large paint bucket - https://amzn.to/3kegDeJ
Purdy 2 1/2" brush - https://amzn.to/3KvmpTH
Drywall stilts - https://amzn.to/3Eux512

💥Visit my Amazon Store for all products and tools that I recommend and use on a regular basis 👍 https://www.amazon.com/shop/bathroomremodelingteacher_

For help with your bathroom remodel 🎓Enroll in my courses today 🎓 -

All the tools and products I use and recommend can be found on my Amazon Storefront (detailed in the description box of the video). You can find my Storefront, and all of my other social medias, by going to https://linktr.ee/bathroomremodelingteacher. Any and all purchases from my Amazon Storefront are greatly appreciated and help keep my channel going!

I hope this helps you with your own installation. Subscribe to my channel to make sure you don’t miss a new upload!

See you next class,

Steve

Comment

Comment

HOW TO MOVE PLUMBING IN A BATHROOM

Hey students!

How many of you would change the layout of your existing bathroom if you could? And how many of you are too scared to do it because of moving the existing plumbing?

I know I have felt that way MANY times when I’ve remodeled my own bathrooms. I felt it this past summer when I remodeled the bathroom in my rental/flip house. I HATED the layout of that bathroom, and I knew it needed to change.

The plumbing aspect is overwhelming at first. At least it definitely was for me. But, I was determined to learn. I acquired all of my knowledge and techniques from other plumbers who have been kind enough to teach me, and also by studying up on the subject online and in books, and from my professional plumbers who follow me. I still have A LOT to learn, but I have come a long way.

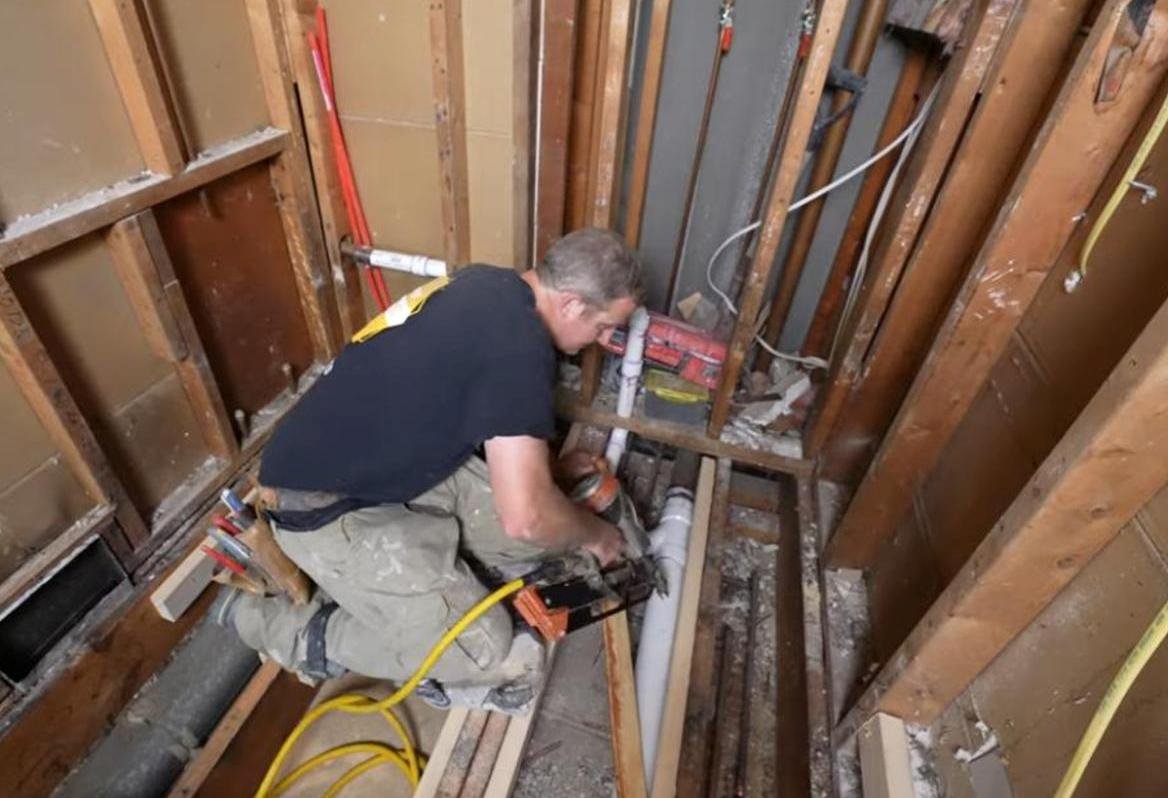
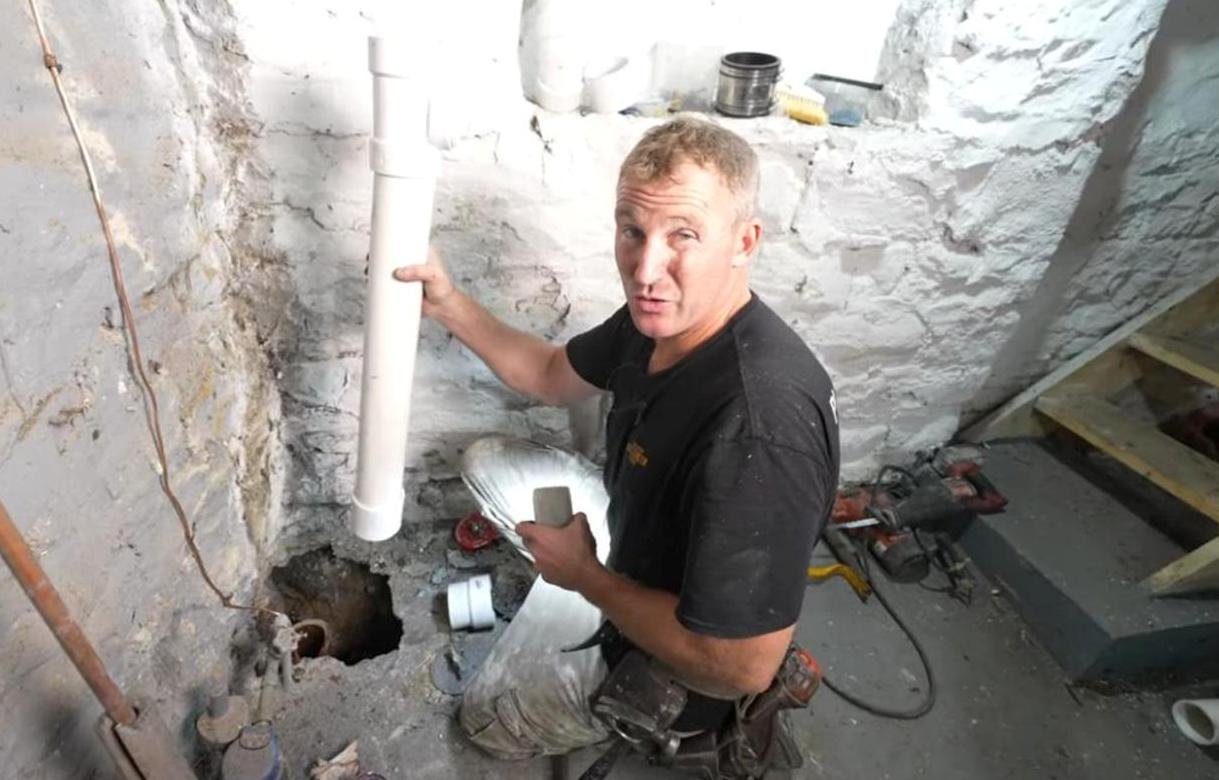
That being said, I wanted to share this video with you to help you with the plumbing in your own bathroom remodeling project. I show you how I remove the old plumbing stack.

 
plumbing bathroom moving stack bathroom remodeling teacher DIY
 

Then, I go over my new connection plan to the existing terracotta plumbing.

 
old terracotta plumbing new connection plan bathroom remodeling teacher DIY
 

I show you how I installed the toilet, sink, and bathtub plumbing.

 
toilet sink bathtub plumbing bathroom remodeling teacher DIY
 

And let’s not forget venting the stack! I definitely show you how to do that.

 
bathroom venting stack remodeling DIY
 

As you can see, we went from this…

 
before bathroom remodel picture DIY bathroom remodeling teacher
 
 
before bathroom remodel picture DIY bathroom remodeling teacher
 

…to this.

after bathroom remodel DIY bathroom remodeling teacher

Be sure to watch the full video for all the details and instruction to help you with your own project.

🔨Some of the materials & tools used in this video (Amazon affiliate links):

Milwaukee sawzall - https://amzn.to/3Z7VCB1
Fein multimaster tool - https://amzn.to/41f0XrY
Hydraulic cement - https://amzn.to/3XRhMX5
3" test plug - https://amzn.to/3Z5eaBQ

💥Visit my Amazon Store for all products and tools that I recommend and use on a regular basis 👍 https://www.amazon.com/shop/bathroomremodelingteacher_

For help with your bathroom remodel 🎓Enroll in my courses today 🎓 -

All the tools and products I use and recommend can be found on my Amazon Storefront (detailed in the description box of the video). You can find my Storefront, and all of my other social medias, by going to https://linktr.ee/bathroomremodelingteacher. Any and all purchases from my Amazon Storefront are greatly appreciated and help keep my channel going!

I hope this helps you with your own installation. Subscribe to my channel to make sure you don’t miss a new upload!

See you next class,

Steve
Comment

Comment

HOW TO BUILD A TILED SHOWER IN 3 DAYS-NEW COURSE!


Hey students!

Did you know that I now offer SIX bathroom remodeling courses?!

I have written and videoed each of these courses myself, so all of the information in every course is coming from a 15+ year experienced, professional bathroom remodeling contractor.

My latest course is called the “3 Day Tiled Shower Course.” This course is fantastic for DIYers because it guides you through the entire process of removing a bathtub and tub surround to installing a pre-made shower pan base and tiling the shower walls. It keeps you organized and moving so you can truly finish the project in just 3 days. And it’s only $39. 👊

My 30+ video and written instruction course will confidently lead you through the demo process…

 
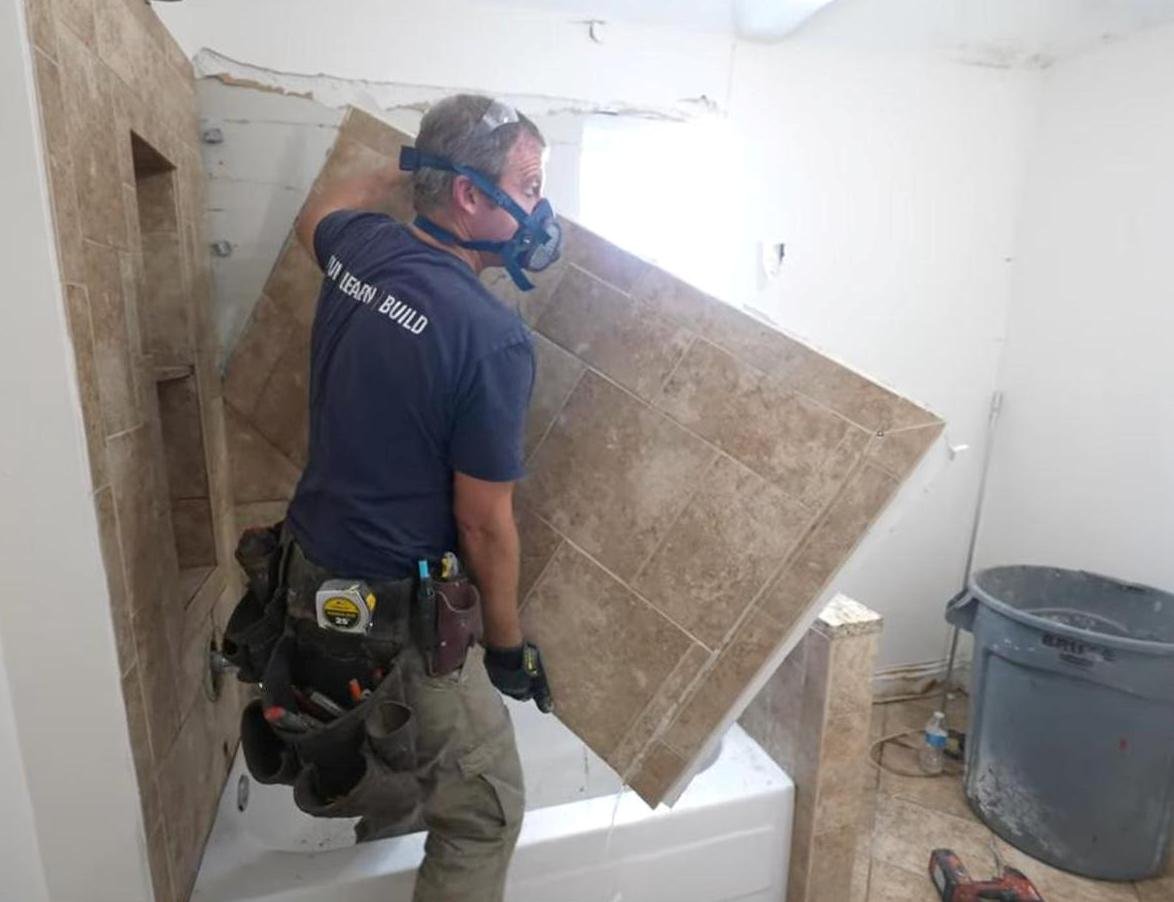
how to build a shower in 3 days course bathroom remodeling demo wall panel
 

…to re-establishing and correcting the plumbing…

 
how to build a shower in 3 days course bathroom remodeling plumbing water supplies drain
 

…to setting and leveling the shower pan…


…to the tile layout and accurate installation…

 
how to build a shower in 3 days course bathroom remodeling tiling thinset coverage
 

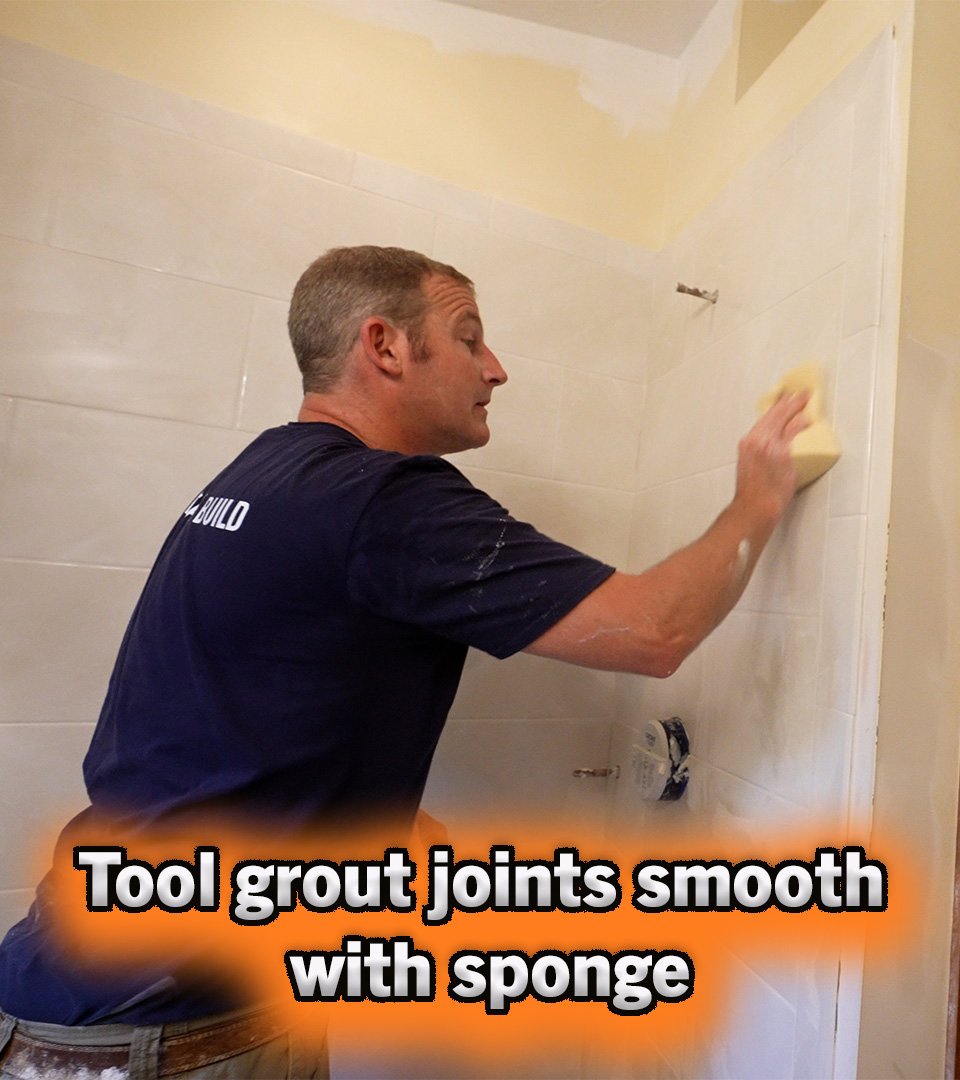
…to the proper grouting methods…

 
how to build a shower in 3 days course bathroom remodeling grouting
 

…and even how to include corner shelves for your shower goods storage!

 
how to build a shower in 3 days course bathroom remodeling caulk corner shelf
 

The coolest part? If you decide to become a DIY Geek Member, you will get all 6 courses (at a discounted price, saving you $135!!!) AND all of the future courses I come out with.

Best. Deal. Ever. 👍

💥Visit my Amazon Store for all products and tools that I recommend and use on a regular basis 👍 https://www.amazon.com/shop/bathroomremodelingteacher_

#diy #shower #bathroomremodel #bathtub #homeimprovement
#realestate #renovation #construction #homerenovation #bathroomdesign #work #bathroomremodelingteacher #stevewhite #tipsandtricks #tutorial #howto #interiordesign #electrical #tiledesign

All the tools and products I use and recommend can be found on my Amazon Storefront (detailed in the description box of the video). You can find my Storefront, and all of my other social medias, by going to https://linktr.ee/bathroomremodelingteacher. Any and all purchases from my Amazon Storefront are greatly appreciated and help keep my channel going!

I hope this helps you with your own installation. Subscribe to my channel to make sure you don’t miss a new upload!

See you next class,

Steve

Comment

Comment

HOW TO INSTALL A FIBERGLASS SHOWER

Hey students!

I do not take on too many projects that do not involve custom tile work. However, I made an exception with this project.

The client needed a bathroom remodel, but also had a tight budget. Foregoing custom tile work and installing a fiberglass shower will achieve this goal. I took this job to show you guys how much money and time you can save by doing fiberglass instead of custom tile.

In this video, I installed a Clarion Fiberglass Shower unit, and I was very impressed with how it was made and how it all turned out.

This particular fiberglass shower was a walk-in shower that was made up of 4 parts, making it super easy to take apart to get inside your house.

 
fiberglass shower installation diy bathroom remodeling teacher
 

After going over some framing tips, the drain pipe placement, and connecting the drain to the shower, I set the shower pan in place with mortar.

 
fiberglass shower unit diy installation bathroom remodeling teacher
 

I also go over some important details you need to know when installing the walls of the unit, plus grab bars and proper caulking.

 
fiberglass shower unit installation diy bathroom remodeling teacher
 

Basically, at the end of the day, you can have a shower fully installed and finished.

 
fiberglass shower unit installation diy bathroom remodeling teacher
 

Be sure to watch the video for all the details on successfully installing a fiberglass unit!

🔨Some of the materials & tools used in this video (Amazon affiliate links):

Clarion Shower Surround - https://clarionbathware.com/product/4s11l-or-4s11r-60-x-33-acrylx-four-piece-alcove-shower/cl020014/cl020014-l-wh
Inside pipe cutter - https://amzn.to/3k4DHMz
New born caulking gun - https://amzn.to/3I28v8S

💥Visit my Amazon Store for all products and tools that I recommend and use on a regular basis 👍 https://www.amazon.com/shop/bathroomremodelingteacher_

For help with your bathroom remodel 🎓Enroll in my courses today 🎓 -

🚿 ULTIMATE CURBLESS SHOWER COURSE-
https://www.bathroomremodelingteacher.com/ultimate-curbless-shower-course-detail

🛁 —> 🚿 CONVERTING TUB TO WALK-IN SHOWER COURSE- https://www.bathroomremodelingteacher.com/converting-tub-to-walkin-shower-course-detail

🛁TUB/SHOWER BATHROOM REMODEL IN 7 DAYS OR LESS COURSE- https://www.bathroomremodelingteacher.com/tubshower-bathroom-remodel-in-7-days-or-less-course-detail

🚿 CUSTOM TILED WALK-IN SHOWER COURSE - https://www.bathroomremodelingteacher.com/custom-tiled-walkin-shower-course-detail

✨ CUSTOM GLASS ENCLOSURE COURSE - https://www.bathroomremodelingteacher.com/custom-glass-enclosure-course-detail

😄DIY BATHROOM GEEK COLLECTION {ALL 5 COURSES!}👊 -https://www.bathroomremodelingteacher.com/diy-geek-membership-detail

#diy #plumbing #bathroomremodel
#realestate #renovation #construction #homerenovation #bathroomdesign #work #bathroomremodelingteacher #stevewhite #tipsandtricks #tutorial #howto #interiordesign #electrical #tiledesign

All the tools and products I use and recommend can be found on my Amazon Storefront (detailed in the description box of the video). You can find my Storefront, and all of my other social medias, by going to https://linktr.ee/bathroomremodelingteacher. Any and all purchases from my Amazon Storefront are greatly appreciated and help keep my channel going!

I hope this helps you with your own installation. Subscribe to my channel to make sure you don’t miss a new upload!

See you next class,

Steve
Comment

Comment

DEMOLISHING AN OLD BATHROOM I BUILT

Hey students!

I despise demo days. Popular TV shows have always made demo days seem fun and exciting, but I think it’s just an insane amount of hard work and heavy lifting.

This past summer I had to demo an old bathroom I had installed years ago. This bathroom was in my rental property I was fixing up to sell. Since it was a rental, the entire house had taken a severe beating from tenant use.

Because I had installed this bathroom years ago, I knew I needed to completely gut it to check out and fix up all the plumbing and electrical. To be totally honest, I knew I had done a few incorrect things when I fixed it up a long time ago, and I wanted to make that right for potential buyers.

Demoing isn’t about going into a space and just going nuts and destroying everything you see. In order to be fast and efficient, you need to be methodical in your approach to gutting a bathroom.

In this video, I demonstrate how I demo an entire bathroom, give you some tips and tricks on doing demo work, and share the importance of exposing every inch of space you are planning on remodeling.

In this particular bathroom, I began by removing fixtures…

 
tile removal how to demo an old bathroom bathroom remodeling teacher DIY
 

…then the glass from the knee wall…

 
tile removal how to demo an old bathroom bathroom remodeling teacher DIY
 

and then the tiled tub surround.

 
tile removal how to demo an old bathroom bathroom remodeling teacher DIY
 

From that point, I make my way through the entire bathroom, gutting it down and baring studs and all to the light of day.

 
tile removal bathroom demo electrical plumbing bathroom remodeling teacher
 

Be sure to watch the video for all the demo details you will need to know before you start your own project.

🔨Some of the materials & tools used in this video (Amazon affiliate links):

Respirator - https://amzn.to/3jXtDFi
Milwaukee Sawzall - https://amzn.to/3I0L3c1
AX demo blades - https://amzn.to/3xmFaRB

💥Visit my Amazon Store for all products and tools that I recommend and use on a regular basis 👍 https://www.amazon.com/shop/bathroomremodelingteacher_

For help with your bathroom remodel 🎓Enroll in my courses today 🎓 -

🚿 ULTIMATE CURBLESS SHOWER COURSE-
https://www.bathroomremodelingteacher.com/ultimate-curbless-shower-course-detail

🛁 —> 🚿 CONVERTING TUB TO WALK-IN SHOWER COURSE- https://www.bathroomremodelingteacher.com/converting-tub-to-walkin-shower-course-detail

🛁TUB/SHOWER BATHROOM REMODEL IN 7 DAYS OR LESS COURSE- https://www.bathroomremodelingteacher.com/tubshower-bathroom-remodel-in-7-days-or-less-course-detail

🚿 CUSTOM TILED WALK-IN SHOWER COURSE - https://www.bathroomremodelingteacher.com/custom-tiled-walkin-shower-course-detail

✨ CUSTOM GLASS ENCLOSURE COURSE - https://www.bathroomremodelingteacher.com/custom-glass-enclosure-course-detail

😄DIY BATHROOM GEEK COLLECTION {ALL 5 COURSES!}👊 -https://www.bathroomremodelingteacher.com/diy-geek-membership-detail

#diy #bathroomremodel #homeimprovement #tile #plumbing #electrical #demo #shower
#realestate #renovation #construction #homerenovation #bathroomdesign #work #bathroomremodelingteacher #stevewhite #tipsandtricks #tutorial #howto #interiordesign #electrical #tiledesign

All the tools and products I use and recommend can be found on my Amazon Storefront (detailed in the description box of the video). You can find my Storefront, and all of my other social medias, by going to https://linktr.ee/bathroomremodelingteacher. Any and all purchases from my Amazon Storefront are greatly appreciated and help keep my channel going!

I hope this helps you with your own installation. Subscribe to my channel to make sure you don’t miss a new upload!

See you next class,

Steve

Comment

Comment

BEST REMODELING TIPS OF 2022

Hey students!

I may be a little late with the 2022 recap, but hey, better late than never!

In this video, I highlight my best tips and tricks from 2022. The best part is these tips encompass ALL DIFFERENT KINDS of remodeling.

One of my most popular videos was how I repaired these nasty concrete steps at my rental/flip property this past summer. This video was so popular that YouTube had me marked as a “concrete repair guy.” HA! Hardly. I did a decent job, but I am by NO means a concrete professional.

 
concrete repair bathroom remodeling teacher DIY

Steps before repair


concrete repair bathroom remodeling teacher DIY

Steps after repair


Another popular video I made was all about removing very old, very difficult, and VERY MESSY concreted tile. I worked on this for a client at the beginning of 2022, and it was HELL. But, it was also an opportunity to show you guys how to do it the best way possible. I go over what tools I used and how I went about doing the job.

 
tile removal bathroom remodeling teacher DIY
 

I’ve also included some of my most popular shorts in this video. Who can forget this toilet’s double wax ring that was used to build up its flange?!

 
toilet wax ring bathroom remodeling teacher DIY
 

Be sure to watch the whole video to catch all 16 of my BEST REMODELING TIPS OF 2022!

🔨Some of the materials & tools used in this video (Amazon affiliate links):

Schluter 38 x 60 shower kit - https://amzn.to/3YnAQNG
Schluter Kerdi band - https://amzn.to/3jUPE7v
Kerdi trowel - https://amzn.to/3JUxr4z

💥Visit my Amazon Store for all products and tools that I recommend and use on a regular basis 👍 https://www.amazon.com/shop/bathroomremodelingteacher_

For help with your bathroom remodel 🎓Enroll in my courses today 🎓 -

🚿 ULTIMATE CURBLESS SHOWER COURSE-
https://www.bathroomremodelingteacher.com/ultimate-curbless-shower-course-detail

🛁 —> 🚿 CONVERTING TUB TO WALK-IN SHOWER COURSE- https://www.bathroomremodelingteacher.com/converting-tub-to-walkin-shower-course-detail

🛁TUB/SHOWER BATHROOM REMODEL IN 7 DAYS OR LESS COURSE- https://www.bathroomremodelingteacher.com/tubshower-bathroom-remodel-in-7-days-or-less-course-detail

🚿 CUSTOM TILED WALK-IN SHOWER COURSE - https://www.bathroomremodelingteacher.com/custom-tiled-walkin-shower-course-detail

✨ CUSTOM GLASS ENCLOSURE COURSE - https://www.bathroomremodelingteacher.com/custom-glass-enclosure-course-detail

😄DIY BATHROOM GEEK COLLECTION {ALL 5 COURSES!}👊 -https://www.bathroomremodelingteacher.com/diy-geek-membership-detail

#diy #homeimprovement #bathroomremodel #tile #plumbing #electrical
#realestate #renovation #construction #homerenovation #bathroomdesign #work #bathroomremodelingteacher #stevewhite #tipsandtricks #tutorial #howto #interiordesign #electrical #tiledesign

All the tools and products I use and recommend can be found on my Amazon Storefront (detailed in the description box of the video). You can find my Storefront, and all of my other social medias, by going to https://linktr.ee/bathroomremodelingteacher. Any and all purchases from my Amazon Storefront are greatly appreciated and help keep my channel going!

I hope this helps you with your own installation. Subscribe to my channel to make sure you don’t miss a new upload!

See you next class,

Steve

Comment

Comment

DIY Granite Countertops

Hey students!

Are you remodeling your kitchen and want to save yourself $1,000 (or more!)? I can help you with that.

Most kitchen renovations call for new countertops, which can be a costly item in a kitchen renovation. There is a way to reduce the cost, and that is installing a granite countertop yourself.

How do I go about doing this? Easy.

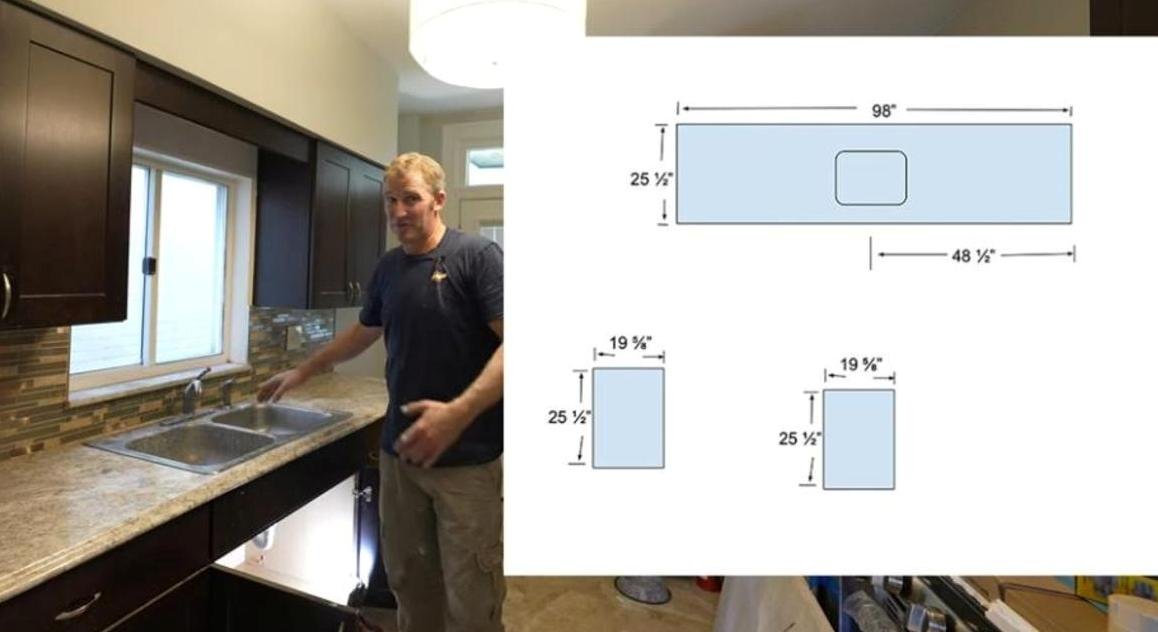
Find yourself a wholesale granite manufacturer. Most cities and suburbs have them. I live right outside of Pittsburgh, and I used Asian Granite. I went there, found the granite I wanted (bonus points if you can find something in their remnant section!), and had the measurements of the countertop space in my kitchen all laid out, in detail, for them. This gives them a rough idea of how much granite your will need and how much it will cost.

 
diy granite countertop installation
 

The granite company will send a rep out to your home to get the exact measurements for the countertops once you have installed your kitchen cabinetry. Obviously, this is to ensure the most accurate cut.

I usually pick up my own granite once it is cut, but I understand that is not what most people can do. Don’t worry— delivery options are available.

As for the actually installation of the granite, you need to watch my video. I break it down step-by-step exactly what you need to do to install granite countertops, from cutting the existing backsplash to prepare for the new granite…

 
cutting backsplash tile diy granite countertop installation bathroom remodeling teacher
 

to setting (I had help on this part!) and caulking the new granite…

 
DIY installing granite countertop bathroom remodeling teacher
 

and cutting and installing your new faucet and kitchen sink!

 
farm sink kitchen faucet installation DIY bathroom remodeling teacher
 

The end product speaks for itself. I hope this video helps you out in your own project!

 
DIY granite countertop installation bathroom remodeling teacher
 

🔨Some of the materials & tools used in this video (Amazon affiliate links):

WEWE sink faucet (only $52 + 5 star ratings) - https://amzn.to/3Xl7UVt
Grinder diamond blade - https://amzn.to/3YyaHve

💥Visit my Amazon Store for all products and tools that I recommend and use on a regular basis 👍 https://www.amazon.com/shop/bathroomremodelingteacher_

For help with your bathroom remodel 🎓Enroll in my courses today 🎓 -

🚿 ULTIMATE CURBLESS SHOWER COURSE-
https://www.bathroomremodelingteacher.com/ultimate-curbless-shower-course-detail

🛁 —> 🚿 CONVERTING TUB TO WALK-IN SHOWER COURSE- https://www.bathroomremodelingteacher.com/converting-tub-to-walkin-shower-course-detail

🛁TUB/SHOWER BATHROOM REMODEL IN 7 DAYS OR LESS COURSE- https://www.bathroomremodelingteacher.com/tubshower-bathroom-remodel-in-7-days-or-less-course-detail

🚿 CUSTOM TILED WALK-IN SHOWER COURSE - https://www.bathroomremodelingteacher.com/custom-tiled-walkin-shower-course-detail

✨ CUSTOM GLASS ENCLOSURE COURSE - https://www.bathroomremodelingteacher.com/custom-glass-enclosure-course-detail

😄DIY BATHROOM GEEK COLLECTION {ALL 5 COURSES!}👊 -https://www.bathroomremodelingteacher.com/diy-geek-membership-detail

#diy #kitchen #homeimprovement
#realestate #renovation #construction #homerenovation #bathroomdesign #work #bathroomremodelingteacher #stevewhite #tipsandtricks #tutorial #howto #interiordesign #electrical #tiledesign

All the tools and products I use and recommend can be found on my Amazon Storefront (detailed in the description box of the video). You can find my Storefront, and all of my other social medias, by going to https://linktr.ee/bathroomremodelingteacher. Any and all purchases from my Amazon Storefront are greatly appreciated and help keep my channel going!

I hope this helps you with your own installation. Subscribe to my channel to make sure you don’t miss a new upload!

See you next class,

Steve

Comment