Comment

HOW TO BUILD A SHOWER OVER CONCRETE

Hey students!

My parents retired and built a new patio home last year. And if you know anything about patio homes, you know how much concrete is involved in them. I helped by building their bathrooms (naturally). Building a shower over a concrete floor can definitely have its challenges…the biggest one is the difficulty of moving any plumbing.

In this video, I go over the step-by-step process of what I find to be the easiest way to build a shower over concrete.

Let me break it down to you real quick…

 
concrete floor shower new construction Schluter drain assembly tile
 

I explain how I prep and finish filling in the concrete around the “existing” drain of the shower.

 
concrete floor shower new construction Schluter drain assembly tile
 

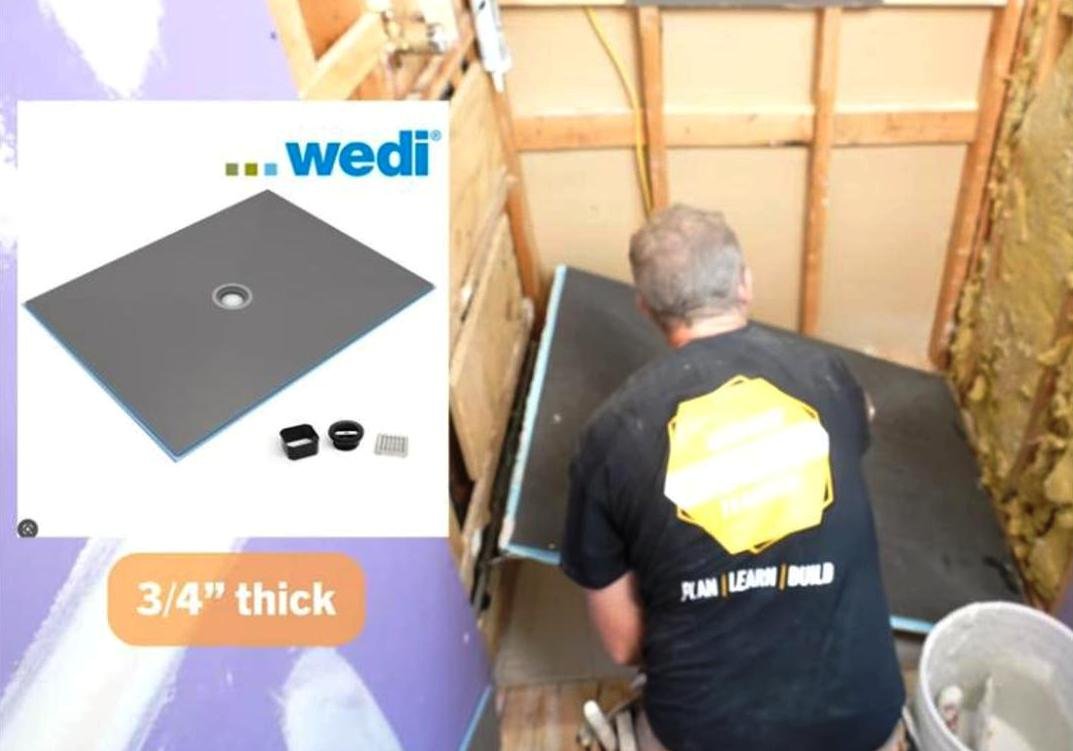
I talk about the thinset I decided to go with, as well as the shower system I chose.

 
concrete floor shower new construction Schluter drain assembly tile
 

Then, I show you how I tailor the shower system to fit perfectly in the shower, and install it.

***Also, check out that sweet knee wall I built! Learn how to do it yourself by watching my video on it.

 
concrete floor shower new construction Schluter drain assembly tile
 

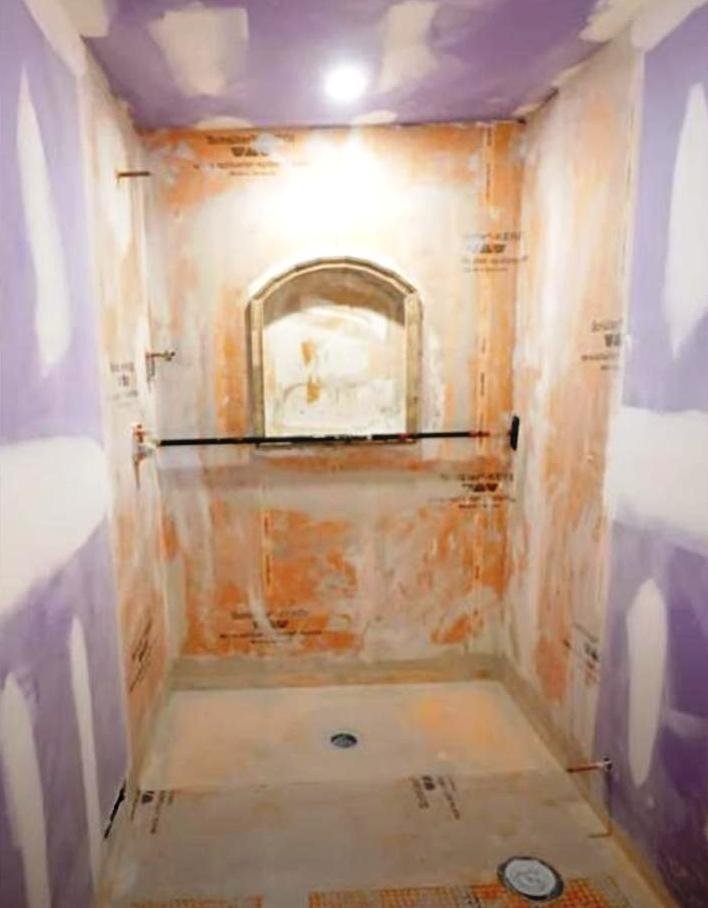
Once I install the waterproofing shower system, I move on to the curb for the shower.

 
concrete floor shower new construction Schluter drain assembly tile
 

Lastly, I install the final parts of the drain (including the waterproofing fleece) and give you my tips for finishing everything off.

🔨The materials & tools used in this video (Amazon affiliate links):

Schluter 38 x 60 shower kit - https://amzn.to/3DhEDnw
Schluter Kerdi band - https://amzn.to/3HvP21h
Kerdi trowel - https://amzn.to/408kVEv

💥Visit my Amazon Store for all products and tools that I recommend and use on a regular basis 👍 https://www.amazon.com/shop/bathroomremodelingteacher_

For help with your bathroom remodel 🎓Enroll in my courses today 🎓 -

🛁 —> 🚿 CONVERTING TUB TO WALK-IN SHOWER COURSE- https://www.bathroomremodelingteacher.com/tub-to-shower-course-detail

🛁TUB & SHOWER REMODEL IN 7 DAYS OR LESS COURSE- https://www.bathroomremodelingteacher.com/tubshowercourse

🚿 CUSTOM TILED WALK-IN SHOWER COURSE - https://www.bathroomremodelingteacher.com/custom-tiled-walkin-shower

✨ CUSTOM GLASS ENCLOSURE COURSE - https://www.bathroomremodelingteacher.com/customglasscourse

😄DIY BATHROOM GEEK COLLECTION {all 4 courses!}👊 -https://www.bathroomremodelingteacher.com/geek-collection-detail

#diy #tile #bathroomremodel #homeimprovement
#realestate #renovation #construction #homerenovation #bathroomdesign #work #bathroomremodelingteacher #stevewhite #tipsandtricks #tutorial #howto #interiordesign #electrical #tiledesign

All the tools and products I use and recommend can be found on my Amazon Storefront (detailed in the description box of the video). You can find my Storefront, and all of my other social medias, by going to https://linktr.ee/bathroomremodelingteacher. Any and all purchases from my Amazon Storefront are greatly appreciated and help keep my channel going!

I hope this helps you with your own installation. Subscribe to my channel to make sure you don’t miss a new upload!

See you next class,

Steve

Comment

Comment

5 REASONS I USE SCHLUTER SHOWER SYSTEMS

Hey students!

I have installed more Schluter® Shower Systems than any other type of waterproofing system for showers. With so many choices out there, I want to shed some light on why these are such popular systems and why I continually use them.

Here are my 5 reasons why I use Schluter Shower Systems:


REASON #1: It’s extremely versatile. Schluter offers so many different products that you can always find something to fit your bathroom.


REASON #2: Their drain is the best. It comes in 3 parts and it’s very easy to install and adjust to your shower needs.


REASON #3: It’s easy to modify. The system allows you a lot of wiggle room when it comes to the location of your shower drain. You can easily change the system to make it work in your bathroom without compromising its function.


REASON #4: Widespread availability. You can find Schluter products in big box stores and other distributors effortlessly.

REASON #5: Price comparison. When you compare Schluter to the cost of other shower systems, you will more than likely find it to be the most affordable.

Be sure to watch the entire video, because I go in depth on the reasons I consistently use the Schluter Shower Systems.

🔨The materials & tools used in this video (Amazon affiliate links):

Schluter 38 x 60 shower kit - https://amzn.to/3wuISbi
Schluter Kerdi band - https://amzn.to/3kGTPUy
Kerdi trowel - https://amzn.to/3R2QLOR

💥Visit my Amazon Store for all products and tools that I recommend and use on a regular basis 👍 https://www.amazon.com/shop/bathroomremodelingteacher_

For help with your bathroom remodel 🎓Enroll in my courses today 🎓 -

🛁 —> 🚿 CONVERTING TUB TO WALK-IN SHOWER COURSE- https://www.bathroomremodelingteacher.com/tub-to-shower-course-detail

🛁TUB & SHOWER REMODEL IN 7 DAYS OR LESS COURSE- https://www.bathroomremodelingteacher.com/tubshowercourse

🚿 CUSTOM TILED WALK-IN SHOWER COURSE - https://www.bathroomremodelingteacher.com/custom-tiled-walkin-shower

✨ CUSTOM GLASS ENCLOSURE COURSE - https://www.bathroomremodelingteacher.com/customglasscourse

😄DIY BATHROOM GEEK COLLECTION {all 4 courses!}👊 -https://www.bathroomremodelingteacher.com/geek-collection-detail

#diy #tile #bathroomremodel #homeimprovement
#realestate #renovation #construction #homerenovation #bathroomdesign #work #bathroomremodelingteacher #stevewhite #tipsandtricks #tutorial #howto #interiordesign #electrical #tiledesign

All the tools and products I use and recommend can be found on my Amazon Storefront (detailed in the description box of the video). You can find my Storefront, and all of my other social medias, by going to https://linktr.ee/bathroomremodelingteacher. Any and all purchases from my Amazon Storefront are greatly appreciated and help keep my channel going!

I hope this helps you with your own installation. Subscribe to my channel to make sure you don’t miss a new upload!

See you next class,

Steve

Comment

Comment

THE BEST WAY TO SET MOSAIC TILE ON A BATHROOM FLOOR

Hey students!

Setting small tile on a bathroom floor is not exactly an easy task, but it is completely achievable. There are things you must do in order for this particular job to go smoothly. From the tile layout to a level floor, you have to be very detailed and prepared to set mosaic floor tile.

Here are my top 5 tips for setting small tile on a bathroom floor:


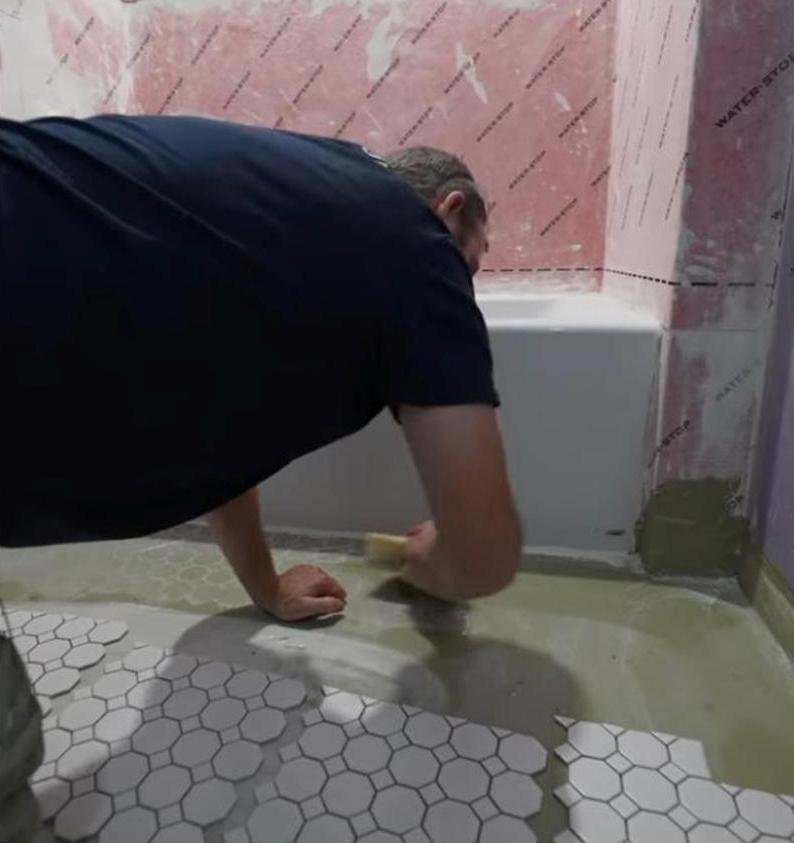
TIP #1: Use my favorite thinset, Ardex X5, to set your tile. Why? This stuff has a long bucket life, which gives you plenty of time to cut and adjust your tile.


TIP #2: Start with a level floor. This is the most important factor of installing a mosaic floor tile. Any type of deviation with the floor levelness will show in your tile work, and it is extremely hard to build up thinset to try and make it level. Do yourself a favor and make sure your floor is 100% flat.


TIP #3: Choose the right mosaic tile. When picking your mosaic tile, be sure to look at the backing of the tile that is holding the tiles together. Can you see the actual tiles through the mesh (like the left pic) or not (like the right pic)? If not, do NOT choose that mosaic. You need the thinset to adhere to the tile itself, not just the mesh backing. Mosaics with solid mesh backings will not fully set and will eventually come loose.


TIP #4: Wipe down the substrate with a damp sponge before applying thinset. This will make the thinset glide on the floor so easily.


TIP #5: Tamp down your mosaic tiles with a grout float. This will ensure an even distribution and setting of the thinset to the tile. I like using the Troxell grout float.

Be sure to watch the entire video, because I share a total of 15 TIPS on how to get that perfectly laid small tile floor in your bathroom.

🔨The materials & tools used in this video (Amazon affiliate links):

Fein Grinder Dust Shroud - https://amzn.to/3kJAodE
Fein Shop-vac - https://amzn.to/3WxpgxL
Makita Grinder - https://amzn.to/3JjQwx3
Montolit CGX blade - https://amzn.to/3JwyZBV
Tlock tile leveling system: - https://amzn.to/3kHpwgC
Montolit 24" tile cutter - https://amzn.to/3Dgb7yh
Schluter Jolly (metal edging) - https://amzn.to/3HaxuWY
Ardex X5 (cheaper at a supplier) - https://amzn.to/3Di7BU3
Dewalt laser - https://amzn.to/3Wx6XsN
Montolit CGX blade - https://amzn.to/3wvVMFW
Montolit STL blade - https://www.contractorsdirect.com/
Montlit squadron blade - https://amzn.to/3j38xES
Fein Multimaster cutter - https://amzn.to/402PIlV
Ardex sponge - https://amzn.to/3Hwovkv
Horseshoe tile spacers - https://amzn.to/3XG9L8m
Linoleum knife (scraper) - https://amzn.to/3JfrvmA
Red tile spacer wedges - https://amzn.to/3JiksJJ
Troxell grout float - https://amzn.to/3Jev4Jy
Tile nippers - https://amzn.to/3XCtSUO

💥Visit my Amazon Store for all products and tools that I recommend and use on a regular basis 👍 https://www.amazon.com/shop/bathroomremodelingteacher_

For help with your bathroom remodel 🎓Enroll in my courses today 🎓 -

🛁 —> 🚿 CONVERTING TUB TO WALK-IN SHOWER COURSE- https://www.bathroomremodelingteacher.com/tub-to-shower-course-detail

🛁TUB & SHOWER REMODEL IN 7 DAYS OR LESS COURSE- https://www.bathroomremodelingteacher.com/tubshowercourse

🚿 CUSTOM TILED WALK-IN SHOWER COURSE - https://www.bathroomremodelingteacher.com/custom-tiled-walkin-shower

✨ CUSTOM GLASS ENCLOSURE COURSE - https://www.bathroomremodelingteacher.com/customglasscourse

😄DIY BATHROOM GEEK COLLECTION {all 4 courses!}👊 -https://www.bathroomremodelingteacher.com/geek-collection-detail

#diy #tile #bathroomremodel #homeimprovement
#realestate #renovation #construction #homerenovation #bathroomdesign #work #bathroomremodelingteacher #stevewhite #tipsandtricks #tutorial #howto #interiordesign #electrical #tiledesign

All the tools and products I use and recommend can be found on my Amazon Storefront (detailed in the description box of the video). You can find my Storefront, and all of my other social medias, by going to https://linktr.ee/bathroomremodelingteacher. Any and all purchases from my Amazon Storefront are greatly appreciated and help keep my channel going!

I hope this helps you with your own installation. Subscribe to my channel to make sure you don’t miss a new upload!

See you next class,

Steve

Comment

Comment

HOW TO WATERPROOF A BATHROOM FLOOR

Hey students!

Excellent and thorough waterproofing saves bathrooms. I swear by this, time and time again. Whenever you are remodeling a bathroom, the #1 issue on your mind should be HOW CAN I BEST WATERPROOF AND PROTECT MY BATHROOM.

So, let’s focus on a specific area of waterproofing in a bathroom— like the floor.

Thanks to modern innovation and technology, it is easy and accessible to get your hands on some high quality waterproofing products and install them yourself. Since there are many different types of waterproofing systems available for bathroom floors, and depending on what kind of tile you are installing, you will want to choose the best option for your specific needs.

I go over all of my favorite waterproofing options for the bathroom floor, as well as the tools and products you need, in this video.

In this video, for the bathroom floor I’m waterproofing, I used a floor leveling system to make my floor perfect for the mosaic tile I was going to lay down. I felt my best option was to go with a liquid waterproofing membrane for the majority of the floor and use a membrane fabric for the corners.

 
waterproof bathroom floor DIY home improvement bathroom remodeling
 

Getting started, I vacuumed all the debris off of the bathroom floor. Then, I used the Laticrete Hydroban liquid membrane to adhere the fabric to the corners of the floor bathroom.

 
waterproof bathroom floor DIY home improvement bathroom remodeling
 

I made sure to do the entire perimeter of the room with the fabric mesh, but I left out the tub area.

 
waterproof bathroom floor DIY home improvement bathroom remodeling
 

Once I was done with the perimeter, I moved on to the tub area. I applied a generous coating of the Laticrete Hydoban liquid membrane to the outside of the tub, basically “cutting in” as close to the tub as I could. I completely waterproofed the tub with a sealant once the liquid membrane dried.

 
waterproof bathroom floor DIY home improvement bathroom remodeling
 

I applied a nice, thick amount of the liquid membrane around the toilet flange, and then I finished the entire floor.

 
waterproof bathroom floor DIY home improvement bathroom remodeling
 

After the first coat dried, I applied a second coat. I felt confident the bathroom floor was completely waterproofed and secure.

🔨The materials & tools used in this video (Amazon affiliate links):

Hydroban - https://amzn.to/3HqvVWo
Mesh for corners - https://amzn.to/3H1N1sd
Hydroban sealant - https://amzn.to/3J8uahO
1/2" nap roller - https://amzn.to/3Hspv90

💥Visit my Amazon Store for all products and tools that I recommend and use on a regular basis 👍 https://www.amazon.com/shop/bathroomremodelingteacher_

For help with your bathroom remodel 🎓Enroll in my courses today 🎓 -

🛁 —> 🚿 CONVERTING TUB TO WALK-IN SHOWER COURSE- https://www.bathroomremodelingteacher.com/tub-to-shower-course-detail

🛁TUB & SHOWER REMODEL IN 7 DAYS OR LESS COURSE- https://www.bathroomremodelingteacher.com/tubshowercourse

🚿 CUSTOM TILED WALK-IN SHOWER COURSE - https://www.bathroomremodelingteacher.com/custom-tiled-walkin-shower

✨ CUSTOM GLASS ENCLOSURE COURSE - https://www.bathroomremodelingteacher.com/customglasscourse

😄DIY BATHROOM GEEK COLLECTION {all 4 courses!}👊 -https://www.bathroomremodelingteacher.com/geek-collection-detail

#diy #tile #bathroomremodel #homeimprovement #waterproofing
#realestate #renovation #construction #homerenovation #bathroomdesign #work #bathroomremodelingteacher #stevewhite #tipsandtricks #tutorial #howto #interiordesign #electrical #tiledesign

All the tools and products I use and recommend can be found on my Amazon Storefront (detailed in the description box of the video). You can find my Storefront, and all of my other social medias, by going to https://linktr.ee/bathroomremodelingteacher. Any and all purchases from my Amazon Storefront are greatly appreciated and help keep my channel going!

I hope this helps you with your own installation. Subscribe to my channel to make sure you don’t miss a new upload!

See you next class,

Steve

Comment

Comment

FLOOR LEVELER TIPS IN A BATHROOM

Hey students!

The one HUGE thing a bathroom floor requires before you lay down the tile (especially a mosaic/smaller tile) is having a LEVEL FLOOR. This isn’t always achieved on its own. Thank goodness for self-leveling products that make this possible in the simplest way. Introducing my absolute favorite leveling system for bathroom floors: the Ardex Liquid Backerboard. This is a self-leveling underlayment for interior wood and concrete subfloors. I love it.

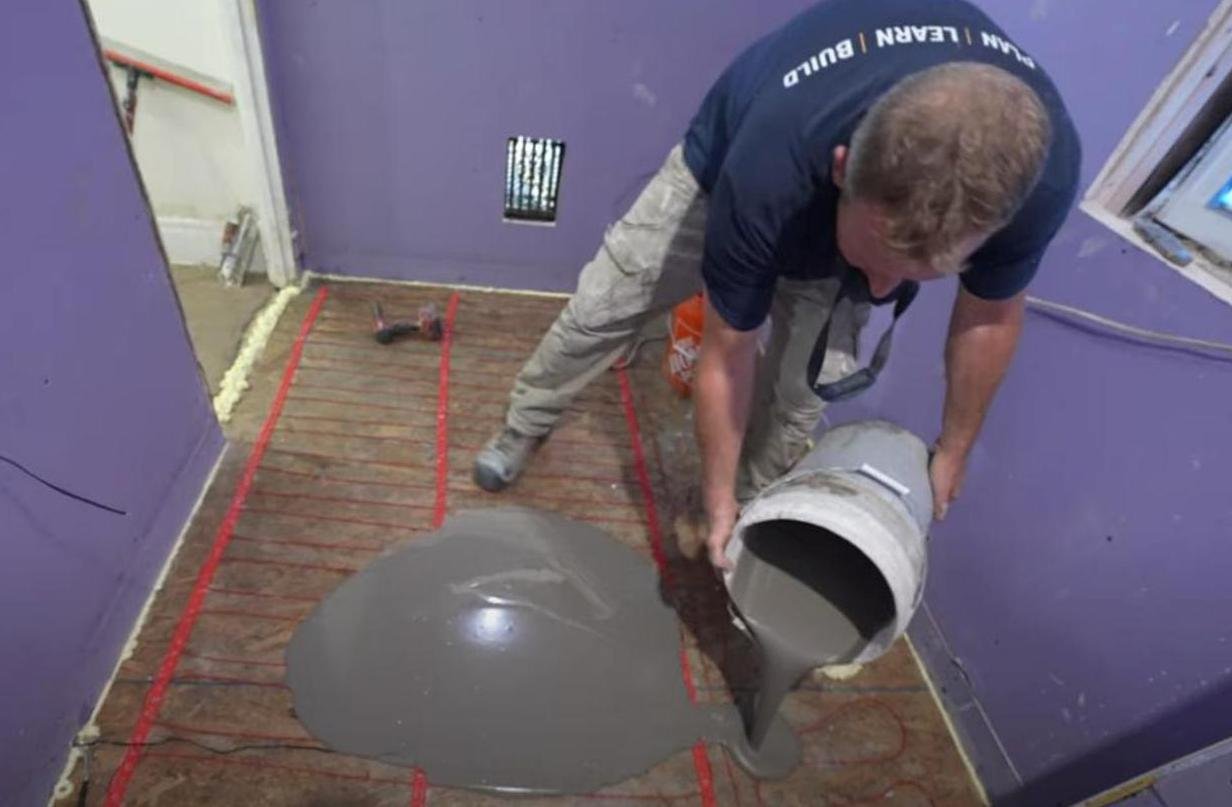
In this bathroom remodeling video, I’m using the Ardex leveling liquid over heated flooring wiring. Nothing better than having warm tootsies in your bathroom— especially in the winter. Doing a heated floor this way saves you a ton of money.

 
floor level bathroom remodel tile mosaic home improvement
 

As you can see, I’ve laid my wire down in the areas where I want the floor to be heated. Laying the wire down manually saves you a lot of money than getting the pre-wired matting.

 
floor level bathroom remodel tile mosaic home improvement
 

Before mixing the leveler, make sure the entire perimeter of the room is sealed and blocked. I used the Great Stuff Pro Sealant.

 
floor level bathroom remodel tile mosaic home improvement
 

Next up, you will want to prime the subfloor before laying down that leveler. I use the Ardex Primer.

 
floor level bathroom remodel tile mosaic home improvement
 

Be sure to watch this entire video, because I go into a few other things you want to do before mixing and pouring the leveling liquid, like setting screws to indicate a level floor and the tools I use to spread the leveler. But once you are done with all of that, you’ll mix up your leveler and pour away.

 
floor level bathroom remodel tile mosaic home improvement
 

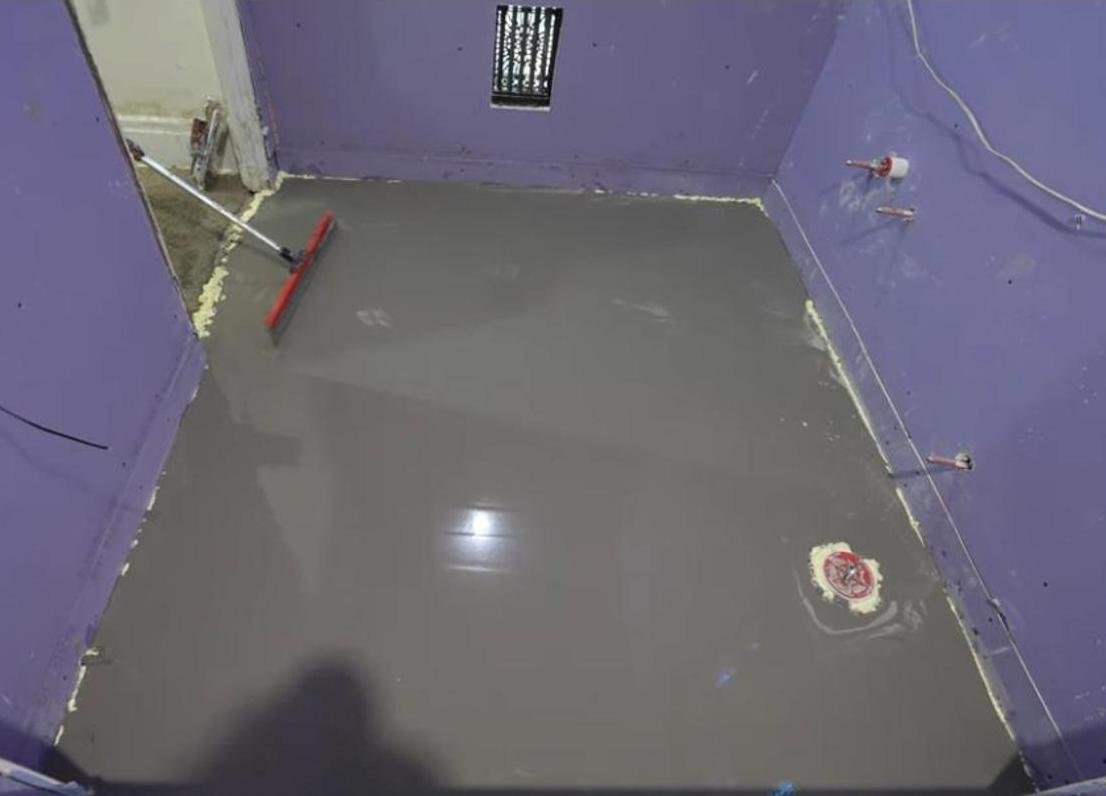
Here is how my floor looked after spreading the liquid floor leveler. Very easy!

🔨The materials & tools used in this video (Amazon affiliate links):

30 Sqft Warming system - https://amzn.to/3H5pVAS
Collomixer - https://amzn.to/3HrTldK
Ardex Floor leveler - https://www.ardexamericas.com/product/ardex-liquid-backerboard/
P51 primer - https://amzn.to/3Xv5qEF
Spray foam gun - https://amzn.to/3Wwkfpk
Spray foam - https://amzn.to/3J7Ylpi
Leveler spreading kit - https://amzn.to/3XLN3Ls

💥Visit my Amazon Store for all products and tools that I recommend and use on a regular basis 👍 https://www.amazon.com/shop/bathroomremodelingteacher_

For help with your bathroom remodel 🎓Enroll in my courses today 🎓 -

🛁 —> 🚿 CONVERTING TUB TO WALK-IN SHOWER COURSE- https://www.bathroomremodelingteacher.com/tub-to-shower-course-detail

🛁TUB & SHOWER REMODEL IN 7 DAYS OR LESS COURSE- https://www.bathroomremodelingteacher.com/tubshowercourse

🚿 CUSTOM TILED WALK-IN SHOWER COURSE - https://www.bathroomremodelingteacher.com/custom-tiled-walkin-shower

✨ CUSTOM GLASS ENCLOSURE COURSE - https://www.bathroomremodelingteacher.com/customglasscourse

😄DIY BATHROOM GEEK COLLECTION {all 4 courses!}👊 -https://www.bathroomremodelingteacher.com/geek-collection-detail

#diy #tile #bathroomremodel #homeimprovement
#realestate #renovation #construction #homerenovation #bathroomdesign #work #bathroomremodelingteacher #stevewhite #tipsandtricks #tutorial #howto #interiordesign #electrical #tiledesign

All the tools and products I use and recommend can be found on my Amazon Storefront (detailed in the description box of the video). You can find my Storefront, and all of my other social medias, by going to https://linktr.ee/bathroomremodelingteacher. Any and all purchases from my Amazon Storefront are greatly appreciated and help keep my channel going!

I hope this helps you with your own installation. Subscribe to my channel to make sure you don’t miss a new upload!

See you next class,

Steve

Comment

Comment

THE BEST CURBLESS SHOWER SYSTEM

Hey students!

Curbless showers are an extreme luxury… and I want to make them more accessible to people.

Since I began specializing in bathroom remodeling 15 years ago, I've been asked to quote shower remodels in two different ways— with a curb and without. Curbless showers were a bit trickier to build back then, but now, with all the innovation in bathroom remodeling, they are much easier to construct.

I have 4 TOP NOTCH shower systems (listed below in no real order) that I can share with you to make your curbless shower building experience easier. In the video, I demo each shower system, give you tips on how to install them, and share my thoughts on each one.

Here is a very brief overview of my favorite systems I like to use:

 
curbless shower system DIY home improvement bathroom remodeling waterproofing
 

The Schluter Curbless Shower System: So simple to use, and the least expensive. Requires a bit more brain power than WEDI. The system is easier to get compared to WEDI since it is sold in more locations.

 
curbless shower system DIY home improvement bathroom remodeling waterproofing
 

WEDI Curbless Shower System: Another easy way to go, and lots of unique drain options are offered. This system is about 25% more expensive than Schluter.

 
curbless shower system DIY home improvement bathroom remodeling waterproofing
 

VIM Shower System: I’ve gotten away from this system because of the expense, but the drains are beautiful.

 
curbless shower system DIY home improvement bathroom remodeling waterproofing
 

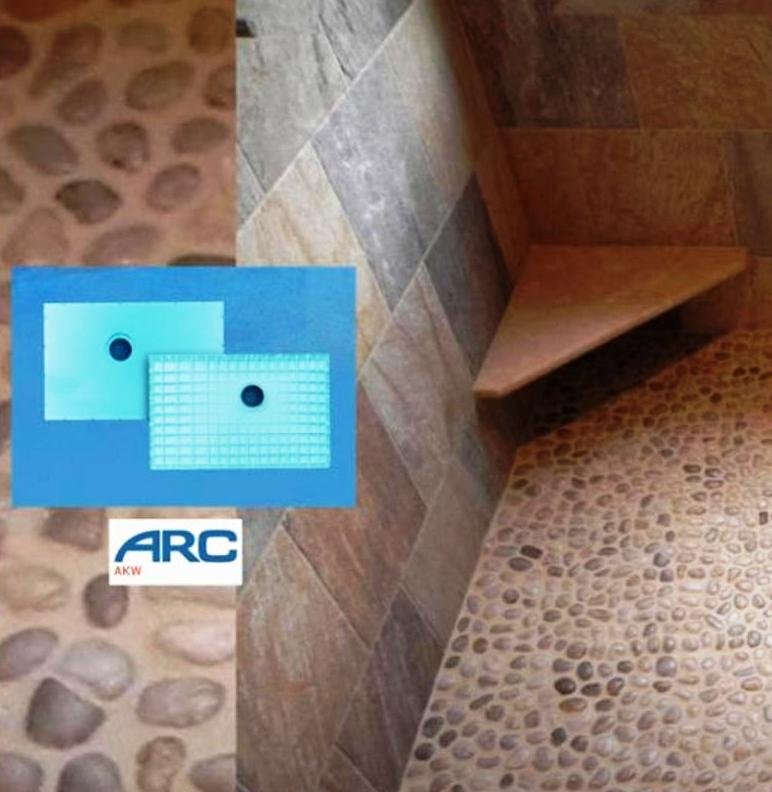
Arc Shower System: Pricey, but the drain designs are phenomenal.

At the time I’m writing this blog, the Schluter Curbless Shower System is my main go-to. But, if I had to use any of the 4 to install a curbless shower, I wouldn’t be mad about it.

Be sure to check out my FREE Curbless Shower System Guide, which goes over, in detail, all of the curbless shower systems and tools/supplies needed to install them. http://bit.ly/3FDADPC

HEADS UP: I’m currently working on a bathroom remodeling course on CURBLESS SHOWERS right now, so stay tuned!

🔨The materials & tools used in this video (Amazon affiliate links):

Schluter 38" x 60" shower pan - https://amzn.to/3kmdYiu
Schluter 48" x 48" shower pan - https://amzn.to/3HlglLN
Wedi 36" x 48" shower pan - https://www.masterwholesale.com/wedi-fundo-ligno-curbless-shower-pan.html
VIM shower system - https://vimproducts.com/
ARC Shower system - https://amzn.to/3XrsB2S

💥Visit my Amazon Store for all products and tools that I recommend and use on a regular basis 👍 https://www.amazon.com/shop/bathroomremodelingteacher_

For help with your bathroom remodel 🎓Enroll in my courses today 🎓 -

🛁 —> 🚿 CONVERTING TUB TO WALK-IN SHOWER COURSE- https://www.bathroomremodelingteacher.com/tub-to-shower-course-detail

🛁TUB & SHOWER REMODEL IN 7 DAYS OR LESS COURSE- https://www.bathroomremodelingteacher.com/tubshowercourse

🚿 CUSTOM TILED WALK-IN SHOWER COURSE - https://www.bathroomremodelingteacher.com/custom-tiled-walkin-shower

✨ CUSTOM GLASS ENCLOSURE COURSE - https://www.bathroomremodelingteacher.com/customglasscourse

😄DIY BATHROOM GEEK COLLECTION {all 4 courses!}👊 -https://www.bathroomremodelingteacher.com/geek-collection-detail

#diy #shower #tile #bathroomremodel #homeimprovement
#realestate #renovation #construction #homerenovation #bathroomdesign #work #bathroomremodelingteacher #stevewhite #tipsandtricks #tutorial #howto #interiordesign #electrical #tiledesign

All the tools and products I use and recommend can be found on my Amazon Storefront (detailed in the description box of the video). You can find my Storefront, and all of my other social medias, by going to https://linktr.ee/bathroomremodelingteacher. Any and all purchases from my Amazon Storefront are greatly appreciated and help keep my channel going!

I hope this helps you with your own installation. Subscribe to my channel to make sure you don’t miss a new upload!

See you next class,

Steve

Comment

Comment

HOW TO INSTALL A SHOWER PAN BASE

Hey students!

“I want a walk-in shower, but I don’t want to deal with all the tile work, especially on the floor, that comes with it.”

“I don’t want to deal with cleaning all the grout lines in a walk-in shower.”

“It’s too overwhelming…”

These are just a few things I hear home owners and DIYers say when they are thinking about remodeling their bathroom and converting their tub to a walk-in shower.

There is an simpler way to do it. Introducing the pre-made DREAMLINE shower pan. I love this thing. It’s easier to clean, no grouting required, no tile layout on the floor necessary, and it comes in different colors to match your tile and decor. It’s great for beginning DIYers.

There are only 5 steps when installing a shower base pan. What’s even better is that I have a course on converting a tub to a walk-in shower, and it involves using this very pan!

 
shower pan base installation DIY home improvement bathroom remodel
 

Step #1: Check levelness. Take note of where the pan may need some help in levelness, so when you go to set it in the mortar, you can use the mortar to make the pan level. REMEMBER: You want to make sure this pan slopes toward that drain.

 
shower pan base installation DIY home improvement bathroom remodel
 

Step #2: Mix the mortar for the shower pan. The mortar gives the shower pan much needed support. You don’t want the pan to bow and flex while standing on it. NOTE: Be sure to pick a mortar that does not have any aggregate in it.


Step #3: Throw down that mortar. Be sure to wet and wipe down the substrate before putting down the mortar. Spread that mortar around like a the thick, chunky peanut butter it is, adding some build up to the areas that need some help with levelness.

 
shower pan base installation DIY home improvement bathroom remodel
 

Step #4: Set the drain BEFORE setting the pan in the mortar.

 
shower pan base installation DIY home improvement bathroom remodel
 

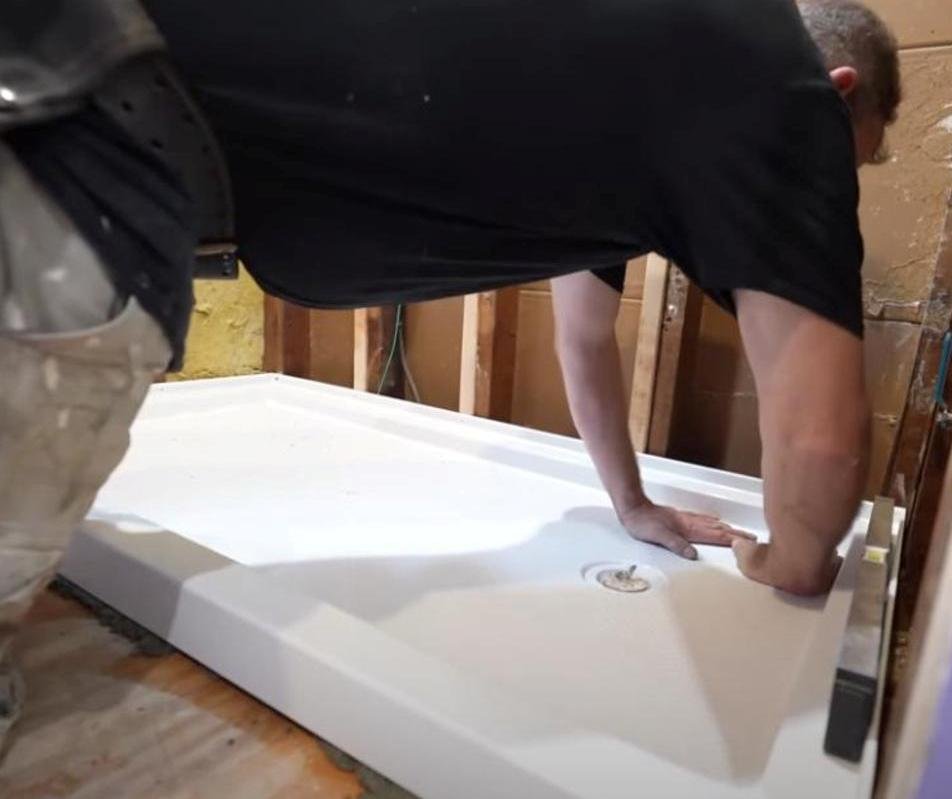
Step #5: Set the pan in the mortar and check for levelness. You may need to do some maneuvering and walking on the pan to make it level. Add plastic shims if needed. Once you have it where you need it, screw the shower pan’s flange in the wood framing to keep it there.

Your base is all set to go! You are ready to add the water-proofing (I love Go-Board for waterproofing) and attaching/finishing the shower drain. Watch the entire video for all those details.

🔨The materials & tools used in this video (affiliate links):

Dreamline SlimLine 32x60 in. shower pan base - https://amzn.to/3Xotvgw
MAPEI 4-to-1 Mud Bed Mix - https://amzn.to/3D3c0tV
Composite shims - https://amzn.to/3GSbccv
Shower pan bases and supplies - https://amzn.to/3wgSdDs

💥Visit my Amazon Store for all products and tools that I recommend and use on a regular basis 👍 https://www.amazon.com/shop/bathroomremodelingteacher_

For help with your bathroom remodel 🎓Enroll in my courses today 🎓 -

🛁 —> 🚿 CONVERTING TUB TO WALK-IN SHOWER COURSE- https://www.bathroomremodelingteacher.com/tub-to-shower-course-detail

🛁TUB & SHOWER REMODEL IN 7 DAYS OR LESS COURSE- https://www.bathroomremodelingteacher.com/tubshowercourse

🚿 CUSTOM TILED WALK-IN SHOWER COURSE - https://www.bathroomremodelingteacher.com/custom-tiled-walkin-shower

✨ CUSTOM GLASS ENCLOSURE COURSE - https://www.bathroomremodelingteacher.com/customglasscourse

😄DIY BATHROOM GEEK COLLECTION {all 4 courses!}👊 -https://www.bathroomremodelingteacher.com/geek-collection-detail

#bathroomremodel #shower #diy #homeimprovement #howto
#realestate #renovation #construction #homerenovation #bathroomdesign #work #bathroomremodelingteacher #stevewhite #tipsandtricks #tutorial #howto #interiordesign #electrical #tiledesign

All the tools and products I use and recommend can be found on my Amazon Storefront (detailed in the description box of the video). You can find my Storefront, and all of my other social medias, by going to https://linktr.ee/bathroomremodelingteacher. Any and all purchases from my Amazon Storefront are greatly appreciated and help keep my channel going!

I hope this helps you with your own installation. Subscribe to my channel to make sure you don’t miss a new upload!

See you next class,

Steve

Comment

Comment

COPPER TO PEX PRO TIPS

Hey students!

I ran into an unexpected problem on this particular job I did last year. I was converting a bath tub into a walk-in shower for older clients. When I removed their tub, I saw this goofy set-up.


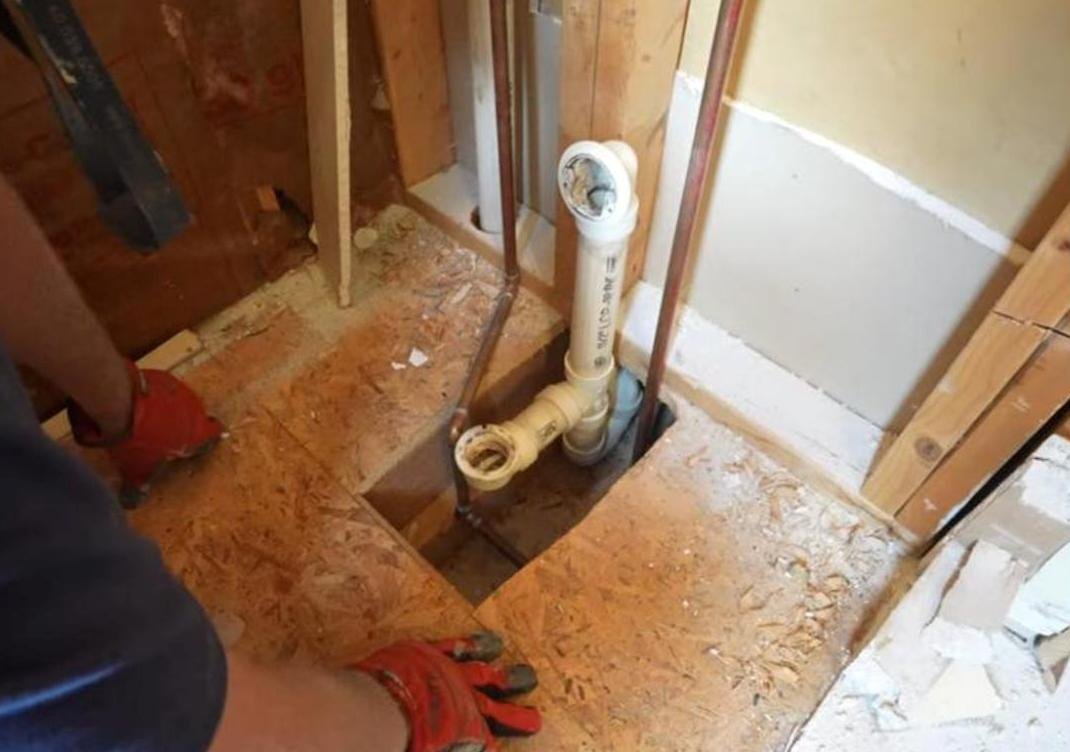
The copper pipe was on top of the subfloor, which was not good. I needed to reconfigure the plumbing, and that is where PEX saved the day.


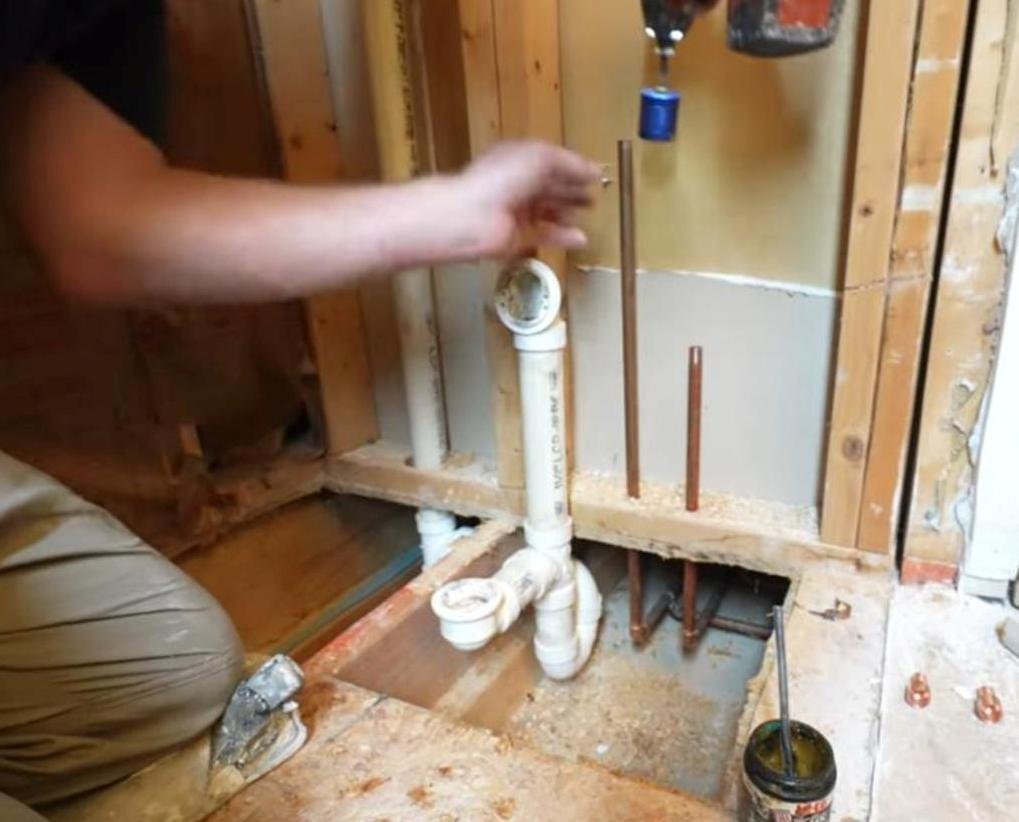
I removed part of the subfloor and wall so I could re-plumb the hot and cold with copper piping. In the video, I demonstrate all the tools I used to make this possible (the links of those tools are listed down below).


Once I had my newly configured copper pipes set up and soldered, I moved on to the Pex. I really do love PEX. It has made bathroom remodeling and plumbing so much easier. A lot of plumbers may disagree with me, but I personally stand by PEX and I have used it numerous times and in my own home with zero issues. Nothing but love for PEX here.

Be sure to watch the full length video here to see how I do it all.

I’ve also created a convenient Copper to PEX Checklist, which includes ALL the products and tools I used, plus extra links for help.

🔨The materials & tools used in this video (affiliate links):

Autocut tool - https://amzn.to/3XlUauq
Wicked pipe sanding tool - https://amzn.to/3iJ9D8S
Copper PEX adapters - https://www.supplyhouse.com/Sioux-Chief-644X2-PowerPEX-1-2-PEX-x-1-2-Female-Sweat-Copper-Pipe-Straight-Adapter-Lead-Free
Map gas torch - https://amzn.to/3Wffssl
Flame guard - https://amzn.to/3QLhvmM
Lead-free solder - https://amzn.to/3QW6ChZ
Flux brushes - https://amzn.to/3GPKrWe
Flux - https://amzn.to/3J1eDjJ
Pro crimp rings - https://amzn.to/3kfEz0E
PEX tubing cutter - https://amzn.to/3iHfjQJ
1/2" rigid PEX crimper - https://amzn.to/3iUm6q2

💥Visit my Amazon Store for all products and tools that I recommend and use on a regular basis 👍 https://www.amazon.com/shop/bathroomremodelingteacher_

For help with your bathroom remodel 🎓Enroll in my courses today 🎓 -

🛁 —> 🚿 CONVERTING TUB TO WALK-IN SHOWER COURSE- https://www.bathroomremodelingteacher.com/tub-to-shower-course-detail

🛁TUB & SHOWER REMODEL IN 7 DAYS OR LESS COURSE- https://www.bathroomremodelingteacher.com/tubshowercourse

🚿 CUSTOM TILED WALK-IN SHOWER COURSE - https://www.bathroomremodelingteacher.com/custom-tiled-walkin-shower

✨ CUSTOM GLASS ENCLOSURE COURSE - https://www.bathroomremodelingteacher.com/customglasscourse

😄DIY BATHROOM GEEK COLLECTION {all 4 courses!}👊 -https://www.bathroomremodelingteacher.com/geek-collection-detail

#diy #plumbing #homeimprovement #bathromremodel
#realestate #renovation #construction #homerenovation #bathroomdesign #work #bathroomremodelingteacher #stevewhite #tipsandtricks #tutorial #howto #interiordesign #electrical #tiledesign

All the tools and products I use and recommend can be found on my Amazon Storefront (detailed in the description box of the video). You can find my Storefront, and all of my other social medias, by going to https://linktr.ee/bathroomremodelingteacher. Any and all purchases from my Amazon Storefront are greatly appreciated and help keep my channel going!

I hope this helps you with your own installation. Subscribe to my channel to make sure you don’t miss a new upload!

See you next class,

Steve

Comment

Comment

15 TIPS TO INSTALL A NEW HOT WATER TANK

Hey students!

In real estate, appearances are everything. I had to replace a 20 year old (but still working really well!) hot water tank in my flip house this past summer because it was old and it didn’t look pretty. You never want something as simple as a funky looking hot water tank to deter any potential buyers.

A hot water tank replacement is a common enough thing most of us have to deal with at one point or another. So, I’ve come up with 15 REALISTIC tips on how to replace your hot water tank at home. I recommend you follow along with the video while you do this because the tips are listed in a step-by-step order.

Here’s the quick (and I mean QUICK) run-down for those of you who are curious…

 
hot water tank replacement install DIY home improvement remodel
 

Begin by shutting off the gas valve to the hot water tank. Then, turn off the water. Once you do that stuff on the inside, you then need to do the “controversial gas shut off” at the meter outside.

 
hot water tank replacement install DIY home improvement remodel
 

Scurry back inside and drain and remove the old tank. You will want to use Sharkbite connections to the existing water supplies.

 
hot water tank replacement install DIY home improvement remodel
 

Set your shiny, new hot water tank and attach the gas line. You will probably need to shim up your new tank to make it fit better and to make connecting the vent easier. Once shimmed, attach the vent to your new tank, and seal the holes around the vent pipe.

 
hot water tank replacement install DIY home improvement remodel
 

Now, we have come to a crucial step: the expansion tank installation. Why do you need an expansion tank? Simple. When the water is heated up in your hot water tank, excess pressure is created inside, and it needs somewhere to go. That’s where this tank comes in to save the day. NOTE: Put this tank on the cold water supply side.

 
hot water tank replacement install DIY home improvement remodel
 

Next up, you will need to refer to the UPC (Uniform Plumbing Code) for the hot water line connections. This will ensure you are within the suggested range of distance of the new plumbing lines and the hot water tank. Best to be safe!

After you have that squared away, connect your hot water line and turn the gas back on. Next, check your gas line for leaks and bleeding. You can use the old soap and water trick for this— very easy! After that is all done, you can finally light your new tank and enjoy your hot water.

Check out the full length video on this with all the details included to help you out.

🔨The materials & tools used in this video (affiliate links):

Pro crimp rings - https://amzn.to/3ZGhBzY
No Go - Go Gauge - https://amzn.to/3Jcc8eL
Pex tubing cutter - https://amzn.to/3ZzvxvE
1/2" rigid pex crimper - https://amzn.to/3H8Ee90
Sharkbite couplings - https://amzn.to/3kpiDk1
Sharkbite removal tool - https://amzn.to/3XwvbUK
Sharkbite Debur/depth gauge - https://amzn.to/3w6StVA
Blue monster teflon tape - https://amzn.to/3CTbyOO
Blue monster pipe sealant - https://amzn.to/3XlafAs
Pipe dope for gas lines - https://amzn.to/3iFDMG7
Quickcrete fast setting mortar - https://amzn.to/3R0tcpX
Foil tape for vent - https://amzn.to/3IUrKmD

💥Visit my Amazon Store for all products and tools that I recommend and use on a regular basis 👍 https://www.amazon.com/shop/bathroomremodelingteacher_

For help with your bathroom remodel 🎓Enroll in my courses today 🎓 -

🛁 —> 🚿 CONVERTING TUB TO WALK-IN SHOWER COURSE- https://www.bathroomremodelingteacher.com/tub-to-shower-course-detail

🛁TUB & SHOWER REMODEL IN 7 DAYS OR LESS COURSE- https://www.bathroomremodelingteacher.com/tubshowercourse

🚿 CUSTOM TILED WALK-IN SHOWER COURSE - https://www.bathroomremodelingteacher.com/custom-tiled-walkin-shower

✨ CUSTOM GLASS ENCLOSURE COURSE - https://www.bathroomremodelingteacher.com/customglasscourse

😄DIY BATHROOM GEEK COLLECTION {all 4 courses!}👊 -https://www.bathroomremodelingteacher.com/geek-collection-detail

#diy #plumbing #homeimprovement #bathromremodel
#realestate #renovation #construction #homerenovation #bathroomdesign #work #bathroomremodelingteacher #stevewhite #tipsandtricks #tutorial #howto #interiordesign #electrical #tiledesign

All the tools and products I use and recommend can be found on my Amazon Storefront (detailed in the description box of the video). You can find my Storefront, and all of my other social medias, by going to https://linktr.ee/bathroomremodelingteacher. Any and all purchases from my Amazon Storefront are greatly appreciated and help keep my channel going!

I hope this helps you with your own installation. Subscribe to my channel to make sure you don’t miss a new upload!

See you next class,

Steve

Comment

Comment

THE TRUTH ABOUT CLEANING DIRTY GROUT

Hey students!

It’s no mystery that grout (the small area between one tile to another, otherwise known as the grout joint) can get nasty from time to time. Sometimes, we have grout that needs a deep, deep clean in the hopes of removing staining. I’m here to tell you that there are different levels of staining— some that can be worked with and scrubbed out, and some that don’t budge. It really depends on how long the grout has been neglected in terms of cleaning.

As a contractor, I cannot stress enough that premix grouts that state they are stain resistant are just that— resistant, but not stain proof. No matter what kind of grout you have in your bathroom or kitchen, all grout needs routine cleaning and can end up needing replaced if not done. I always recommend Epoxy Grout for showers. In my many years of experience, it has been the grout that seems to always look like I had just installed it, even years later.

That being said, I do have a guide of questions you can ask yourself when assessing the damage of your own tile grout, and how to correct it.

 
tile grout cleaning stain bathroom remodel DIY home improvement
 

Step 1: Take an honest, hard look at your tile grout. I’m gonna be real with you. The tile grout pictured above was in a rental property of mine, and I’m 99% sure those guys never cleaned the bathroom. I was looking at heavy, deep staining here. It was not going to be easy.

 
tile grout cleaning stain bathroom remodel DIY home improvement
 

Step 2: Try home cleaning remedies first. The most effective home cleaning remedies that I have personally used are baking soda and vinegar (this is #!), and a cleaner with bleach included. The best is the baking soda and vinegar— No nasty chemical smell, and it lifts the dirt right out of the grout. If you are in a hurry/lazy and don’t want to mix up the vinegar/baking soda concoction, then my next best is a cleaner with bleach included. Take a grout scrub brush and get to work.

 
tile grout cleaning stain bathroom remodel DIY home improvement
 

Step 3: Try industrial cleaners if the home cleaners don’t cut it. My go-to is the Custom Grout Deep Clean. Spray it on, scrub, and let it sit for 5-10 minutes. Wipe it off and pray that it worked. Another popular choice the ZEP Grout Cleaner and Brightener. Both can be found at Home Depot or Amazon.

 
tile grout cleaning stain bathroom remodel DIY home improvement
 

Step 4: Scrape out the grout and re-grout your tile, or paint the grout. This part is no fun. If the grout staining isn’t budging, it is more than likely permanent. You will either have to scrape out staining on the grout, or scrape out ALL the grout and re-grout the tile. Another option is painting the grout (there are lots of products out there, though I have not tried them).

For the tile grout in my rental property, it was totally ruined. I ended up tearing the entire bathroom out and redoing it. I have to say that the main lesson here is to regularly clean your grout to keep it from getting nasty.

These grout issues are the main reason why I use an epoxy grout most of the time when remodeling bathrooms. I find they are easier to clean, look nicer longer, and can resist staining the most. Watch my full video on Epoxy Grout Installation so you can feel confident in doing it yourself - https://youtu.be/HfqFPr9X2sU

🔨The materials & tools used in this video (affiliate links):

Laticrete Spectralock Pro - https://amzn.to/3GHHsz1
Laticrete Spectra Lock Pro (Needs Part C) - https://amzn.to/3w2mNAK
Quartzlock Grout - https://amzn.to/3H2bcYN
Custom Deep Clean Grout Cleaner - https://amzn.to/3ixGzB8
Grout scrub brush - https://amzn.to/3X6MagA
ZEP Grout Cleaner and Brightener - https://amzn.to/3W46nlP

💥Visit my Amazon Store for all products and tools that I recommend and use on a regular basis 👍 https://www.amazon.com/shop/bathroomremodelingteacher_

For help with your bathroom remodel 🎓Enroll in my courses today 🎓 -

🛁 —> 🚿 CONVERTING TUB TO WALK-IN SHOWER COURSE- https://www.bathroomremodelingteacher.com/tub-to-shower-course-detail

🛁TUB & SHOWER REMODEL IN 7 DAYS OR LESS COURSE- https://www.bathroomremodelingteacher.com/tubshowercourse

🚿 CUSTOM TILED WALK-IN SHOWER COURSE - https://www.bathroomremodelingteacher.com/custom-tiled-walkin-shower

✨ CUSTOM GLASS ENCLOSURE COURSE - https://www.bathroomremodelingteacher.com/customglasscourse

😄DIY BATHROOM GEEK COLLECTION {all 4 courses!}👊 -https://www.bathroomremodelingteacher.com/geek-collection-detail

#diy #tile #homeimprovement #bathromremodel #grout
#realestate #renovation #construction #homerenovation #bathroomdesign #work #bathroomremodelingteacher #stevewhite #tipsandtricks #tutorial #howto #interiordesign #electrical #tiledesign

All the tools and products I use and recommend can be found on my Amazon Storefront (detailed in the description box of the video). You can find my Storefront, and all of my other social medias, by going to https://linktr.ee/bathroomremodelingteacher. Any and all purchases from my Amazon Storefront are greatly appreciated and help keep my channel going!

I hope this helps you with your own installation. Subscribe to my channel to make sure you don’t miss a new upload!

See you next class,

Steve

Comment

Comment

BATHROOM CEILING DRYWALL TIPS

Hey students!

I like to work alone. Well, mostly alone— my wife is sometimes with me on the job site. But, most of the time, it’s just me. I get a lot of questions as to why I’m like this. First, it’s hard to find good help. Second, I don’t like to wait on others when I’m trying to get a task done. And third, I’ve been burned so many times with hired “help” that I’ve developed some serious trust issues. 😄

Since I work alone a lot, I’ve learned how to get things done (that normally take at least two people) by myself— like drywalling a bathroom ceiling. These tips will help you when drywalling your bathroom ceiling, regardless if you are working alone or not.

Here are some of those tips highlighted (and all of the products I use are listed towards the end)…

 
drywall bathroom ceiling tips home improvement DIY remodeling
 

Tip #1: Make sure your ceiling is level. This may sound obvious, but when you are in the thick of it with all the mess and construction, it can be an easy oversight. Having a leveled ceiling will make installing your drywall 100% easier. Which brings me to my 2nd tip… .

 
drywall bathroom ceiling tips home improvement DIY remodeling
 

Tip #2: Add furring strips to make your ceiling level. In the video, I show you how certain areas of the ceiling are level, while others are not. This is where I add pieces of wood (most at different widths and depths) to make my ceiling nice and level for drywalling.

 
drywall bathroom ceiling tips home improvement DIY remodeling
 

Tip #3: Glue your drywall to your furring strips. A strong adhesive is your extra set of hands to help you get that drywall up by yourself. It gives you some time to get those drywall screws in.

 
drywall bathroom ceiling tips home improvement DIY remodeling
 

Tip #4: Use the BoardMate drywall fitting tool to lend an extra hand. I love this little board! It creates a ledge for the drywall to sit on while you are putting it up and screwing it in. Huge help!

Be sure to watch the full video for all of my drywalling solo tips!

🔨The materials & tools used in this video (affiliate links):

Hilti drywall gun - https://amzn.to/3Xas6tY
Hilti magazine attachment - https://amzn.to/3ixd5TJ
Dewalt dimple bits - https://amzn.to/3iC8CPN
Roller drywall lift - https://amzn.to/3CIhsCv
Boardmate - https://amzn.to/3iwqfk3
Rotozip - https://amzn.to/3W7pD1R
Klein hybrid linesman strippers - https://amzn.to/3QHUelB
Wago levers - https://amzn.to/3CFkpna
Halo recessed light - https://amzn.to/3W76PzK
Spray foam adhesive - https://amzn.to/3W8VlvL

💥Visit my Amazon Store for all products and tools that I recommend and use on a regular basis 👍 https://www.amazon.com/shop/bathroomremodelingteacher_

For help with your bathroom remodel 🎓Enroll in my courses today 🎓 -

🛁 —> 🚿 CONVERTING TUB TO WALK-IN SHOWER COURSE- https://www.bathroomremodelingteacher.com/tub-to-shower-course-detail

🛁TUB & SHOWER REMODEL IN 7 DAYS OR LESS COURSE- https://www.bathroomremodelingteacher.com/tubshowercourse

🚿 CUSTOM TILED WALK-IN SHOWER COURSE - https://www.bathroomremodelingteacher.com/custom-tiled-walkin-shower

✨ CUSTOM GLASS ENCLOSURE COURSE - https://www.bathroomremodelingteacher.com/customglasscourse

😄DIY BATHROOM GEEK COLLECTION {all 4 courses!}👊 -https://www.bathroomremodelingteacher.com/geek-collection-detail

#diy #drywall #electrical #framing #bathroomremodel #homeimprovement #realestate #renovation #construction #homerenovation #bathroomdesign #tile #work #bathroomremodelingteacher #stevewhite #tipsandtricks #tutorial #howto #interiordesign #electrical #tiledesign

All the tools and products I use and recommend can be found on my Amazon Storefront (detailed in the description box of the video). You can find my Storefront, and all of my other social medias, by going to https://linktr.ee/bathroomremodelingteacher. Any and all purchases from my Amazon Storefront are greatly appreciated and help keep my channel going!

I hope this helps you with your own installation. Subscribe to my channel to make sure you don’t miss a new upload!

See you next class,

Steve

Comment

Comment

BATHROOM ELECTRICAL TIPS

Hey students!

When it comes to completely overhauling your bathroom for a remodel, you will inevitably need to run some new electric (and possibly deal with the old). There really is no way around it.

Since I’ve been through this many times over, I’ve come up with 14 helpful tips for you to consider when it comes to installing electric in your bathroom.

Here are some of those tips highlighted…

 
electrical tips for bathroom DIY home improvement remodeling
 

Tip #1: Consider the height and location of your switches and outlets in your bathroom. This is where you can tailor your electrical access to your own personal needs. Be mindful of where you place your outlet(s) around the vanity area. Where does your hand naturally go to turn on a light upon entering the bathroom? Does the door interfere? These are great questions to ask yourself when you are wiring and placing electrical boxes.

 
electrical tips for bathroom DIY home improvement remodeling
 

Tip #2: Roll out your wire to prevent it from twisting. Once you get your wire out of the box, roll out a decent amount of length so that when you run it, it won’t twist and turn on you.

 
electrical tips for bathroom DIY home improvement remodeling
 

Tip #3: Be very thoughtful where you drill your holes to run wires. For example, try to keep these holes in the middle of a joist (if that is an area that is in the way), and make sure to keep those wires from interfering with drywall installation, fixture installation, etc.

 
electrical tips for bathroom DIY home improvement remodeling
 

Tip #4: When adding lighting above your shower, consider its location and the obstacles you will have to overcome to properly install the lighting (such as joist interference, insulation obstruction, etc.).

Be sure to watch the full length video to benefit from all 14 tips I suggest when running the electrical in your bathroom.

🔨The materials & tools used in this video (affiliate links):

Klein hybrid linesman strippers - https://amzn.to/3w05Qqo
Adjustable electrical box - https://amzn.to/3iyUTJC
3 gang box 44 cu in. - https://amzn.to/3vVRwzf
3 gauge box 53 cu in - https://amzn.to/3X8G2V9
15 amp wire - https://amzn.to/3XjhYPH
20 amp wire - https://amzn.to/3CHO5QB
WAGO levers - https://amzn.to/3W3Vb8Z
HALO recessed light - https://amzn.to/3iw2HM5

💥Visit my Amazon Store for all products and tools that I recommend and use on a regular basis 👍 https://www.amazon.com/shop/bathroomremodelingteacher_

For help with your bathroom remodel 🎓Enroll in my courses today 🎓 -

🛁 —> 🚿 CONVERTING TUB TO WALK-IN SHOWER COURSE- https://www.bathroomremodelingteacher.com/tub-to-shower-course-detail

🛁TUB & SHOWER REMODEL IN 7 DAYS OR LESS COURSE- https://www.bathroomremodelingteacher.com/tubshowercourse

🚿 CUSTOM TILED WALK-IN SHOWER COURSE - https://www.bathroomremodelingteacher.com/custom-tiled-walkin-shower

✨ CUSTOM GLASS ENCLOSURE COURSE - https://www.bathroomremodelingteacher.com/customglasscourse

😄DIY BATHROOM GEEK COLLECTION {all 4 courses!}👊 -https://www.bathroomremodelingteacher.com/geek-collection-detail

#diy #electrical #bathroomremodel #homeimprovement #realestate #renovation #construction #homerenovation #bathroomdesign #tile #work #bathroomremodelingteacher #stevewhite #tipsandtricks #tutorial #howto #interiordesign #electrical #tiledesign

All the tools and products I use and recommend can be found on my Amazon Storefront (detailed in the description box of the video). You can find my Storefront, and all of my other social medias, by going to https://linktr.ee/bathroomremodelingteacher. Any and all purchases from my Amazon Storefront are greatly appreciated and help keep my channel going!

I hope this helps you with your own installation. Subscribe to my channel to make sure you don’t miss a new upload!

See you next class,

Steve

Comment

Comment

HOW TO REPAIR A PLASTER CEILING

Hey students!

If you have an older home, you probably have plaster walls and ceilings. We all know how old plaster likes to crumble and fall…and repairing plaster can be such a nightmare. Plus, it’s almost impossible to find a professional to come over and repair an area without paying an arm and a leg, let alone finding someone able to do it at all!

I live near Pittsburgh, PA, and if you are unfamiliar with the area, a lot of the homes around here are OLD. The home I flipped this past summer was located right outside the city and it was built in the early 1900s. It also came with plaster ceilings in need of some repair. I took the opportunity to fix this problem in my flip house and document it to share with you.

In this video, I demonstrate a ceiling repair after running new wires to a light fixture. Be sure to watch the full video for all the details and tips!

Here are the nasty repairs I need to make…

 
plaster repair DIY home improvement
 

I use a strong adhesive and apply it around the inside edges to stop any further deterioration of the plaster. I then use my extension pulls to apply constant pressure to those side to ensure the adherence of the glue to the plaster.

 
plaster repair DIY home improvement
 

Then I use Plaster Weld to prime the surface to prepare it for the plaster. It really does help with the bond of the new plaster to the old, broken down areas.

 
plaster repair DIY home improvement
 

Add the base coat…

 
plaster repair DIY home improvement
 

and then the finish coat.

 
plaster repair DIY home improvement
 

Finally, I texturize the repaired areas to match the entire ceiling. I know this is not the popular choice. Popcorn ceilings get a bad rep. However, texturizing makes plastering much more forgivable. If you aren’t an expert in the plastering arena, this will give you a pass.

🔨The materials & tools used in this video (affiliate links):

Great stuff adhesive - https://amzn.to/3GTkeXO
Great stuff gun - https://amzn.to/3vVkgZ7
Plaster weld - https://amzn.to/3IBSDM2
Base coat - https://www.homedepot.com/p/Gold-Bond-Kal-Kote-Base-50-lb-Basecoat-Plaster-Bag-50002647/204297325
Veneer finish coat - https://www.homedepot.com/p/Gold-Bond-Kal-Kote-Smooth-Finish-Plaster-50002660/100320230
Plaster hawk - https://amzn.to/3Xlw0Qk
Trowels- https://amzn.to/3GtY39d
Homax pop corn ceiling - https://amzn.to/3X13OT2
Hopper gun - https://amzn.to/3ICZa9n

💥Visit my Amazon Store for all products and tools that I recommend and use on a regular basis 👍 https://www.amazon.com/shop/bathroomremodelingteacher_

For help with your bathroom remodel 🎓Enroll in my courses today 🎓 -

🛁 —> 🚿 CONVERTING TUB TO WALK-IN SHOWER COURSE- https://www.bathroomremodelingteacher.com/tub-to-shower-course-detail

🛁TUB & SHOWER REMODEL IN 7 DAYS OR LESS COURSE- https://www.bathroomremodelingteacher.com/tubshowercourse

🚿 CUSTOM TILED WALK-IN SHOWER COURSE - https://www.bathroomremodelingteacher.com/custom-tiled-walkin-shower

✨ CUSTOM GLASS ENCLOSURE COURSE - https://www.bathroomremodelingteacher.com/customglasscourse

😄DIY BATHROOM GEEK COLLECTION {all 4 courses!}👊 -https://www.bathroomremodelingteacher.com/geek-collection-detail

#diy #plaster #bathroomremodel #homeimprovement #realestate #renovation #construction #homerenovation #bathroomdesign #tile #work #bathroomremodelingteacher #stevewhite #tipsandtricks #tutorial #howto #interiordesign #electrical #tiledesign

All the tools and products I use and recommend can be found on my Amazon Storefront (detailed in the description box of the video). You can find my Storefront, and all of my other social medias, by going to https://linktr.ee/bathroomremodelingteacher. Any and all purchases from my Amazon Storefront are greatly appreciated and help keep my channel going!

I hope this helps you with your own installation. Subscribe to my channel to make sure you don’t miss a new upload!

See you next class,

Steve

Comment

Comment

HOW TO INSTALL A USB OUTLET IN YOUR BATHROOM

Hey students!

Have you noticed how more and more of our electronic devices are actually powered by a USB cord instead of the good old fashioned plug-in? These little USB devices are even infiltrating our bathrooms. Things like electric toothbrushes and beard and nose hair trimmers require a USB connection to get them going! Pretty soon it’ll be the hair dryer and curling irons!

Installing a USB outlet in your bathroom doesn’t seem to be that pressing of an issue, but I can guarantee that it will have a big impact. Let’s make your life a little bit easier.

In this video, I show a solution to a common problem— getting USB charger for your bathroom.

 
USB Outlet DIY Electrical Bathroom
 

I used the LEVITON OUTLET.

 
USB Outlet DIY Electrical Bathroom
 

I also used the KLEIN CIRCUIT BREAKER FINDER to turn off the power supply so I wouldn’t electrocute myself switching this outlet out.

 
USB Outlet DIY Electrical Bathroom
 

And because I’m all about safety (LOL), I use the GE 20A Single Pole Circuit Breaker to keep this outlet water secure.

 
USB Outlet DIY Electrical Bathroom
 

Now you can rest easy knowing you can charge your phone while using the bathroom. 😄

Be sure to watch the full video for the step-by-step guidance on exactly how to switch your outlet.

🔨Some of the materials & tools used in this video (affiliate links):

Ground Fault Circuit Breaker - https://amzn.to/3XmzZMB
USB outlet - https://amzn.to/3inwEOg
GFI USB outlet - https://amzn.to/3VYxvTh
Klein circuit finder - https://amzn.to/3WXdxtx

💥Visit my Amazon Store for all products and tools that I recommend and use on a regular basis 👍 https://www.amazon.com/shop/bathroomremodelingteacher_

For help with your bathroom remodel 🎓Enroll in my courses today 🎓 -

🛁 —> 🚿 CONVERTING TUB TO WALK-IN SHOWER COURSE- https://www.bathroomremodelingteacher.com/tub-to-shower-course-detail

🛁TUB & SHOWER REMODEL IN 7 DAYS OR LESS COURSE- https://www.bathroomremodelingteacher.com/tubshowercourse

🚿 CUSTOM TILED WALK-IN SHOWER COURSE - https://www.bathroomremodelingteacher.com/custom-tiled-walkin-shower

✨ CUSTOM GLASS ENCLOSURE COURSE - https://www.bathroomremodelingteacher.com/customglasscourse

😄DIY BATHROOM GEEK COLLECTION {all 4 courses!}👊 -https://www.bathroomremodelingteacher.com/geek-collection-detail

#diy #electrical #bathroomremodel #homeimprovement #realestate #renovation #construction #homerenovation #bathroomdesign #tile #work #bathroomremodelingteacher #stevewhite #tipsandtricks #tutorial #howto #interiordesign #electrical #tiledesign

All the tools and products I use and recommend can be found on my Amazon Storefront (detailed in the description box of the video). You can find my Storefront, and all of my other social medias, by going to https://linktr.ee/bathroomremodelingteacher. Any and all purchases from my Amazon Storefront are greatly appreciated and help keep my channel going!

I hope this helps you with your own installation. Subscribe to my channel to make sure you don’t miss a new upload!

See you next class,

Steve
Comment

1 Comment

TIPS ON INSTALLING A BATHROOM VANITY

Hey students!

There are certain areas in the bathroom that are easier to fix up than others— like installing a new vanity. If you have a bathroom that just needs a vanity replacement, this is a great place to start and build confidence.

Vanity replacement is much more easy-going since there really isn’t a huge time crunch when doing it, and there aren’t too many technicalities involved either. There are, however, a few tips I can give you that make the job of installing a new vanity go much more smoothly.

In this video I highlight a few common issues when it comes to installing a bathroom vanity, and how to overcome them, such as…

 
DIY bathroom vanity installation tips
 

…planing the backside of the vanity to make it sit flush against the wall…

 
DIY bathroom vanity installation tips
 

…painting the pipes to get an accurate location for drilling the holes in the vanity…

 
DIY bathroom vanity installation tips
 

…cutting off excessive vanity top overhang…

 
DIY bathroom vanity installation tips
 

…and attaching the sink faucet before setting the countertop to the vanity.

Be sure to watch the full video, and let me know if the tips I give have helped you out.

🔨Some of the materials & tools used in this video (affiliate links):

Amazon shower valve - https://amzn.to/3Iv7LLs
Pro crimp rings - https://amzn.to/3vGO9MH
No Go - Go Gauge - https://amzn.to/3IvrNp4
Pex tubing cutter - https://amzn.to/3XthLsT
Pex valves - https://amzn.to/3XcqtLL
CGX Blade - https://amzn.to/3VQ8wSi
Planer - https://amzn.to/3ZsxhHc

💥Visit my Amazon Store for all products and tools that I recommend and use on a regular basis 👍 https://www.amazon.com/shop/bathroomremodelingteacher_

For help with your bathroom remodel 🎓Enroll in my courses today 🎓 -

🛁 —> 🚿 CONVERTING TUB TO WALK-IN SHOWER COURSE- https://www.bathroomremodelingteacher.com/tub-to-shower-course-detail

🛁TUB & SHOWER REMODEL IN 7 DAYS OR LESS COURSE- https://www.bathroomremodelingteacher.com/tubshowercourse

🚿 CUSTOM TILED WALK-IN SHOWER COURSE - https://www.bathroomremodelingteacher.com/custom-tiled-walkin-shower

✨ CUSTOM GLASS ENCLOSURE COURSE - https://www.bathroomremodelingteacher.com/customglasscourse

😄DIY BATHROOM GEEK COLLECTION {all 4 courses!}👊 -https://www.bathroomremodelingteacher.com/geek-collection-detail

#diy #plumbing #bathroomremodel #homeimprovement #realestate #renovation #construction #homerenovation #bathroomdesign #tile #work #bathroomremodelingteacher #stevewhite #tipsandtricks #tutorial #howto #interiordesign #electrical #tiledesign

All the tools and products I use and recommend can be found on my Amazon Storefront (detailed in the description box of the video). You can find my Storefront, and all of my other social medias, by going to https://linktr.ee/bathroomremodelingteacher. Any and all purchases from my Amazon Storefront are greatly appreciated and help keep my channel going!

I hope this helps you with your own installation. Subscribe to my channel to make sure you don’t miss a new upload!

See you next class,

Steve

1 Comment

2 Comments

HOW TO MAKE AN ARCHED SHOWER NICHE

Hey students!

I remember when I first decided to work exclusively on bathrooms. It was 2008, and my now wife and I had just purchased and renovated our first home together in the Northside of Pittsburgh. After we finished that massive project, I decided to make a career pivot and exclusively work on bathrooms, specifically aiming for the high-end bathrooms.

I was turning 30, and I was still learning a lot about tile work. It was my dream to be able to do something like an arched niche in a bathroom. And now here I am… showing you guys how to do it yourselves!!! Talk about a full circle moment.

I’m telling you this because I’m just a regular guy who had big goals, and I made them happen. I fully believe that you can do that too. What’s even better is that I can help you out and share my knowledge with you.

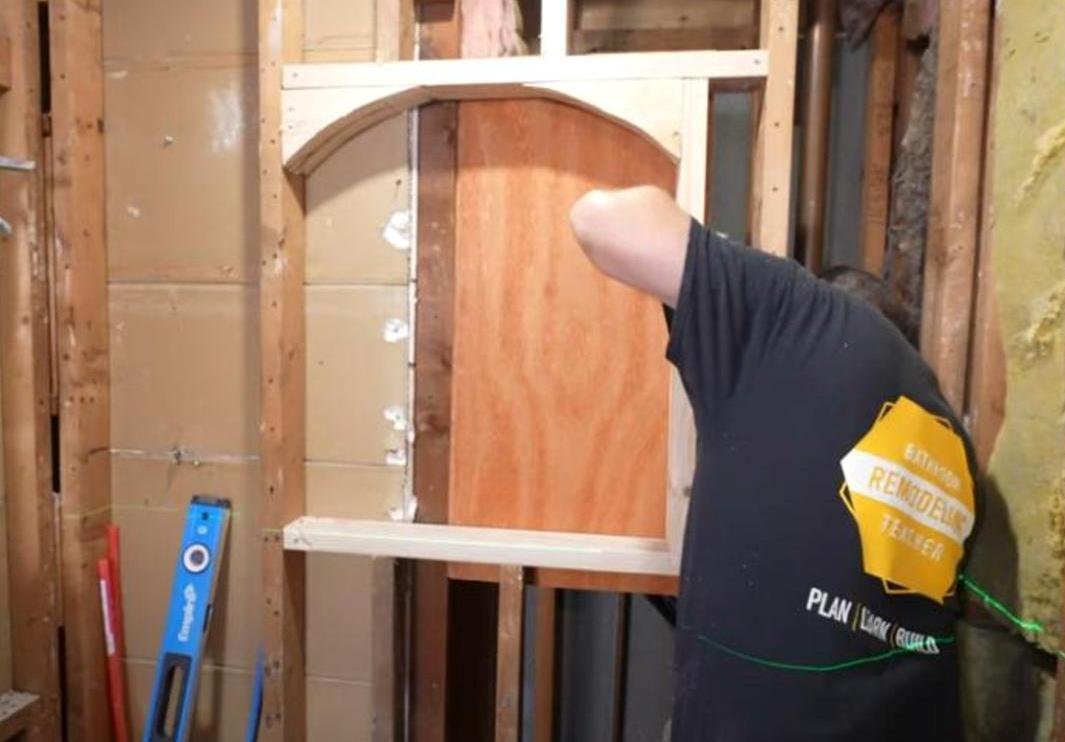
An arched niche is a beautiful design feature to add to a bathroom that basically has zero architectural interest. I did this for a client last year, and the end result was near perfect.

In this video, I begin with a completely blank slate. Like, a “bare-bones-to-the-studs” slate. The arch is a custom design I made, and I show you my process from the beginning…

 
tile DIY home improvement arched recessed niche bathroom shower
 

…to the design…

 
tile DIY home improvement arched recessed niche bathroom shower
 

…to the tile layout…

 
tile DIY home improvement arched recessed niche bathroom shower
 

…to the installation…

 
tile DIY home improvement arched recessed niche bathroom shower
 

…to the final result.

 
tile DIY home improvement arched recessed niche bathroom shower
 

Be sure to watch the full video, and let me know what you think of this bathroom design element and if you are thinking of doing it yourself.

🔨Some of the materials & tools used in this video (affiliate links):

Spin doctor leveling system - https://amzn.to/3GFkpWC
Montolit 24" tile cutter - https://amzn.to/3ieRgrY
Ardex X5 (cheaper at a supplier) - https://amzn.to/3jY2h1a
Dewalt laser - https://amzn.to/3X5Sg0u
Montolit cutting blade for grinder - https://amzn.to/3X9bUbW
Montolit STL blade - https://www.contractorsdirect.com/
Montlit squadron blade - https://amzn.to/3QeIVRK
Fein Multimaster cutter - https://amzn.to/3jVEpva
Ardex sponge - https://amzn.to/3QeSsIx
Horseshoe tile spacers - https://amzn.to/3Cs3HaS
Fein Grinder Dust Shroud - https://amzn.to/3vC7uyB
Fein Shop-vac - https://amzn.to/3GICdjK
Makita Grinder - https://amzn.to/3vZcdKZ
Montolit CGX blade - https://amzn.to/3GdxrJA
Linoleum knife (scraper) - https://amzn.to/3Xbx8Gb

💥Visit my Amazon Store for all products and tools that I recommend and use on a regular basis 👍 https://www.amazon.com/shop/bathroomremodelingteacher_

For help with your bathroom remodel 🎓Enroll in my courses today 🎓 -

🛁 —> 🚿 CONVERTING TUB TO WALK-IN SHOWER COURSE- https://www.bathroomremodelingteacher.com/tub-to-shower-course-detail

🛁TUB & SHOWER REMODEL IN 7 DAYS OR LESS COURSE- https://www.bathroomremodelingteacher.com/tubshowercourse

🚿 CUSTOM TILED WALK-IN SHOWER COURSE - https://www.bathroomremodelingteacher.com/custom-tiled-walkin-shower

✨ CUSTOM GLASS ENCLOSURE COURSE - https://www.bathroomremodelingteacher.com/customglasscourse

😄DIY BATHROOM GEEK COLLECTION {all 4 courses!}👊 -https://www.bathroomremodelingteacher.com/geek-collection-detail

#diy #tile #bathroomremodel #homeimprovement #realestate #renovation #construction #homerenovation #bathroomdesign #tile #work #bathroomremodelingteacher #stevewhite #tipsandtricks #tutorial #howto #interiordesign #electrical #tiledesign

All the tools and products I use and recommend can be found on my Amazon Storefront (detailed in the description box of the video). You can find my Storefront, and all of my other social medias, by going to https://linktr.ee/bathroomremodelingteacher. Any and all purchases from my Amazon Storefront are greatly appreciated and help keep my channel going!

I hope this helps you with your own installation. Subscribe to my channel to make sure you don’t miss a new upload!

See you next class,

Steve

2 Comments

1 Comment

MY HONEST OPINION ON AN AMAZON SHOWER FAUCET

Hey students!

Most of us already know the sheer expense of remodeling a bathroom. Well, what if I told you that you could save yourself some serious money on an expensive part of a shower… without sacrificing the quality and functionality of the product?! I didn’t think it was actually possible, but I was wrong.

I purchased the Gabrylly Shower System from Amazon to install in the flip house I was working on this past summer, and I was really impressed with it.

 
shower faucet installation DIY Amazon

The Gabrylly Shower System ($230 as of 1/4/2023)


This wasn’t my first time ordering an “Amazon Brand” faucet. I’ve installed a few of them before, and each time I was shocked at the make and function of the faucets. They are solid and heavy, and fairly easy to install. They are so similar to other high end brands, like Hansgrohe, but cost 5x LESS than the brand name! The ONLY thing I will say is I’m not sure of the Amazon brand longevity. Only time will tell, so that will be something I will have to follow up on.

 
shower faucet installation DIY Amazon
 

In this video, I show you the step-by-step process of installing this shower system, from the rough-in-stages…

 
shower faucet installation DIY Amazon
 

…to the finishing stages.

 
shower faucet installation DIY Amazon
 

The end result looks really sharp.

 
shower faucet installation DIY Amazon
 

Be sure to watch the full video, and let me know if you plan on ordering on of these faucets!

🔨Some of the materials & tools used in this video (affiliate links):

Amazon shower valve - https://amzn.to/3CpvMzE
Pro crimp rings - https://amzn.to/3GFRv95
No Go - Go Gauge - https://amzn.to/3Z7V7Yz
T2 pipe sealant - https://amzn.to/3X6lH2e
Pex tubing cutter - https://amzn.to/3Z7C1Si
1/2" ridgid pex crimper - https://amzn.to/3vDinAg
Pex drop ear - https://amzn.to/3X0z83S
Sharbite washer angle valve - https://amzn.to/3GE4HLm
Sharkbite removal tool - https://amzn.to/3ZdqyR6
Squadro tile blade - https://amzn.to/3VLy3vy

💥Visit my Amazon Store for all products and tools that I recommend and use on a regular basis 👍 https://www.amazon.com/shop/bathroomremodelingteacher_

For help with your bathroom remodel 🎓Enroll in my courses today 🎓 -

🛁 —> 🚿 CONVERTING TUB TO WALK-IN SHOWER COURSE- https://www.bathroomremodelingteacher.com/tub-to-shower-course-detail

🛁TUB & SHOWER REMODEL IN 7 DAYS OR LESS COURSE- https://www.bathroomremodelingteacher.com/tubshowercourse

🚿 CUSTOM TILED WALK-IN SHOWER COURSE - https://www.bathroomremodelingteacher.com/custom-tiled-walkin-shower

✨ CUSTOM GLASS ENCLOSURE COURSE - https://www.bathroomremodelingteacher.com/customglasscourse

😄DIY BATHROOM GEEK COLLECTION {all 4 courses!}👊 -https://www.bathroomremodelingteacher.com/geek-collection-detail

#diy #plumbing #bathroomremodel #homeimprovement #realestate #renovation #construction #homerenovation #bathroomdesign #tile #work #bathroomremodelingteacher #stevewhite #tipsandtricks #tutorial #howto #interiordesign #electrical #tiledesign

All the tools and products I use and recommend can be found on my Amazon Storefront (detailed in the description box of the video). You can find my Storefront, and all of my other social medias, by going to https://linktr.ee/bathroomremodelingteacher. Any and all purchases from my Amazon Storefront are greatly appreciated and help keep my channel going!

I hope this helps you with your own installation. Subscribe to my channel to make sure you don’t miss a new upload!

See you next class,

Steve

1 Comment

Comment

HOW TO SET AND INSTALL STONE

Hey students!

Setting tile opens the door to a lot of different opportunities— one of which is the ability to set stone. I think that if you can set tile, you can set stone. Don’t get me wrong— I think masons are incredibly talented, and they most certainly can set stone better than I can. But, if you want to save a few dollars and have yourself a beautiful stone wall, then I say you should go for it on your own.


Obviously, setting heavy stone is very labor intensive. But, the one nice thing about setting this kind of stone is your room for error. It doesn’t have to look perfect. You won’t be killing yourself trying to keep things straight and in-line. If anything, the more “messy” it looks, the more natural it looks. And that was what I was going for.


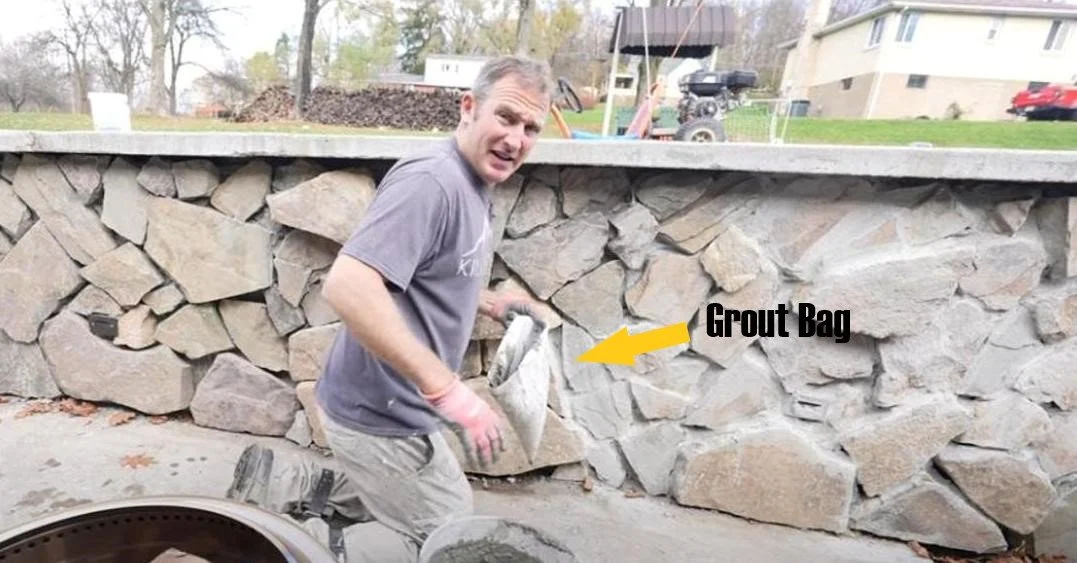
One hot tip I show you how is how I fill in the gaps with mortar using a grout bag.


See? Not too shabby!

In this full length video, I share my entire process of setting stone on a patio wall.

🔨Some of the materials & tools used in this video:

Ardex x5 thinset - https://amzn.to/3WZK6Xd
Muriatic acid - https://amzn.to/3vzFJGI
Grout bag - https://amzn.to/3GbZXeD

💥Visit my Amazon Store for all products and tools that I recommend and use on a regular basis 👍 https://www.amazon.com/shop/bathroomremodelingteacher_

For help with your bathroom remodel 🎓Enroll in my courses today 🎓 -

🛁 —> 🚿 CONVERTING TUB TO WALK-IN SHOWER COURSE- https://www.bathroomremodelingteacher.com/tub-to-shower-course-detail

🛁TUB & SHOWER REMODEL IN 7 DAYS OR LESS COURSE- https://www.bathroomremodelingteacher.com/tubshowercourse

🚿 CUSTOM TILED WALK-IN SHOWER COURSE - https://www.bathroomremodelingteacher.com/custom-tiled-walkin-shower

✨ CUSTOM GLASS ENCLOSURE COURSE - https://www.bathroomremodelingteacher.com/customglasscourse

😄DIY BATHROOM GEEK COLLECTION {all 4 courses!}👊 -https://www.bathroomremodelingteacher.com/geek-collection-detail

#diy #stone #homeimprovement #bathroomremodel #realestate #renovation #construction #homerenovation #bathroomdesign #tile #work #bathroomremodelingteacher #stevewhite #tipsandtricks #tutorial #howto #interiordesign #electrical #tiledesign

All the tools and products I use and recommend can be found on my Amazon Storefront (detailed in the description box of the video). You can find my Storefront, and all of my other social medias, by going to https://linktr.ee/bathroomremodelingteacher. Any and all purchases from my Amazon Storefront are greatly appreciated and help keep my channel going!

I hope this helps you with your own installation. Subscribe to my channel to make sure you don’t miss a new upload!

See you next class,

Steve
Comment

Comment

HOW TO WATERPROOF A HOT TUB

Hey students!

Let’s switch things up a bit and have a little fun…

This is still in the vein of bathroom remodeling, because we are going to be talking about waterproofing a cedar hot tub! I got this hot tub from my neighbor. He inherited it from a friend and he had no use for it. I was really excited to get this cedar hot tub! It reminded me of the short time I lived in Colorado. The was an old cedar hot tub close to where I was staying that my friends and I would use often. This item is for sure a luxury one to me!

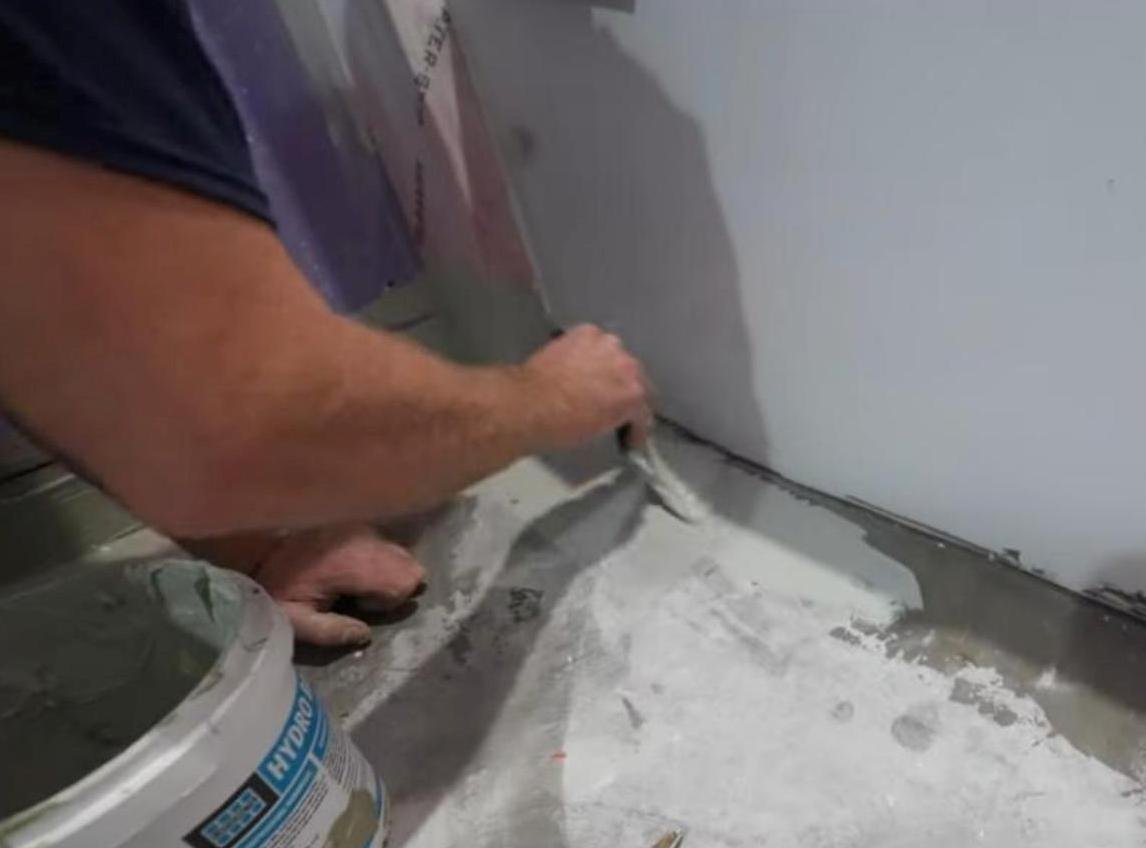
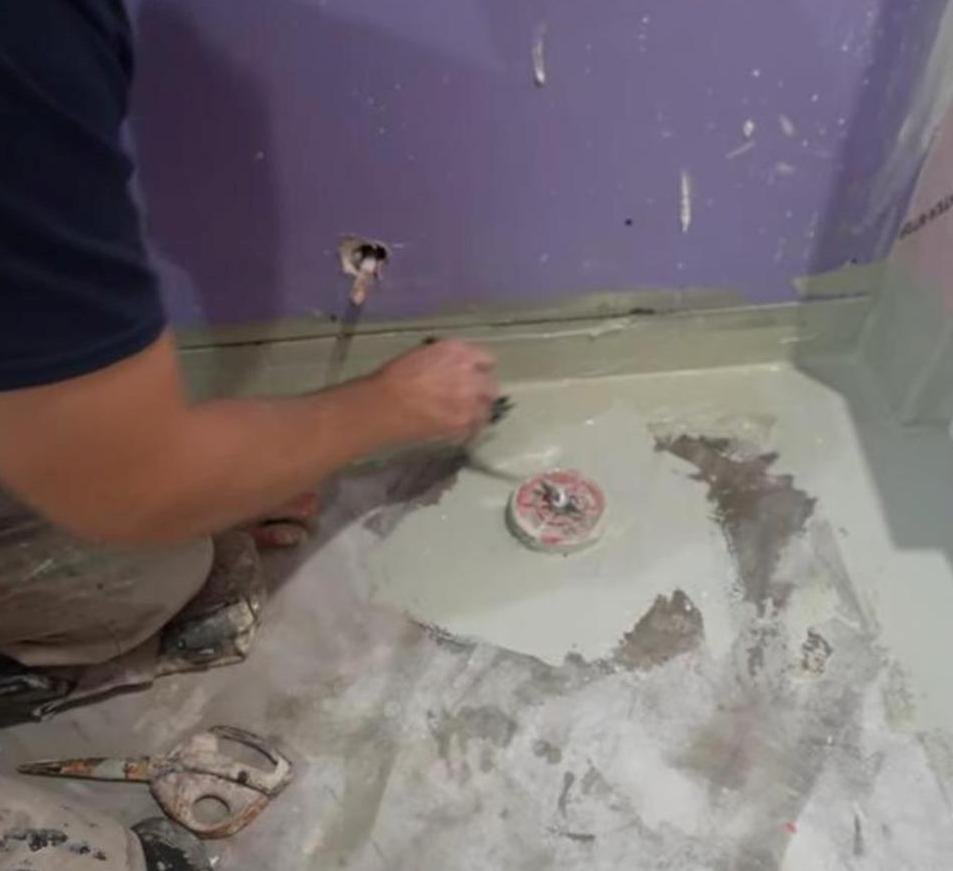
Once I put the hot tub together it quickly occurred to me that it was going to have a hard time holding water. So being a bathroom remodeler, I naturally thought of Laticrete Hydro Ban as the solution.

It’s a short video, but I basically explain my reasoning for using Laticrete and then install it.


As you can see, I’m pretty serious about this hot tub!

Be sure to watch the full video for more details and guidance.

🔨Some of the materials & tools used in this video:

Laticrete Hydroban XP - https://amzn.to/3WxD0sG
Laticrete membrane - https://amzn.to/3G116qt

💥Visit my Amazon Store for all products and tools that I recommend and use on a regular basis 👍 https://www.amazon.com/shop/bathroomremodelingteacher_

For help with your bathroom remodel 🎓Enroll in my courses today 🎓 -

🛁 —> 🚿 CONVERTING TUB TO WALK-IN SHOWER COURSE- https://www.bathroomremodelingteacher.com/tub-to-shower-course-detail

🛁TUB & SHOWER REMODEL IN 7 DAYS OR LESS COURSE- https://www.bathroomremodelingteacher.com/tubshowercourse

🚿 CUSTOM TILED WALK-IN SHOWER COURSE - https://www.bathroomremodelingteacher.com/custom-tiled-walkin-shower

✨ CUSTOM GLASS ENCLOSURE COURSE - https://www.bathroomremodelingteacher.com/customglasscourse

😄DIY BATHROOM GEEK COLLECTION {all 4 courses!}👊 -https://www.bathroomremodelingteacher.com/geek-collection-detail

#diy #outdoors #homeimprovement #bathroomremodel #realestate #renovation #construction #homerenovation #bathroomdesign #tile #work #bathroomremodelingteacher #stevewhite #tipsandtricks #tutorial #howto #interiordesign #electrical #tiledesign

All the tools and products I use and recommend can be found on my Amazon Storefront (detailed in the description box of the video). You can find my Storefront, and all of my other social medias, by going to https://linktr.ee/bathroomremodelingteacher. Any and all purchases from my Amazon Storefront are greatly appreciated and help keep my channel going!

I hope this helps you with your own installation. Subscribe to my channel to make sure you don’t miss a new upload!

See you next class,

Steve
Comment

Comment

HOW TO INSTALL A BATHTUB

Hey students!

The bathtub is the basic necessity in most bathrooms. It can also be the most daunting when installing for the first time. I’m here to help you with that. I offer the TUB & SHOWER REMODEL IN 7 DAYS OR LESS course, which takes you through, step-by-step, the installation of the bathtub.

Here are some of the highlights of the video:


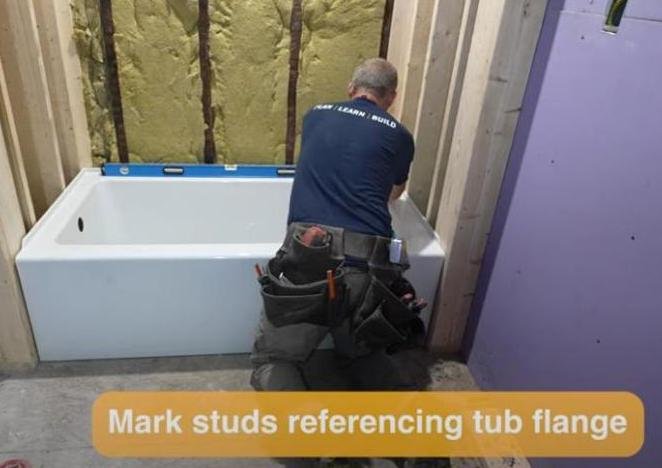
1: Mark the wall studs referencing the tub flange. It helps maintain levelness.

 
bathtub installation tub shower
 

2: Cut out the drain for the tub. Be sure to measure where the drain is going to be as accurately as you can before making the cut.


3: Tub drain assembly— Hot Tip: Install the tub drain BEFORE installing the bathtub. Makes life so much easier!

 
bathtub installation tub shower
 

4: Protect the plywood/subfloor where the tub is going to be sitting. Add a piece of plastic (i.e. garbage bag) before laying mortar. The mortar is being used to keep the tub in place.

 
bathtub installation tub shower
 

5: When connecting your plumbing to the tub, if you have the access, do it from underneath! It really helps insure a secure connection. Also, add silicone to really make the connection tight!

Be sure to watch the full video for more details and guidance!

🔨The materials & tools used in this video:

American Standard Studio tub - https://amzn.to/3jd8vtJ
Drain assembly - https://amzn.to/3PyLxcI
Ridgid Tub wrench - https://amzn.to/3HFpz5R
Empire lighted level - https://amzn.to/3HJiBNl
Hilti impact driver - https://amzn.to/3BCHypV
Bucket mortar mixer - https://amzn.to/3Wstd7x

💥Visit my Amazon Store for all products and tools that I recommend and use on a regular basis 👍 https://www.amazon.com/shop/bathroomremodelingteacher_

For help with your bathroom remodel 🎓Enroll in my courses today 🎓 -

🛁 —> 🚿 CONVERTING TUB TO WALK-IN SHOWER COURSE- https://www.bathroomremodelingteacher.com/tub-to-shower-course-detail

🛁TUB & SHOWER REMODEL IN 7 DAYS OR LESS COURSE- https://www.bathroomremodelingteacher.com/tubshowercourse

🚿 CUSTOM TILED WALK-IN SHOWER COURSE - https://www.bathroomremodelingteacher.com/custom-tiled-walkin-shower

✨ CUSTOM GLASS ENCLOSURE COURSE - https://www.bathroomremodelingteacher.com/customglasscourse

😄DIY BATHROOM GEEK COLLECTION {all 4 courses!}👊 -https://www.bathroomremodelingteacher.com/geek-collection-detail

#diy #plumbing #homeimprovement #bathroomremodel #realestate #renovation #construction #homerenovation #bathroomdesign #tile #work #bathroomremodelingteacher #stevewhite #tipsandtricks #tutorial #howto #interiordesign #electrical #tiledesign

All the tools and products I use and recommend can be found on my Amazon Storefront (detailed in the description box of the video). You can find my Storefront, and all of my other social medias, by going to https://linktr.ee/bathroomremodelingteacher. Any and all purchases from my Amazon Storefront are greatly appreciated and help keep my channel going!

I hope this helps you with your own installation. Subscribe to my channel to make sure you don’t miss a new upload!

See you next class,

Steve

Comment